

SERVICING – Shimano Torium 16
This is an illustrated step by step pictorial I did for the FNR forum many years back. After it went down, I thought all the work was lost. Fortunately, I found this on my Multiply album and so I’m sharing it here…
After 2 trips to fish for sailfish, I completely stripped down the reel for servicing. I then greased all non spool related bearings, but because I wanted to be able to cast with this reel, I oiled the spool spindle bearings.
Since I don’t want to be opening this reel ever so often, I coated Quicksilver Marine 2-4-C grease to all interior metal parts for corrosion protection, and used Surecatch Lithium grease (the cheap red grease) on all other parts except the drag stack.
The original drags were greased, but only after 2 trips, I found that although the drag was still creamy smooth, it lacks power. When I inspected the drags, it was coated by a mush of graphite enriched grease, so I decided to try running them dry to see what happens. Now, without grease, there is a hint of inertia before the drag gives. But it is a lot more powerful.
Update: I’ve since replaced Shimano’s brittle Dartanium drag discs with greased Carbontex discs. I also replaced the Belleville washers with that from a Shimano TLD 20 (Replacement part number tt-0040A) and now I get stupendous drag power and smooth inertia free drags, such that I now wonder if the graphite sideplates will be up to the job considering the greater strain.
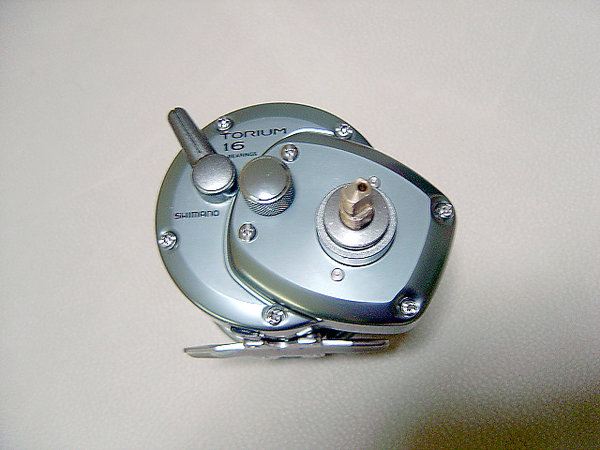
I’m disappointed that this reel has graphite sideplates, that’s covered by a thin gauge, stamped, anodised aluminium. But at the price point that this reel is placed, it can’t be helped, I guess. The way it envelops the graphite sideplate looks suspiciously like a corrosion nest waiting for a time to happen. I decided to butter the inside thickly with Marine 2-4-C grease to not let the salt do its work.
Here’s a step by step journey of how I assemble the reel. Hope it helps you.
LL
Exploded view of all the parts

As I stripped the reel, I laid each part from top left to right, in the order that it is removed.
Some parts may look alike on both sides, but there are subtle differences on their faces, eg one face has a bevel while the other doesn’t. To prevent mix ups, I carefully place each piece in the same way they came out. I’ll try to explain what I did to service and assemble the reel as I go along.
The graphite sideplate with ratchet

I’ve removed the spool spindle bearing on this side for servicing.
Spool Spindle bearing

The shield is removed on this bearing to make servicing and cleaning more effective.
I degreased off the old lithium grease till the bearings are clean and dry (you can tell they are clean and dry when you can hear the balls rattle in their races when you shake them), then I gave it a strong blast of dry air to blow away any residue of degreaser and water, and added a drop of Shimano’s spool bearing oil. It is a very light oil so that the bearing will spin even at very low torque and helps with casting.
Install Bearing, grease the ratchet

The bearing is a drop in fitting, then snap on the circlip to retain bearing in place.
Dab a bit of lithium grease to the moving parts and contact points of the ratchet. As the ratchet mechanism and pawl is made of stainless steel, and the sideplate is made of graphite (same material as Shimano Charter Special, as well as Fuji reel seats for rods), I need not protect it against corrosion with Marine grease.
Sideplate cover

This is a disappointment when I stripped the reel. I thought that the Torium was an “economy copy” of the Trinidad. But I surely didn’t expect this el-cheapo stamped aluminium side plate.
Better slap on some 2-4-C grease to keep it from corroding.
All buttered up!

I use Mercury Outboard Motors’ 2-4-C Marine grease for coating the inside of parts. It has excellent anti-corrosion properties even in saltwater. It is very sticky and will adhere to surfaces well. Better still, it contains Teflon, so it helps the screws etc to screw in and out smoothly.
For lubrication, I do not use 2-4-C but lithium reel grease.
Sideplate mated up

The greased sideplate cover is mated to the graphite sideplate. Now set aside for a moment, to prepare the frame.
Frame preparation

The slots and holes in the frame can trap seawater which will eventually start galvanic corrosion. Have to coat these with 2-4-C grease before screwing on the sideplate.
Greased and oiled!

I butter 2-4-C grease onto metal surfaces to protect against corrosion. However the spool spins within very tight tolerances between the frame sides and therefore, I cannot grease these for fear of contaminating grease onto the spool flanges which will make casting bad.
Instead, I applied a layer of CorrosionX oil to these sides.
Now set the frame aside to prepare the spool.
Spool and bearing preparation

The other bearing is mounted on the other side of the spool spindle and locked in place by a stainless steel crosspin. I was lazy to remove the pin since the bearing is still in good condition, so I degreased the bearing and oiled it lightly with Shimano’s spool bearing oil.
I cannot grease the spool flanges without affecting its balance, so I coated them with CorrosionX oil instead.
Now is the time to install the spool and sideplate.
Installing spool and sideplate

Place spool into the frame, taking care not to smear it onto the greased sides.
Fitting the sideplate

Align the holes of the sideplate to the frame.
Sparingly dab a bit of grease to each screw, and with a finger, wipe away any excess.
Then carefully thread in all screws and tighten crosswise (2 o’clock, 8 o’clock, 10 o’clock, 5 o’clock), taking care not to over torque.
Preparing for the drivetrain

The right side houses the drivetrain and clutch mechanism. I started by coating the surfaces with 2-4-C grease except the points of contact (note the red grease patches) where I applied lithium grease instead.
Note also, that I do not oil nor grease the spool spindle. Grease contamination on this spindle or the inside of the pinion will seriously decrease casting distance.
The bronze drive shaft is circlipped to the frame, and because I do not want to risk accidentally scratching out the paint while I remove the circlip, I decided that oiling the shaft turning surfaces with CorrosionX oil will be sufficient for now.
Install Anti Reverse backup mechanism

I greased the underside of the serrated Anti reverse ratchet, but on the top side, I lightly smeared lithium grease only on the outer edge. I keep the inner surface dry because I want to run the drag dry.
Update: Now that I’m using greased Carbontex drags, I need not worry about messing grease on this surface.
Note that the bevelled (rounded edges) side of the ratchet faces up, ie the ratchet teeth point in an anti-clockwise direction.
The anti reverse pawl is greased, the spring tabs are fitted onto the ratchet and then assembled onto the frame.
Lock in the pawl

Shimano has a name for all their parts. This one is called the Anti Reverse Keeper. So smart!
Anyway, this part again has 2 sides. The bevelled side faces downwards this time.
Likewise, I grease the anti reverse keeper, screws, I wipe away the excess grease, and take care not to over torque.
Install the Yoke

The Yoke Plate looks like the gate of a manual gear shifter in a car. It sits within guiding grooves on the frame.
Grease the undersides as well as the stamped up wedges with lithium grease and paste it within its grooves. The grease will keep it in place so that you can work on other things without it falling out.
Two sides to the Yoke

There are 2 sides to the Yoke. The side where the edges are chamfered (cut at an angle) on the arms should face bottom.
Fixing in the Yoke and Pinion

Grease the yoke, taking care to grease the chamfered edges.
Work grease into the teeth of the brass pinion gear, taking care not to contaminate the inside hole with grease or your casting will be badly affected. While your hands are dirty, grease the Main Drive Gear in similar manner too.
Then wipe off the excess grease, mate the yoke to pinion taking note that the chamfered side faces down, then install it onto the two mounting posts and the spool spindle should go through the centre hole of the pinion.
Install Yoke Springs

Grease sparingly, the posts that the yoke will slide on, then drop in the the 2 yoke springs, one on each post.
By now, If you are still with me, you deserve a break because the next steps need clean, grease free hands. So go wash your hands, fix yourself a cuppa tea and get ready to handle the drags.
Prepare the drag washers

Torium’s drag are greased, “wet” drags. New out of the box, they are very smooth and powerful. However with use, the graphite powder mixes with the grease causing the drag to lose friction so that maximum rated drag cannot be achieved.
I decided to try running the drag “dry” like I do with my smaller Baitcasters to see if these hold up better to long use.
Carefully degrease the drag washers. I said CAREFULLY, because they break very easily, being made out of the same basic material as your pencil lead.
When clean and dry, drop the smallest piece down the bronze drive shaft and sit it onto the anti reverse ratchet plate.
Installing Main Drive

You will notice that the bottom graphite drag washer is still affixed to my Main Drive Gear. That is because drag grease had caused a vacuum to form on this drag washer, and to pry this out will mean that the fragile graphite drag washer will break. I opted to leave it in place for the time being, till I get myself a set of replacement Carbontex drags.
If you had not already done so, work lithium grease into the teeth of the Main Drive Gear, wiping away any excess. Take care not to contaminate the underside as well as the drag housing with grease. Any contamination has to be cleaned away with solvent.
Drop the main drive down the drive shaft, and mesh with the teeth of the pinion, while seating it firmly on the drag washer below.
Installing the drag pieces

Torium’s drag pieces follow a particular alternating order of graphite, stainless steel, graphite, and so on. If you do not place them in the proper order, you will not achieve maximum friction for your drag.
The first piece to go in is the graphite washer with a big centre hole.
Fit in the stainless steel washer with a square key hole over that.
Fitting in drags continued

Next drop in the big graphite drag washer with a small centre hole. There are two identical pieces and you can use any piece first.
Eared Washer

Looking at the wear marks on this Eared Washer will tell you that friction is applied more on the outer circumference than the inner diameter.
The tabs should be mounted facing down. Therefore, if you had mounted your washer as shown, you got it wrong!
Correct mounting for Eared Washer

The eared washer is correctly mounted with the two ear tabs sitting in the slots on the Main Drive Gear, and pointing down at the Main Drive.
Do not get oil or grease onto these washers, and if you want to have a “wet” drag, you need to get yourself a proper grease for drags as ordinary grease will not work in this purpose.
Final Graphite Drag installed

Drop in the second piece of graphite drag with a small centre hole. You’re almost done!
Drag installation Complete!

Drop in the final piece of drag washer – the Stainless Steel Key washer that has a thicker centre piece.
The flat side of this washer should face downwards at your Main Drive Gear.
Congratulations, your drag installation is completed. It’s time to finish up the cuppa cha, and get onto the remaining installation, which will grease up your hands again. So go finish off that tea, while I wait for you…
Preparing the Right Sideplate

As usual, 2-4-C grease protection and lithium grease need to be applied at the necessary places.
Do not grease the One Way roller bearing. Instead, I use corrosionX oil for these bearings. Using too thick an oil or grease can cause the One Way bearings not to catch and lose instant anti reverse. However, Torium has a more positive and stronger pawl type anti reverse should this one way roller bearing fail.
Greasing points

Mercury’s Quicksilver 2-4-C marine grease is coated around the right side plate housing, taking care not to contaminate
1) The One way Roller Bearings
2) The Spool spindle orifice
Apply lithium grease onto the mating surfaces of the Clutch Cam. Note that the Clutch lever in this picture is pulled down to the “free” position.
Clutch lever engaged

In this view, the clutch lever is in engaged position.
In order to assemble, you need to match the clutch lever position to the Yoke Plate’s position. The yoke plate is the stainless steel plate that looks like a manual car’s gear shift gate.
My Yoke Plate is retracted, which allow the pinion to fall into the hole and mesh with Main Drive Gear. (refer to picture titled Install Yoke). Therefore I need the clutch lever to be in engaged position.
If your Yoke plate is pushed forward and the pinion is lifted up and disengaged from the main drive, you need to position the clutch lever to disengage.
Slide in the black plastic line clip at the groove in the bottom of the Right Side plate. The curved side should be inside the reel when installed.
Install The Right side cover

Align the spindle shaft and all screw holes of the frame to corresponding points on the right side plate, making sure your clutch lever is engaged/disengaged according to the description on the previous picture.
Grease the mounting screws’ threads, wiping off the excess and tighten off, taking care not to over torque.
Insert the Roller Bearing inner tube with the castellated end pointing down the drive shaft(the end with two tabs sticking out).
Grease the rim of the Cast Control Housing. NOTE, only grease the rim to prevent water ingress from the cast control cap.
Fix in the Cast control cap

Drop a tiny drop of light Spool Bearing oil on the tip of the spool spindle, then screw in the cast control cap.
Grease the large Drive shaft ball bearing and insert down the drive shaft. Rotate bearing and drive shaft till the Roller Bearing Inner tube engages into the top piece of the stainless steel drag washer.
Work your Clutch lever, and spin your spool to check that clutch and anti reverse is engaging correctly.
Plastic Bearing Shield

Drop in the plastic Bearing Shield to protect the bearing from water.
Bearing Thrust Washer

The tiny, thin washer called Bearing Thrust Washer is the next to be threaded on the Drive Shaft.
Drag Spring Washers
Over the Bearing thrust washer, Install the two cupped belvielle washers.
You should face the cups inwards at each other like: ()
Star Drag Washer

Next, drop in the star drag washer, taking note that the side with bevelled edges should be facing up.
Installing the Star Drag Clicker

This operation needs patience, dexterity and some special tools:
1) a pair of needlenose forceps
2) a large paper clip or a baiting needle.
Grease the Clicker spring and insert into the hole in the side of the drive shaft. Thickly greasing it prevents the spring from jumping out and getting lost.
Installing the Clicker Pin

Next, grease and insert the Clicker Pin with its narrow end first, into the same hole where the spring is sitting.
Installing the star drag

Thread on the Star Drag until it is obstructed by the Clicker Pin, and back off by a turn.
Then with the straightened end of a paper clip or a baiting needle, insert into the hole at the end of the drive shaft and depress the Clicker Spring. The Clicker Pin should likewise retract, allowing you to screw the star drag down.
If you have an assistant, get him to help you hold the drive shaft firm and screw down the drag star.
Installing Drag Star

Tighten down the Drag Star till the clicker pin is seen at the serrated ratchet in the star lever. Remove the paper clip/baiting needle and test rotate the drag star to ensure the clicker mechanism is seated well.
Install Drive Shaft Shield

Grease and drop the drive shaft shield over the drag star.
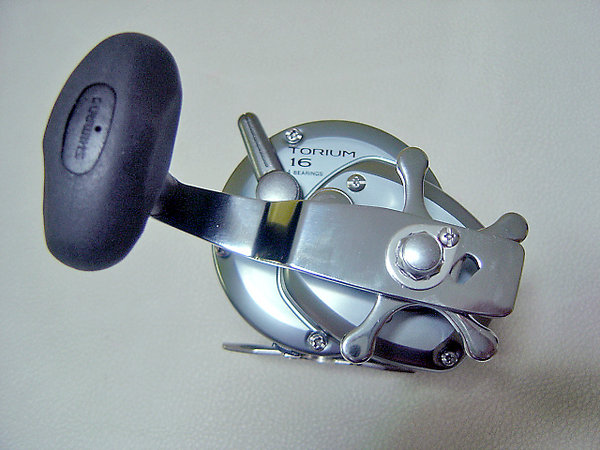
Installing the Handle

Bend the end of your paper clip to form an “L”. Insert this into the tiny hole at the oval cover of the handle and pull out the cover.
Drop a drop of CorrosionX oil down the handle shaft and spin the handle to work the oil out at the bottom. Wipe off the black stained oil, and add more oil. Repeat till oil comes out clean. Press the oval cap back to shut.
Install the handle, choosing whether you want to use the outer keyhole or the inner keyhole for cranking power or cranking speed respectively.
Finishing off
Carefully thread in the Handle Nut. Tighten and lock in place with the Handle Nut Plate. Align the hole and screw in the locking screw.
Finished!
Spool in your line, brew yourself a cuppa victory tea, sit back and dream fishing!
I hope this step-by-step guide helped you in servicing your own reel too. If you found this useful, please click the blue LIKE and FOLLOW buttons. If you would like me to help you service your reel, or if you would like to help me with the cost of keeping this blog running, please drop me a message via WhatsApp at +65-9431-0400. Thank You!
Text and Images © Lawrence Lee
All Rights Reserved
If you want to use any content for your own publication, please write me @ Lee.TC.Lawrence@gmail.com
