

SERVICING – Bogan Sharpeye
This is a new brand that has hit our shores and like everything from China, it looks great from a distance, has all the features that Daiwa and Shimano have, and yet, they come at an irresistibly low price.
This was a pre-owned reel, and the new owner complained about its lack of drag power despite having had modified drags, and wanted a faster spindle speed so that he can experience a full blown birdnest until his thumb gets educated! The reel felt smooth to crank, and the bearings were not corroded, but are covered with a rather thick oil. It all look to me that this has potential to be tuned into a very usable reel without having to spend much more than some solvent, compressed air and good oils… pulled some line out on a spring balance and at full lockdown, it read less than 500g (1 lb)! Wow, something had gone miserably wrong with the drag modification methinks.
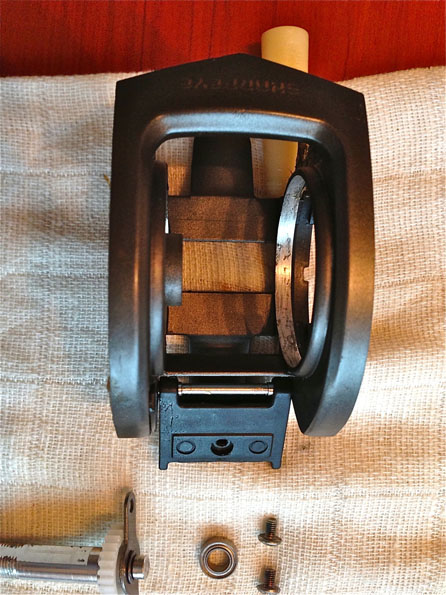
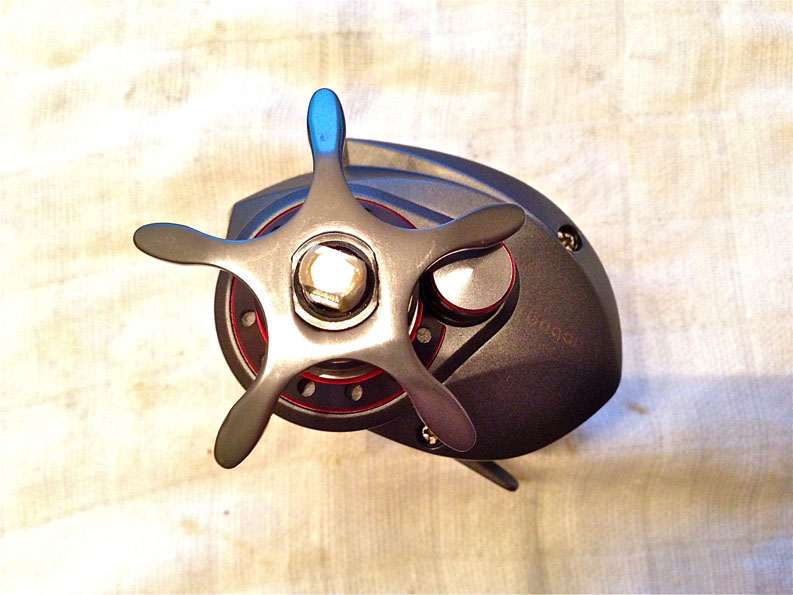
So here are some shots of the reel before I pull it apart.
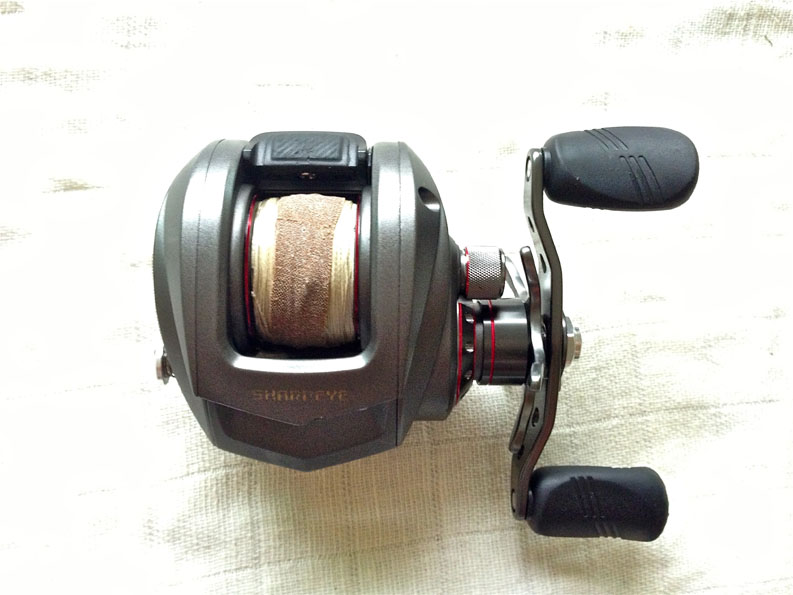
The reel has an angular shape and a matt grey paint scheme that reminds me of the B1 Stealth Bombers. The handles, drag star and nose reminds me of Daiwa.
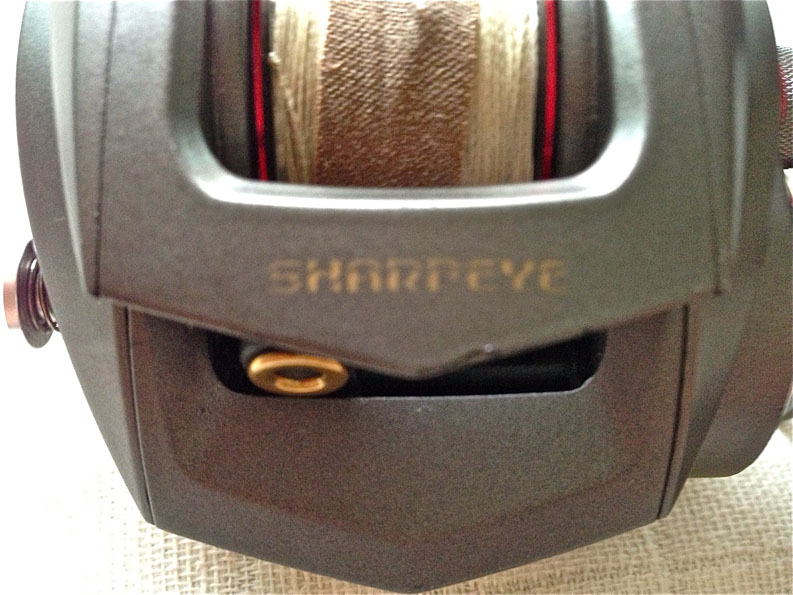
Titanium Nitride coated line guide and drilled lightweight spool endows the reel with a feeling that this could perform as good as it looks.
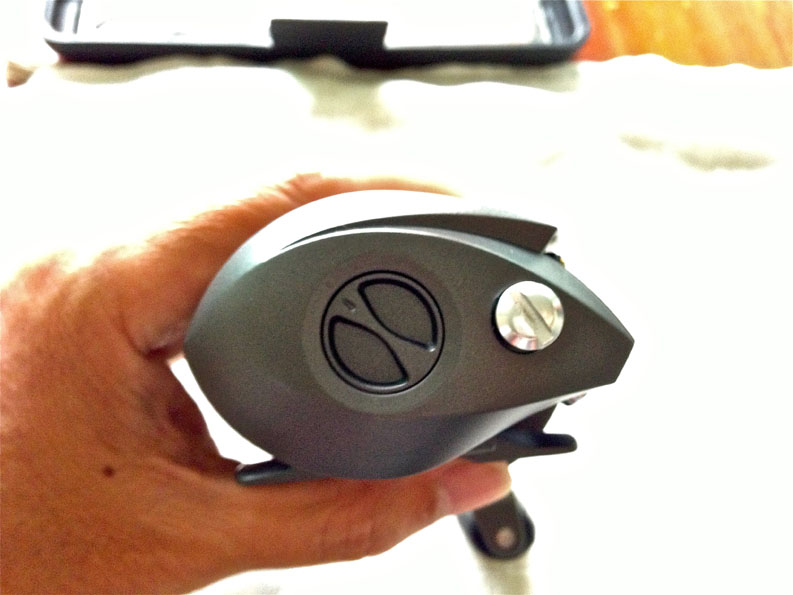
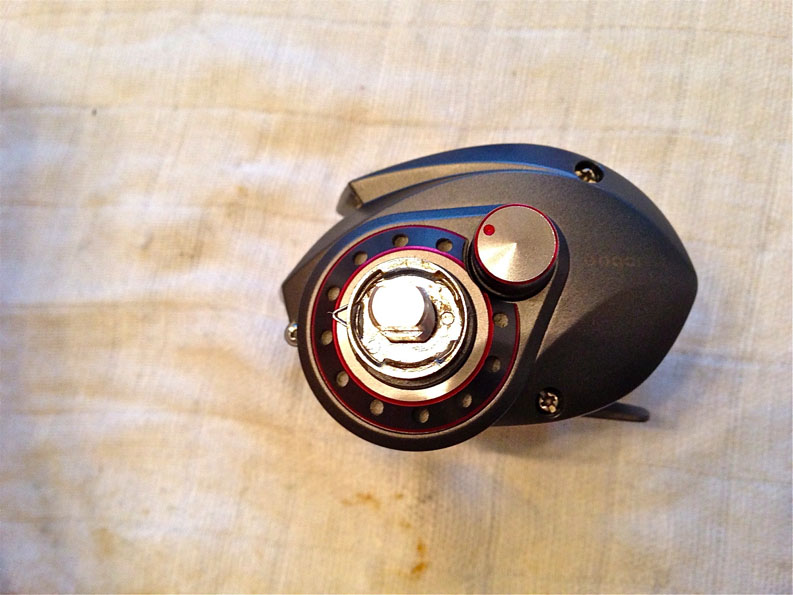
Recessed magnetic braking control will not get changed accidentally when you palm the reel as it turns with a purposeful click into each indent for each of the 10 setting positions. The sideplate securing screw would have been better if it was knurled for friction.
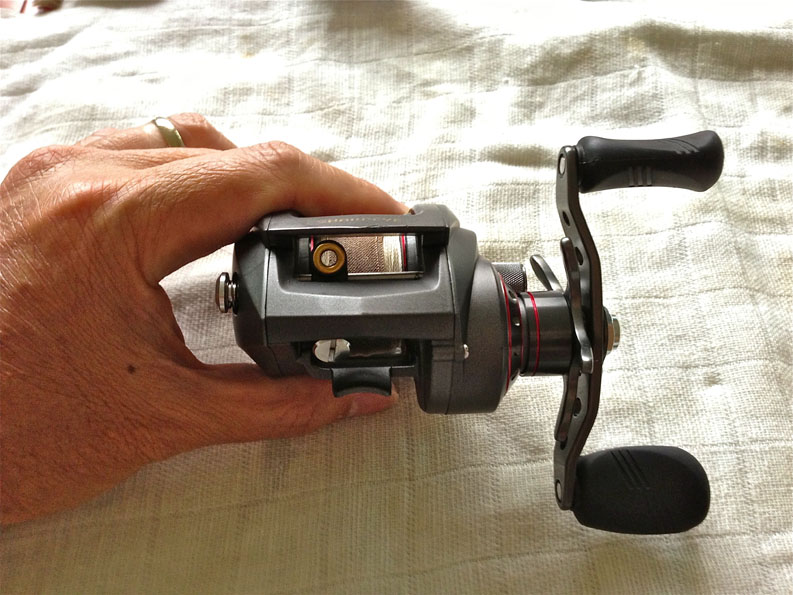
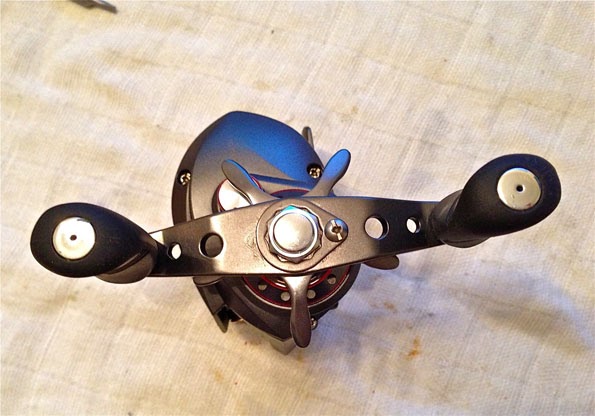
A huge overhanging gearbox is de rigueur for modern reels, and this reel has one no lesser.
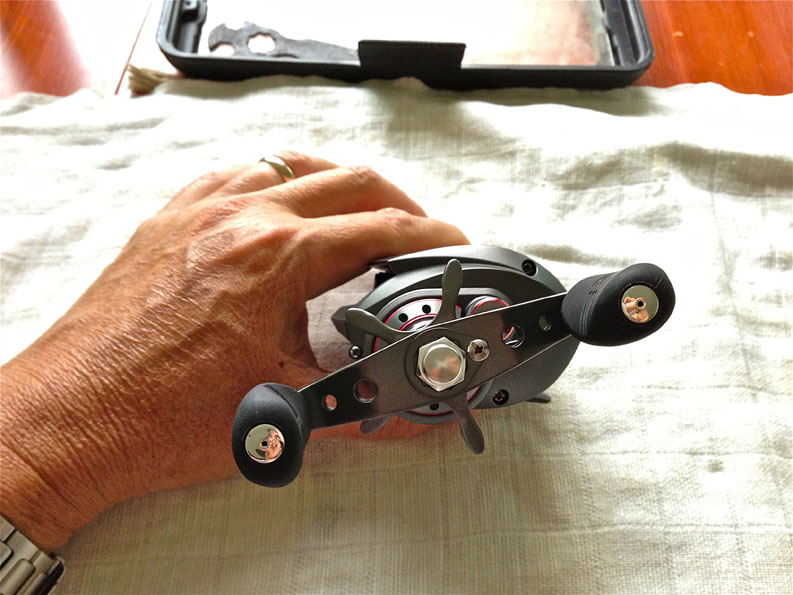
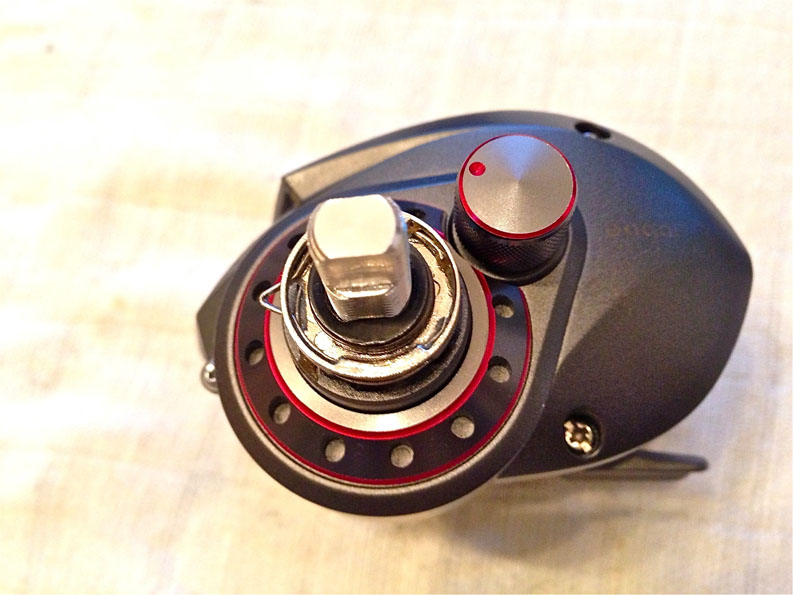
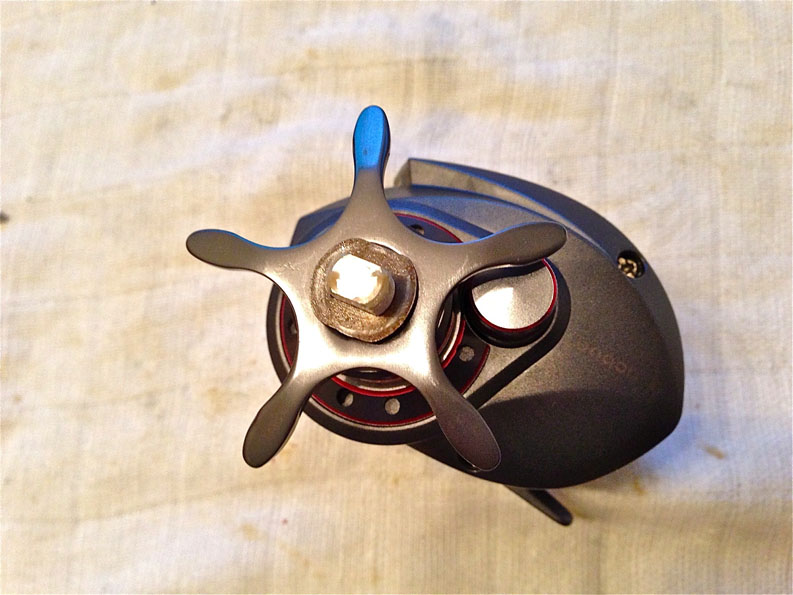
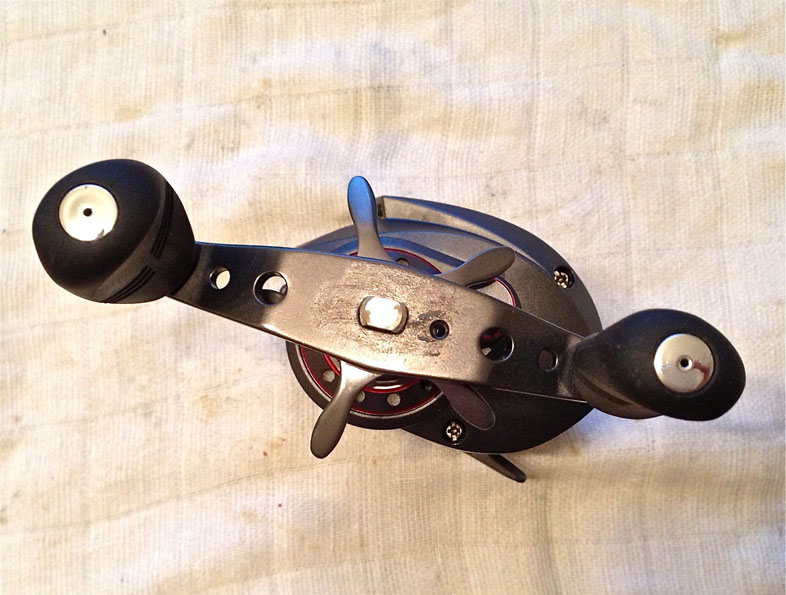
The Chinese chose to use a huge 12mm aluminum Handle Nut that is reverse threaded for this left hand cranking reel. In contrast, the Cast Control knob is anorexic and also reverse threaded, requiring some getting used to when you make your adjustments. Each handle knob is supported by its own ball bearing.
Servicing the high speed bearings first
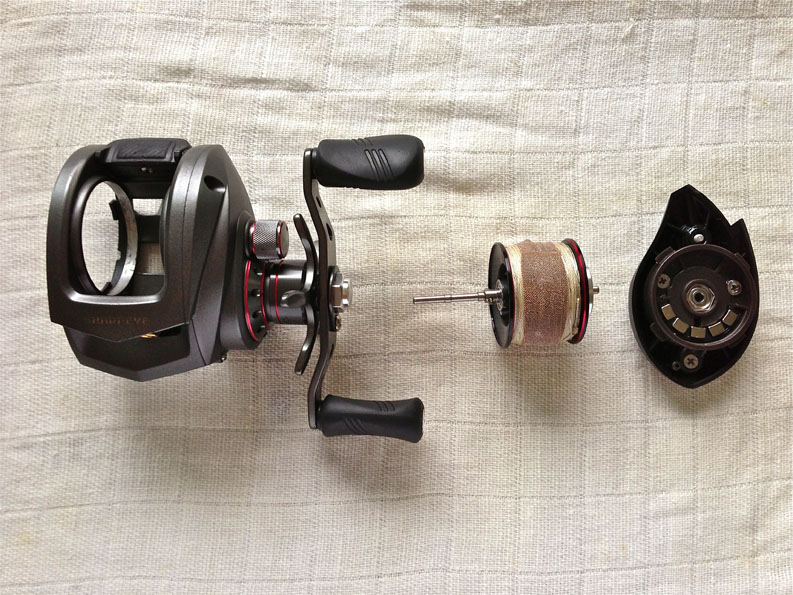
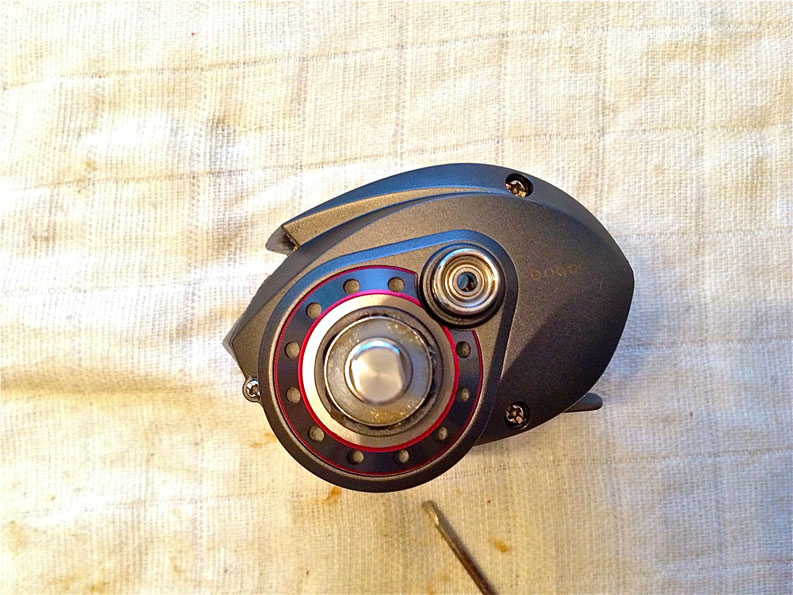
Begin by taking the spool out to reveal the spool bearings.
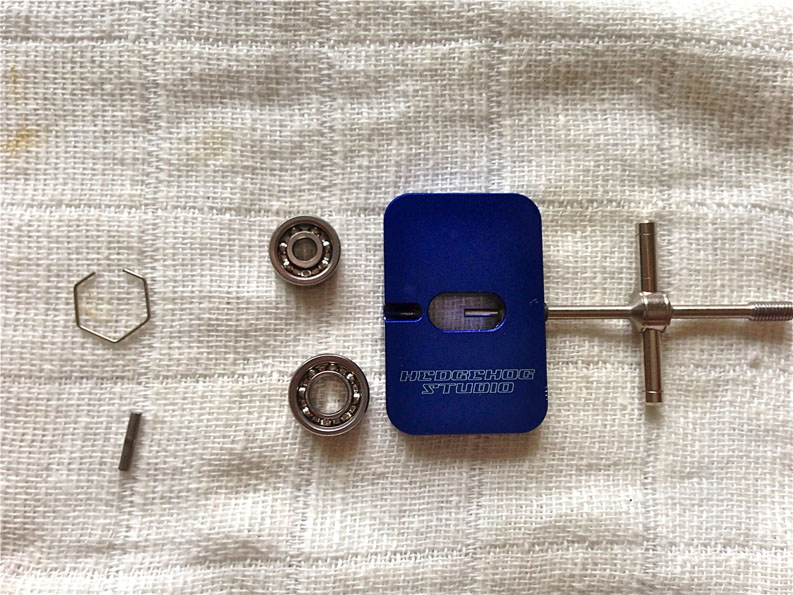
You need a spool pin plier/tool to remove the bigger spool bearing.
Bearings unshielded and degreased, these have seen some wear but are still capable of spinning for at least 20 seconds at a flick of a finger – pretty good results for unrated bearings! I used a light oil to lubricate them.
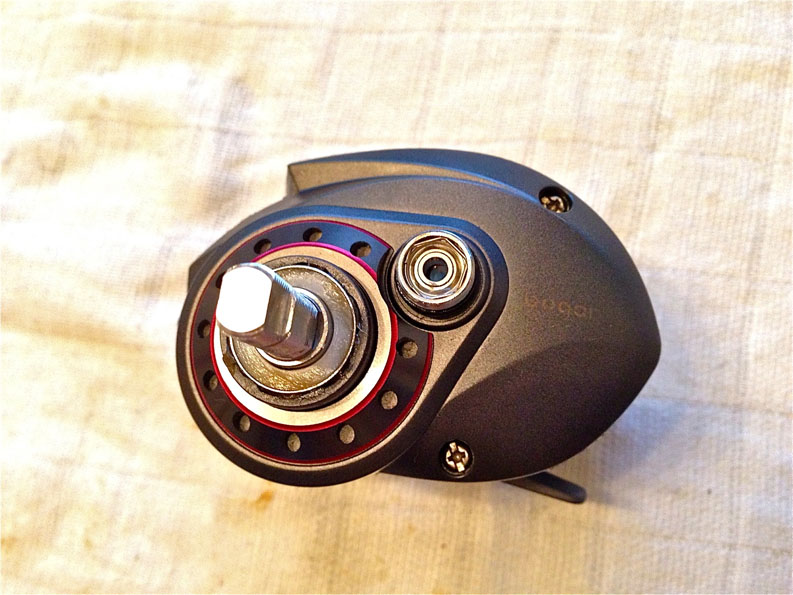
In case you want to change them out to faster grades or ceramics, the Smaller Spool Bearing is 10 x 3 x 4mm (OD x ID x Thickness); the Bigger Spool Bearing is 11 x 5 x 4mm.
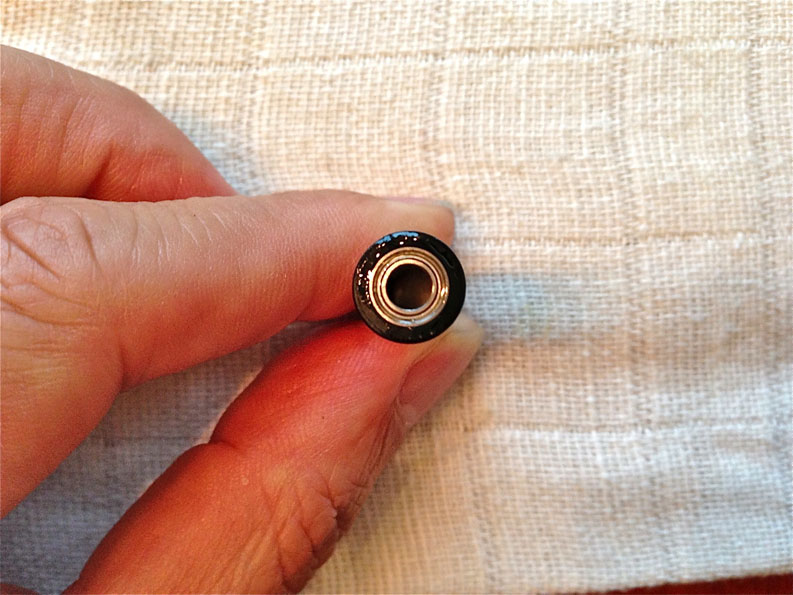
The 3rd high speed bearing (8 x 3 x 4mm) is behind the Cast Control Knob. This one has press in shields so I didn’t try removing them, but degreased and re-lubed with a light oil.
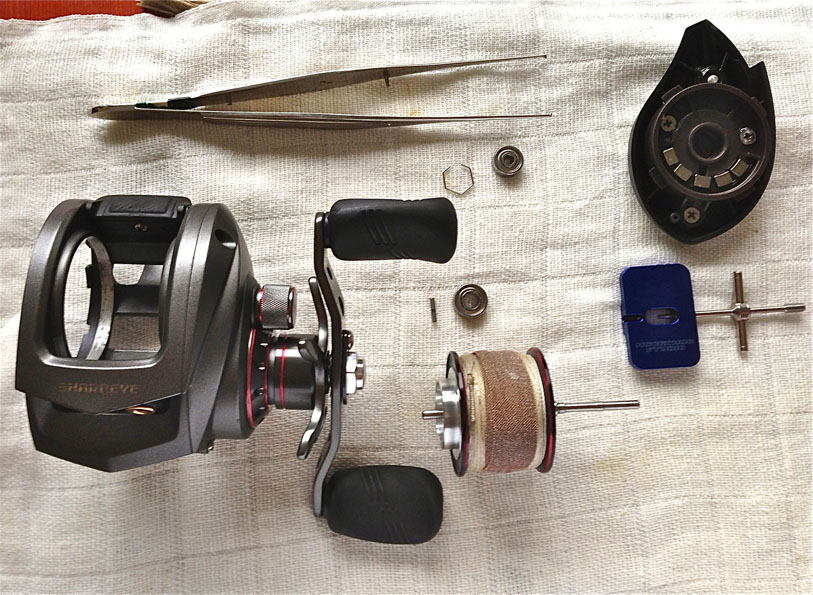
A simple reel
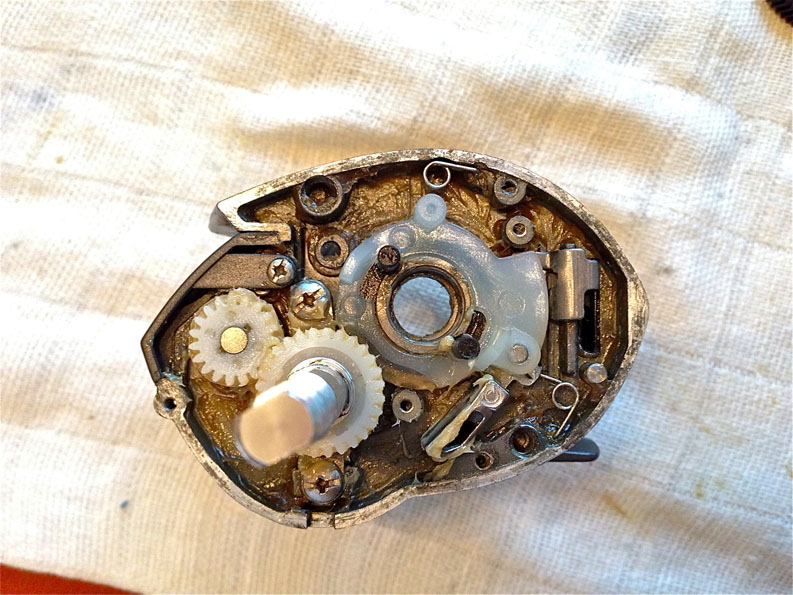
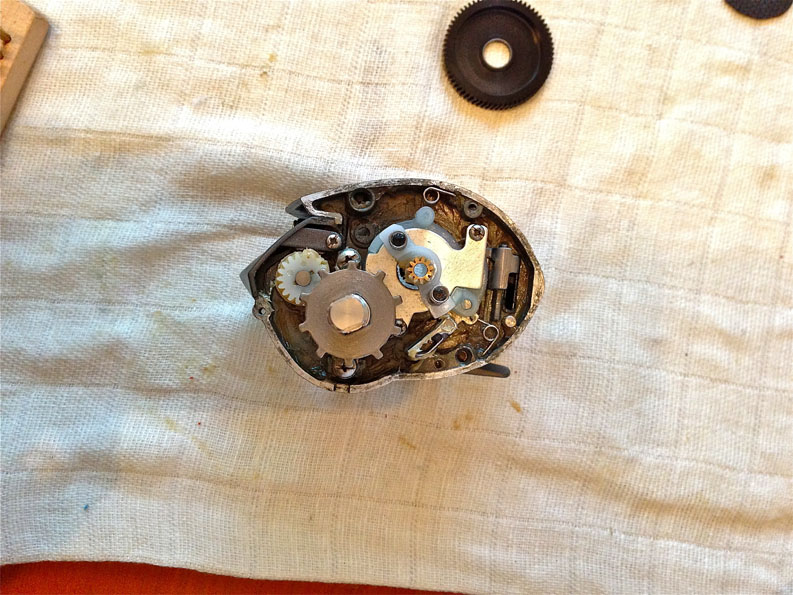
Normally, I’d start by studying the reel schematic. However, this reel didn’t come with one, so I had to strip the reel very carefully, lest some small unknown part might surprise me and make a getaway whilst I’m cracking it open.
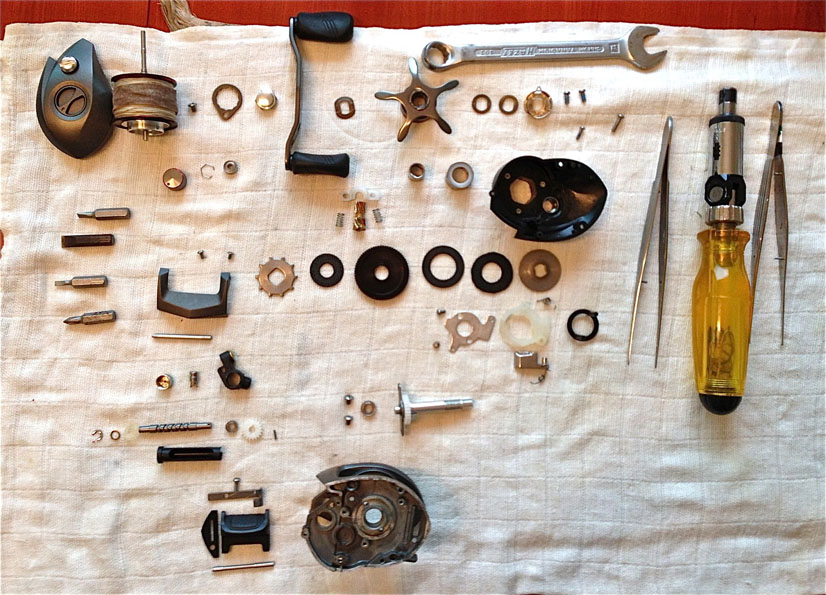
Here’s all the parts in this reel.
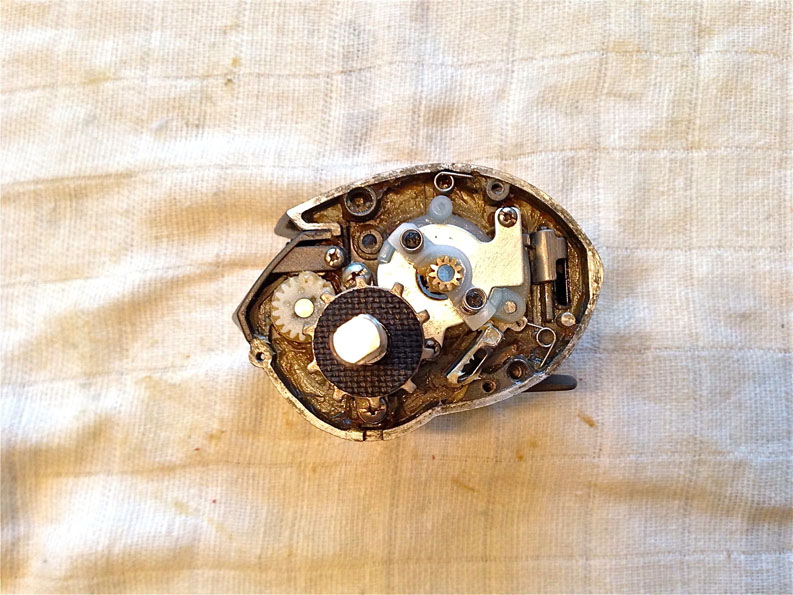
Modified Drag

The Previous Owner had changed the original drag washers out (Originals look like Super Smoothies) with these HT100 looking graphite discs.
This Drag pressure washer was mounted upside down when I opened the reel. That’s probably why there was only a pound of drag at full lock, and the presence of the extra HT100 washer when there was no steel keyed plate to bite on.
Slap on the protection
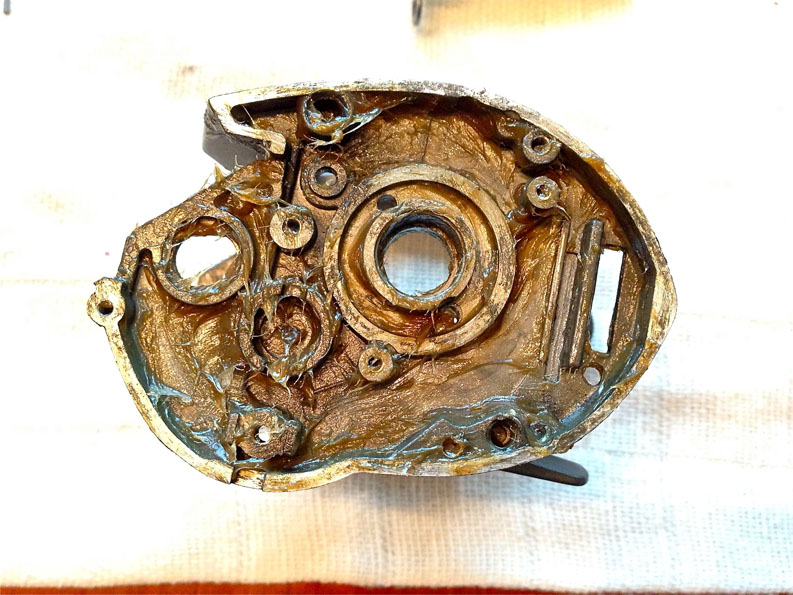
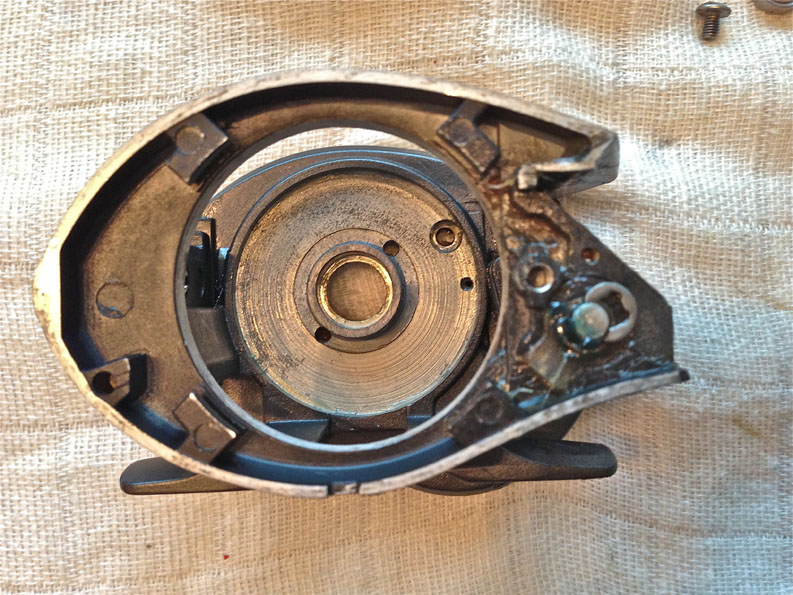
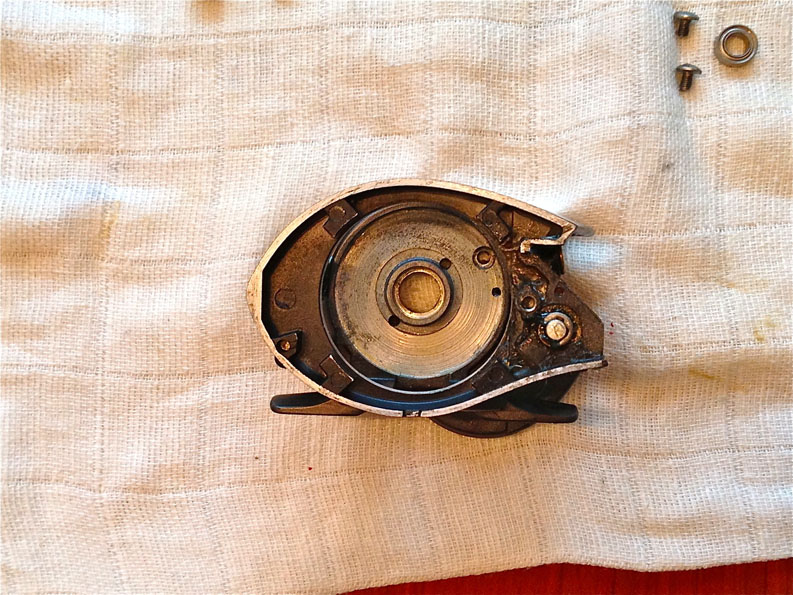
The frame insides have a coat of anodizing that seem to have been scraped off where the frame flanges meet the side plate. I coated everything with Quicksilver 2-4-C Marine grease for added protection against calvanic corrosion.
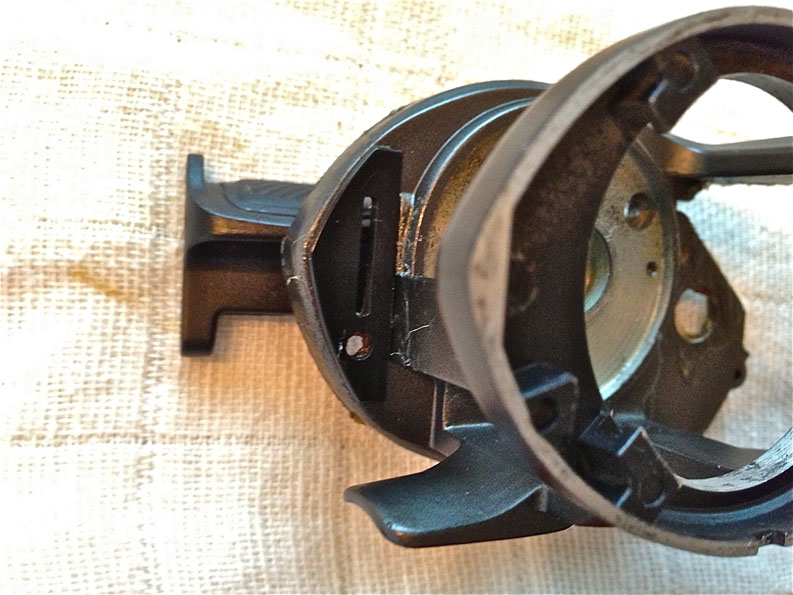
Slap some Marine Grease beneath this Thumb Bar guide as it is prone to collect salt water, and snap it in place.
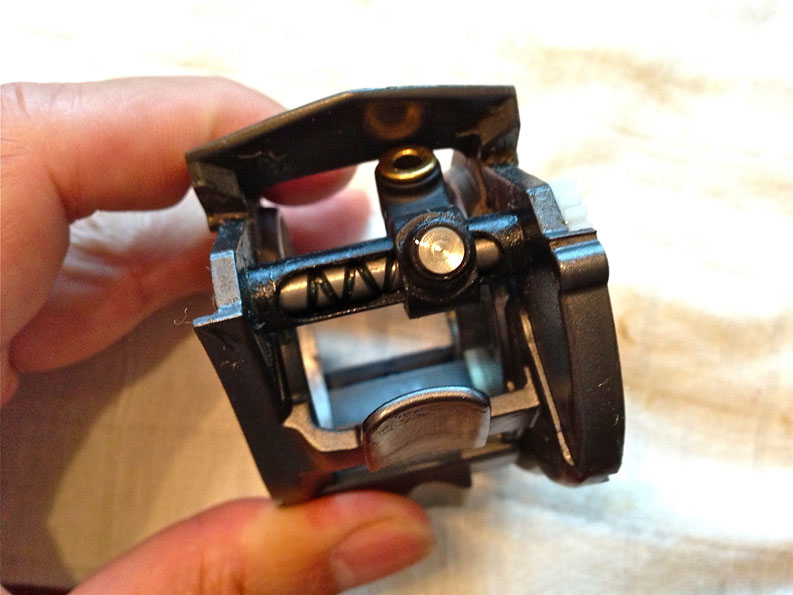
Slip on Thumb bar and slide Stainless Steel pivot bar to secure in place.
Stainless Steel Clutch Link has a snug fit. Slide it through frame and Thumb Bar.
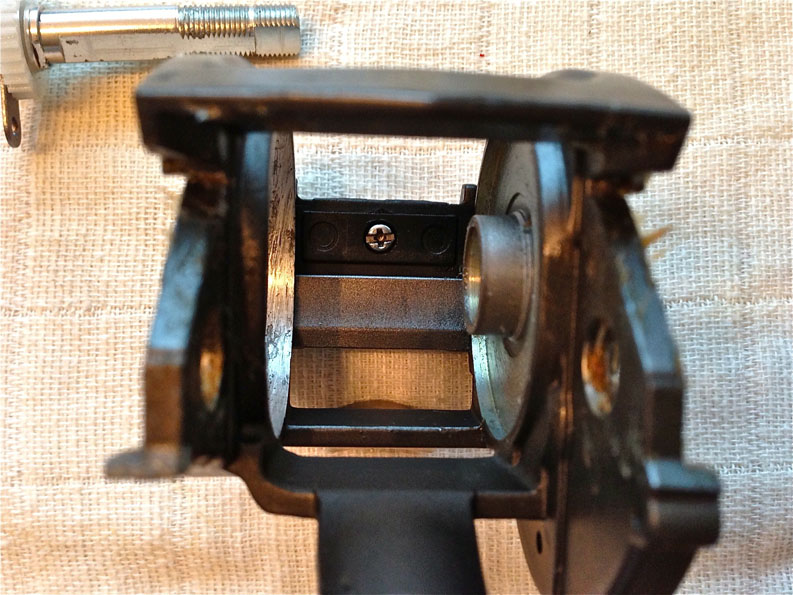
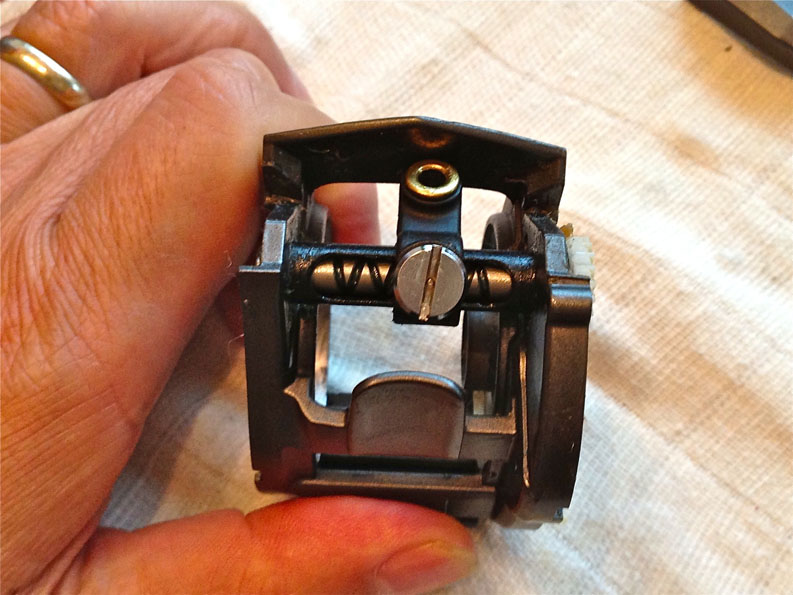
Secure Thumb Bar to Stainless Steel Clutch Link with a Self Tapping Screw. In the background, you can see how the threads on Gear Shaft are showing wear because Star Drag was forcefully cinched down tight in order to milk out some drag friction.
Levelwind assembly
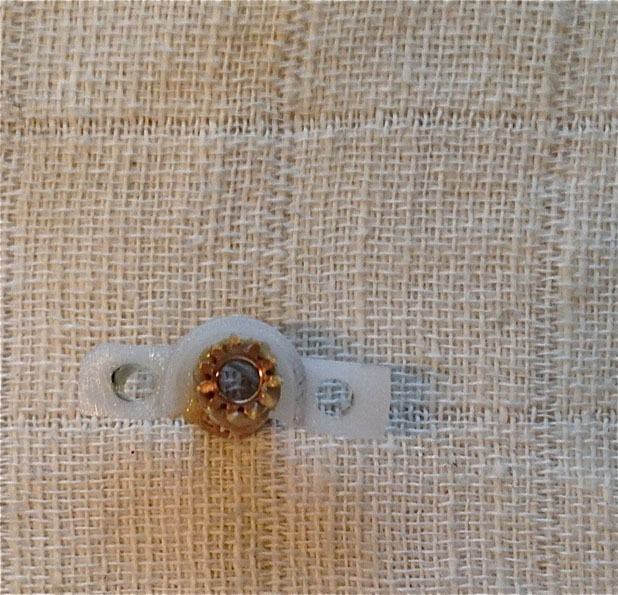
Grease this side of frame with Quicksilver 2-4-C marine grease and attach the clear plastic Worm Shaft Holder, rotate till its tongue points to 7 o’clock position and sits withinin the shaped slot for it.
The Worm Shaft is supported by this tiny 7 x 4 x 2.5mm Ball Bearing. I didn’t attempt the pry out the shields as they were not replaceable. Lubricated with Corrosion X and slip into the big end of Level Wind Tube.
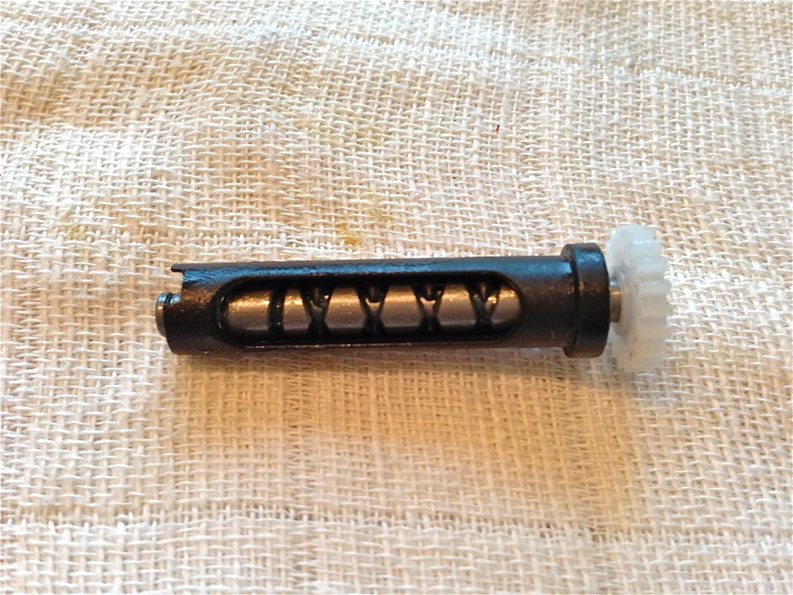
Lubricate and Slip Worm Shaft through bearing, Worm Shaft Gear and Worm Shaft Pin
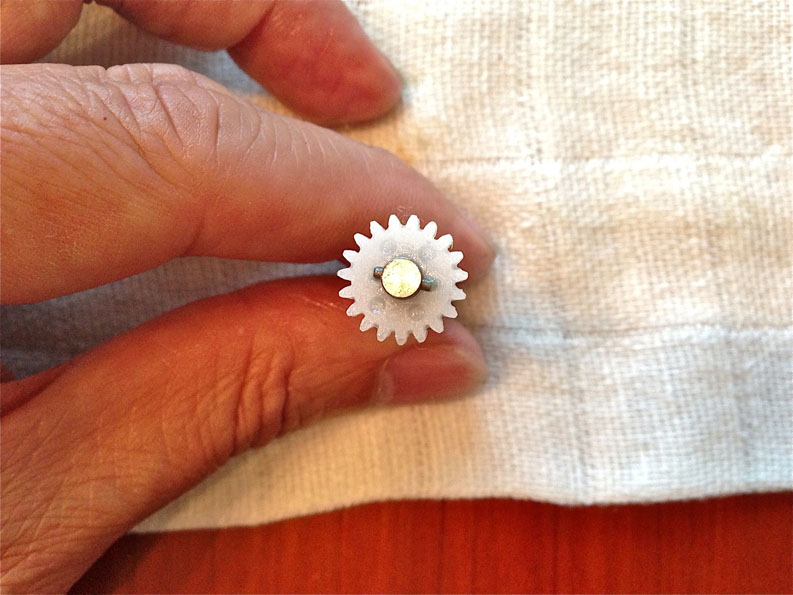
Worm Shaft Pin sits in recesses casted into plastic Worm Shaft Gear
Thread Level Wind Shaft assembly through frame and Line Guide. Rotate Level Wind Shaft till the castellated end mates onto matching grooves on clear plastic Worm Shaft Holder
Grease, attach washer and secure with E-clip.
E-Clips have a tendency to fly off and get lost. If you don’t have a box of these as spares, then it is safer to assemble them under a clear plastic bag
Lubricate Levelwind Pawl with Corrosion X and install in Line Guide (If you don’t have Corrosion X, ReelX is a suitable substitute)
Secure with Line Guide Nut, do not overtorque
Pass Stainless Steel Line Guide Shaft through holes in the frame and Line Guide. Lubricate with Corrosion X. You are now done with the Level wind.
Fitting the Nosepiece
Grease side of frame where marine grease had been smeared off, and slip on plastic Nosepiece
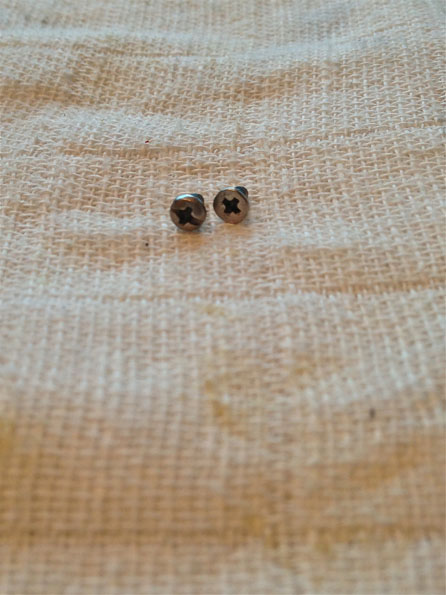
Nosepiece is held by 2 different screws – Domed head on the left and chamfered Philips head for the right.
Philips head screw secures the chamfered right side

Domed head secures the left side
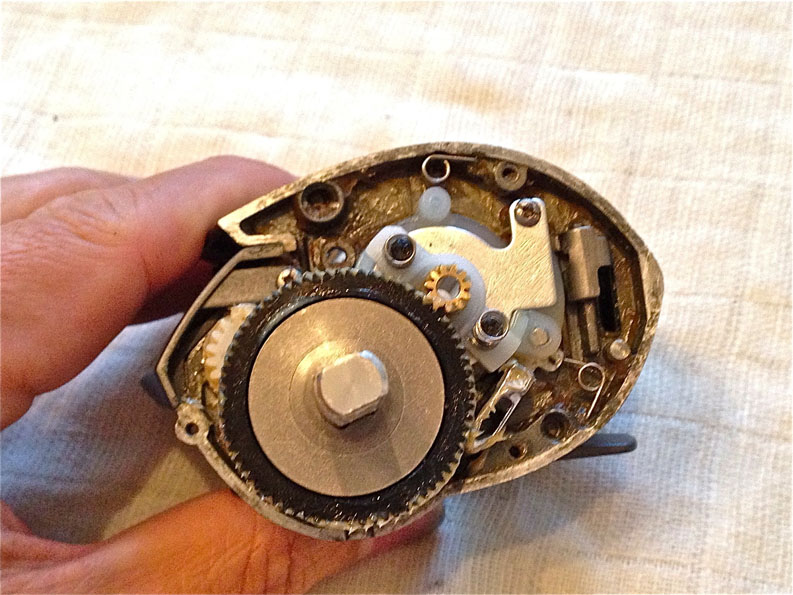
Installing the Clutch and Drivetrain
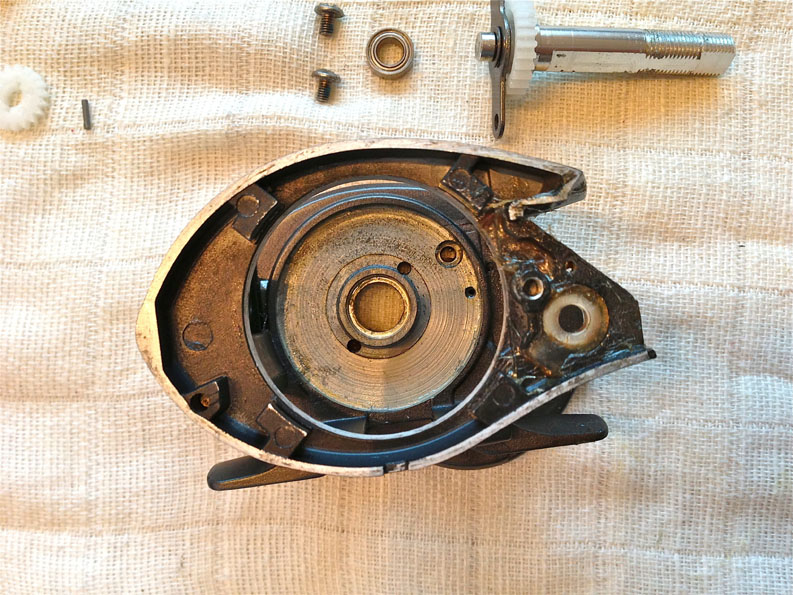
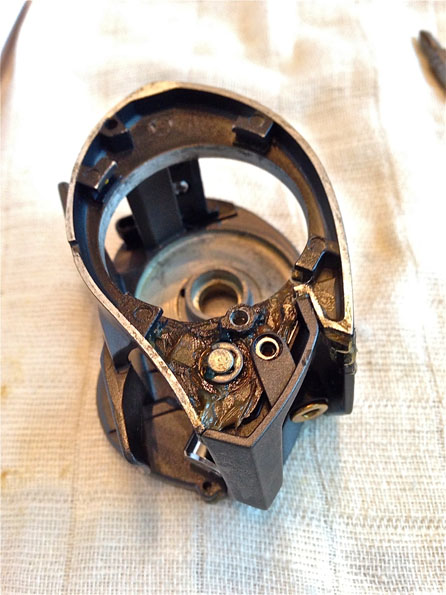
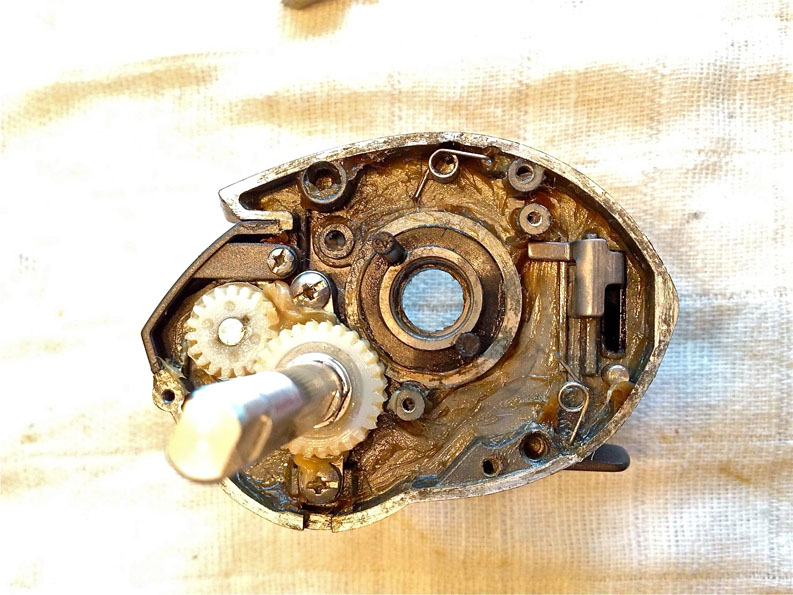
9 x 5 x 3mm Gear Shaft Support Bearing’s shields cannot be re-fitted so I oiled with Corrosion X and filled the Bearing housing on the frame with grease.
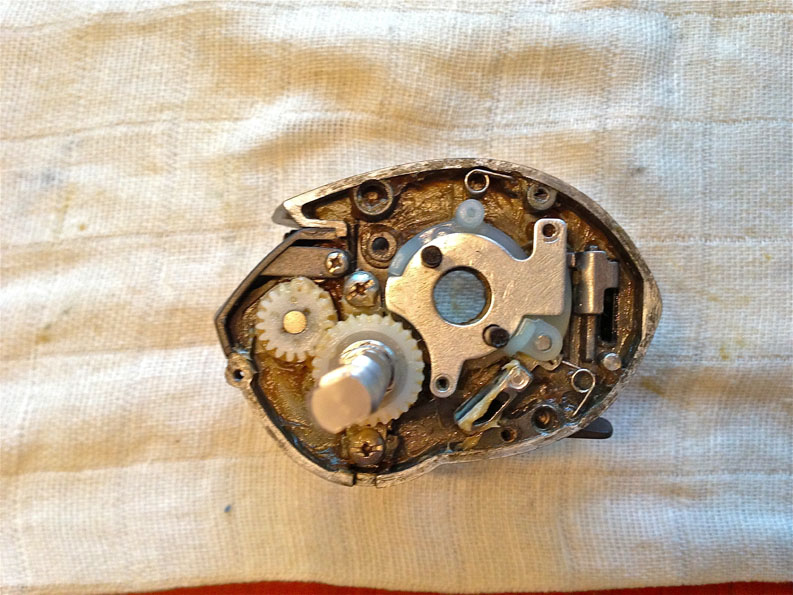
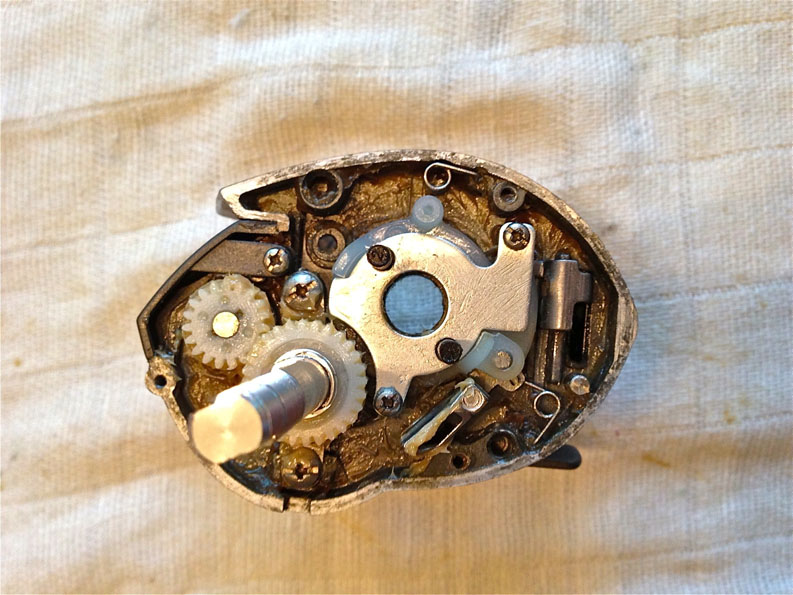
Gear Shaft plate is slightly angled like a war boomerang. Rotate till it match mountings in the frame.
Secure Gear Shaft plate with screws. After fitting this in, I realized that it will be easier to fit the clutch mechanism first… So you’ll see this disappear in the next few pics.
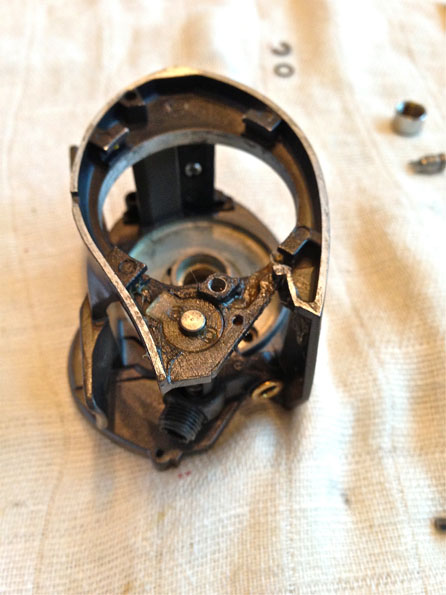
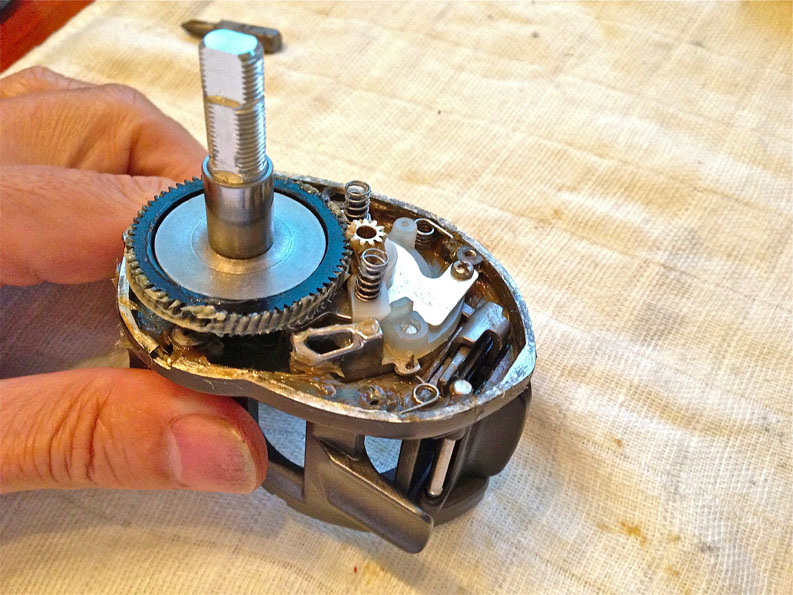
Yoke Holder sits within grooves in the frame. Pins beneath each post fits into corresponding holes in the frame. Take careful note of its seating position as you need to displace it slightly in order to install the springs and Lift Curve. Insert tabs of the 2 clutch springs into the respective holes in the frame. You might need to feel around to find the holes beneath the grease.

Hook the steel Kick Lever to Kick Lever Spring. The white plastic Lift Curve is connected to a post on Kick Lever and Clutch Spring. Its travel is restricted by the 2 posts of Yoke Holder
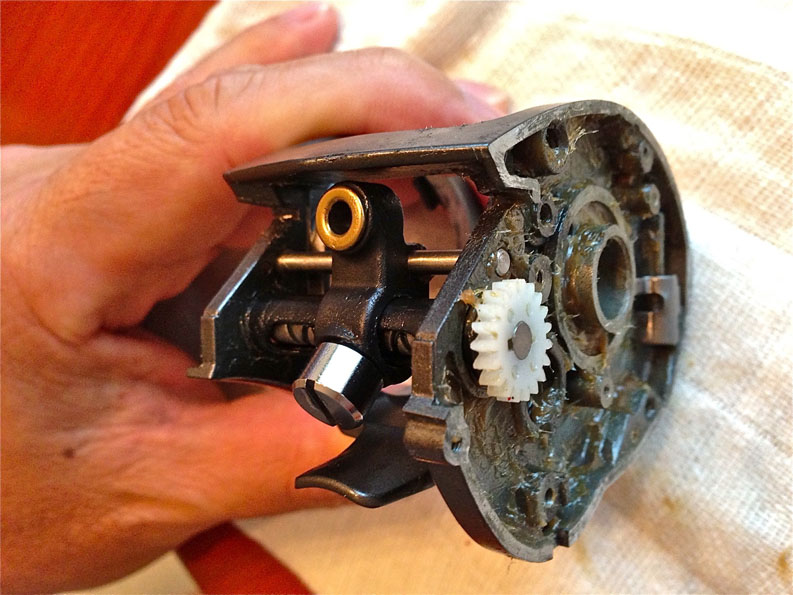
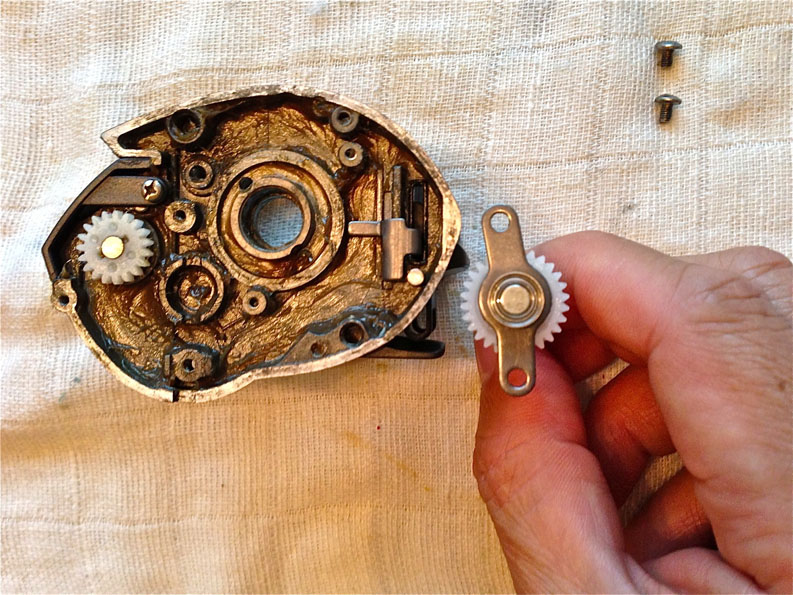
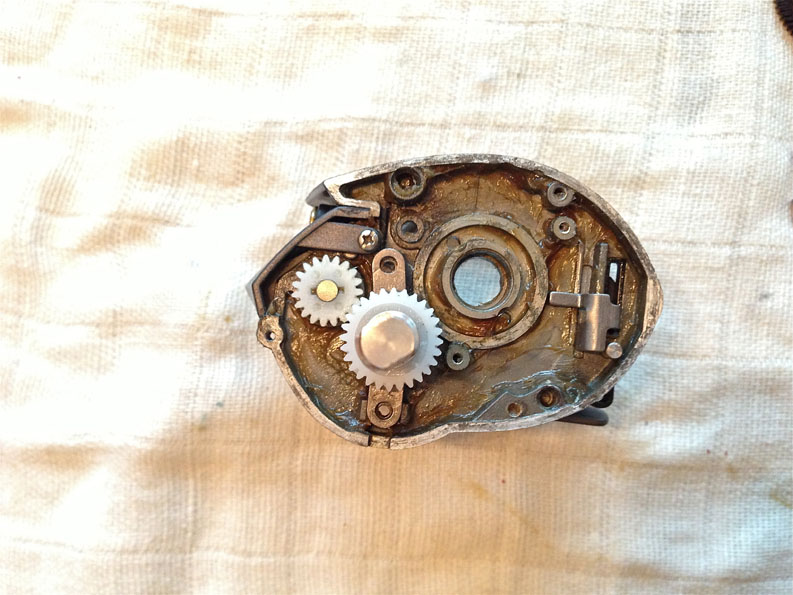
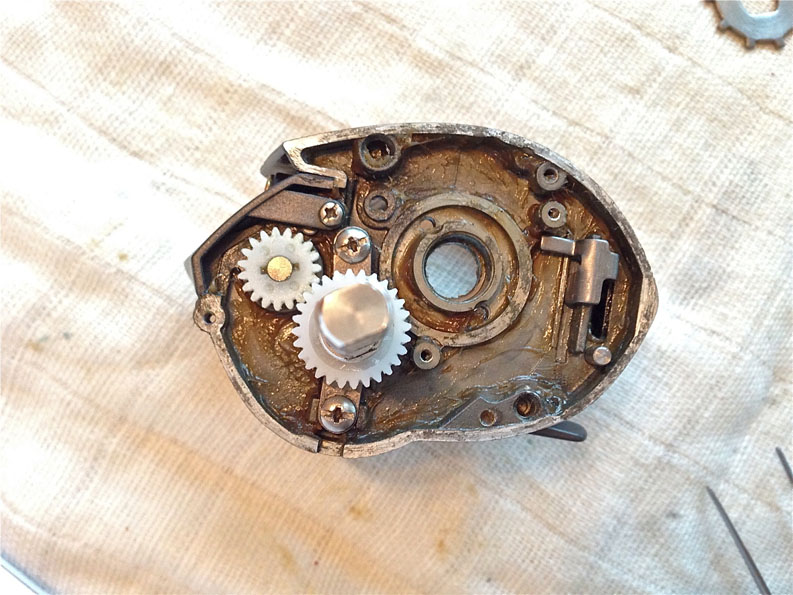
Attach Gear Shaft assembly (from the steps outlined above) and work Cal’s Grease between the teeth of both plastic gears
Grease and seat Clutch Plate over Yoke Holder
Fasten Clutch Plate with 2 Screws

Lightly grease Ratchet with Cal’s Grease
The Pinion Gear’s inner tube had been polished with Autosol till a mirror finish to minimize friction on the spool spindle. Work Cal’s Grease between the teeth, taking care not to have any grease contaminate inner tube. Hang it by the neck onto white plastic Yoke, with its wedged shaped wings facing down
Assemble Yoke to the two mounting posts of Yoke Holder, making sure Pinion Gear is between Yoke and Main Gear. Insert Yoke Springs to the two posts of Yoke Holder
Modified Drags
Place HT100 material drag washer on top of Ratchet
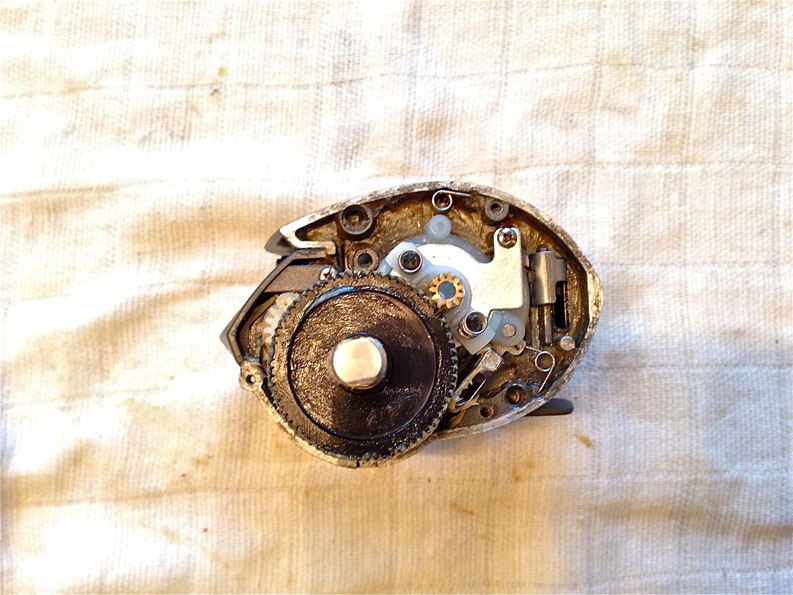
Work Cal’s Grease between teeth of Main Gear. Lightly grease other surfaces and install
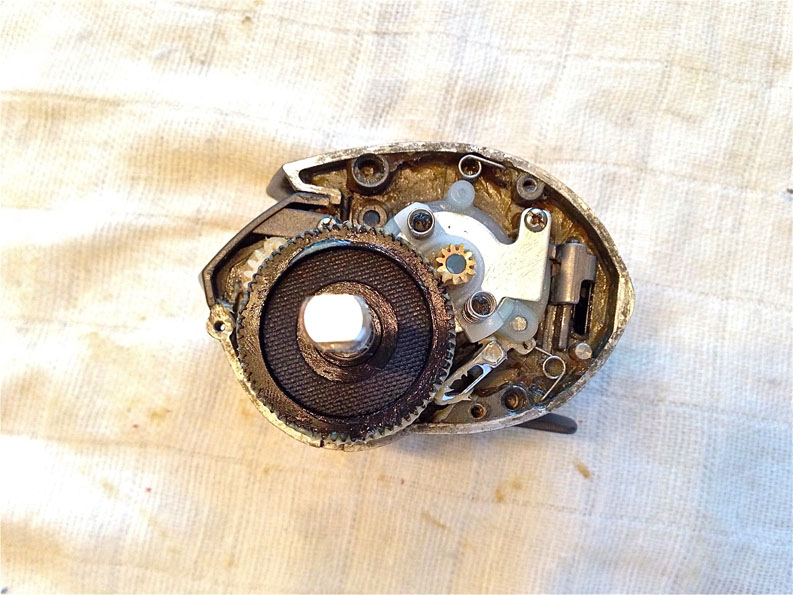
Carbon drag washer goes in next.
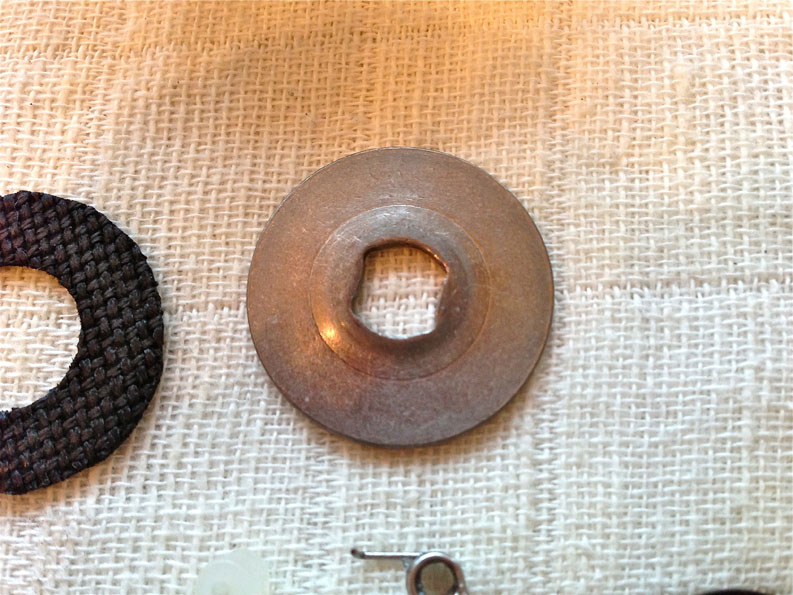
Lightly grease both sides of Drag Pressure Washer and install with the convex side facing up. If you look at this one closely, one part of the convex is flattened due to incorrect installation.
Lubricate Antireverse sleeve with Corrosion X and install.
Finishing up
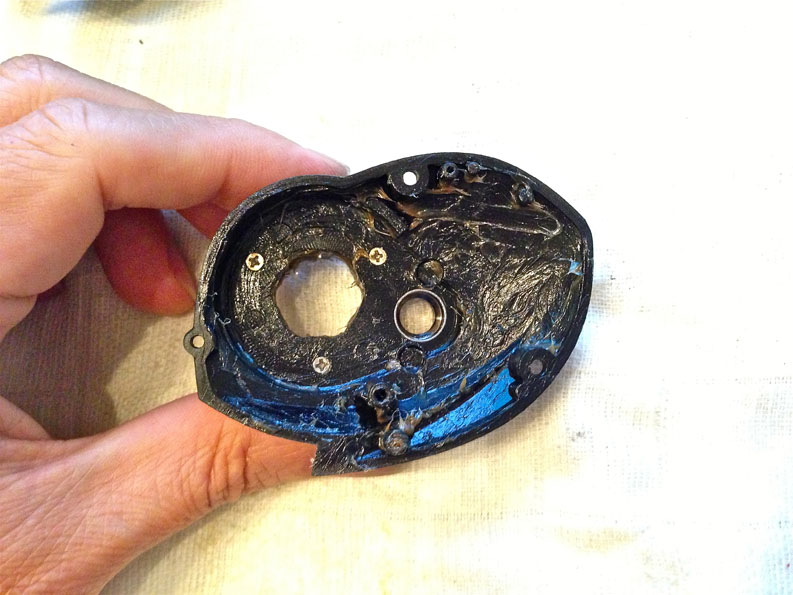
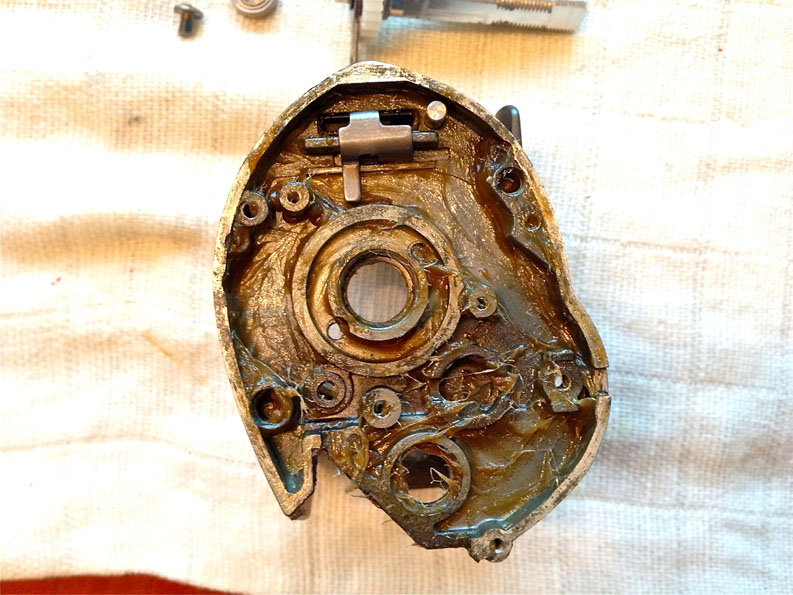
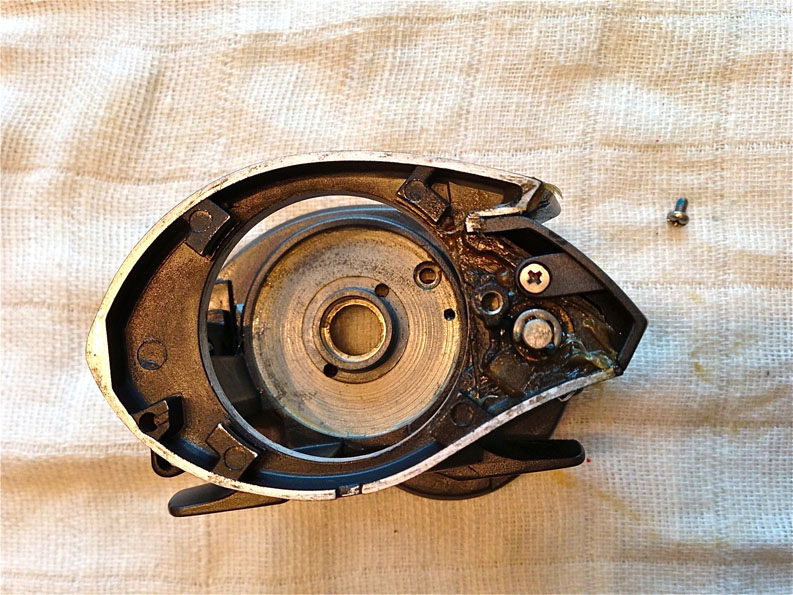
Side plate is a piece of molded graphite reinforced plastic. One can still see the coarse grinding marks of the mold on it. There actually is no need to grease this piece at all, except for the hole where Antireverse bearing sits in.
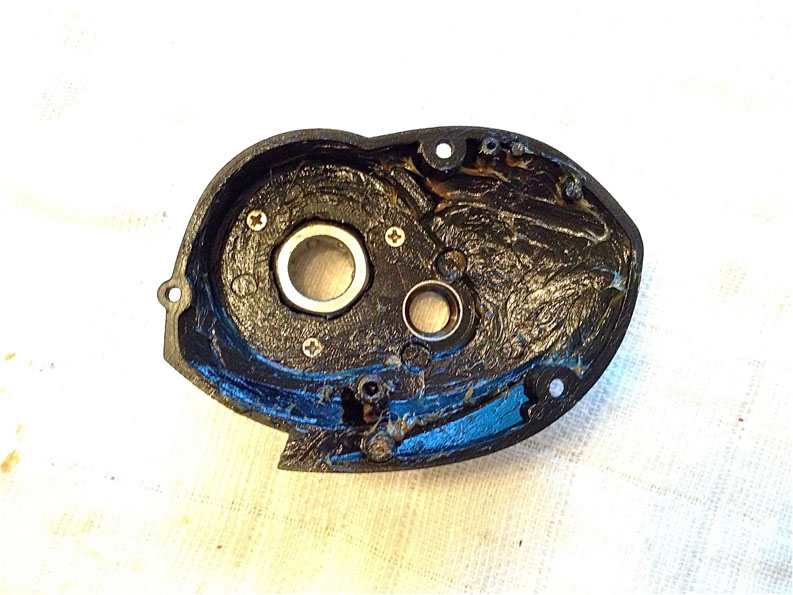
Oil Antireverse bearing with Corrosion X. Do not use grease as it may cause slippage. Install into Side Plate with the metal end facing into the reel (white plastic end faces handle)

Touch up Frame flanges that may have grease smeared away, then join side plate to frame taking care not to pinch the two Yoke Springs. Secure with screws. This slot screw is a long self tapping screw.
The smaller screw at 8 o’clock position is very very long……………………….. I wonder why it need to be that long. You screw and screw it in (or out) and it is still not there yet! I’ve heard that some people get a blister from this protruding screw.
Oil 8 x 3 x 4mm Cast Control bearing with a light oil and install.
Secure with C-clip

Lubricate threads of the anorexic Cast Control knob and thread in, taking note it is reverse threaded as this is a Left Hand crank reel.
Grease Drag clicker and install
For greater drag pressure, grease Belleville Drag Springs and install them spooned like (( or ))
Grease threads and ratchet in Star Drag and thread it in. Cinch Star drag down as tight as you can by hand
Grease spring washer and install
Grease contact surfaces of handle to delay corrosion
Carefully thread in aluminum 12mm Handle Nut taking note it is reverse threaded on this Left Hand Cranking reel. Secure with Handle Nut cover and screw.
Clean off grease from the outside with a piece of Kitchen Towel moistened with Simple Green. Refit spool, sideplate and you are done!
PS: when I tested drag after servicing, the line burst at above 4.5kg when it embedded itself into the spool. I had used an additional Belleville Drag Spring from Shimano’s Antares DC7 on top of the 2 original Belleville Drag Springs. It was excessive, so I removed it and final Drag numbers are a “Safer” 2+kg.
After installing everything back, we found the spool did not have much longer free spin times than when we started. (We got around 10 seconds before, but after all the work, it barely broke 20 sec). It might be because the Magnetic brakes are still working at the lowest setting, or some dirt (eg Autosol dust) had gotten into the bearings. Have to revisit this on another day.
Update: The magnets were excessive for an experienced caster. By removing the first, middle and last magnet, freespool increased to more than 30 seconds.
HTH,
LL
I hope this step-by-step guide helped you in servicing your own reel too. If you found this useful, please click the blue LIKE and FOLLOW buttons. If you would like me to help you service your reel, or if you would like to help me with the cost of keeping this blog running, please drop me a message via WhatsApp at +65-9431-0400. Thank You!
Text and Images © Lawrence Lee
All Rights Reserved
If you want to use any content for your own publication, please write me @ LawrenceLee_TC@yahoo.com
