

FIRST IMPRSSION – ABU Revo ver3 STX 8.0
Hi Friends,
A belated Happy Chanukah, Christmas and New Year to you and yours!
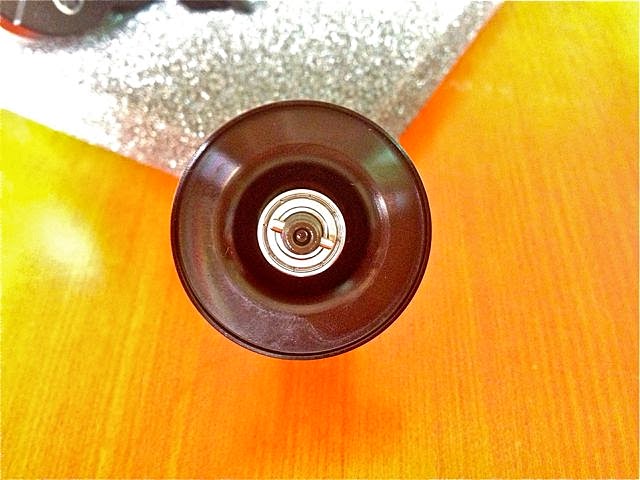
I normally will only buy a reel after playing with it in the shop till I’m satisfied it suits me. This is the first reel that I ever mail ordered.
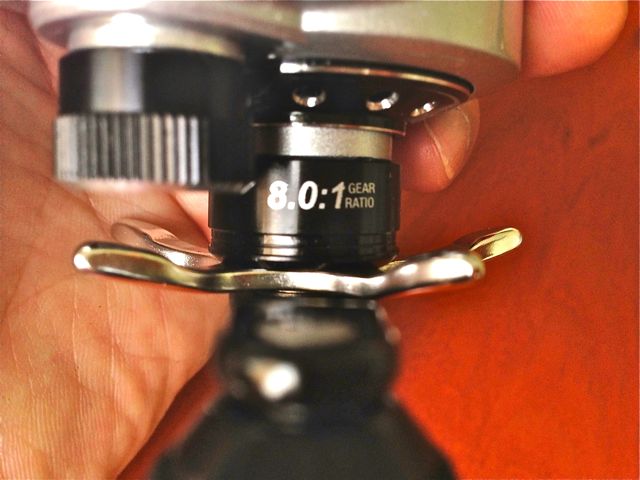
So here are some shots of the reel before I pull it apart.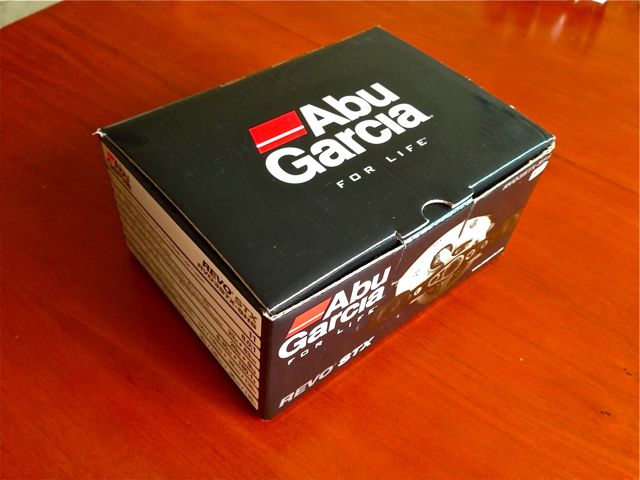 This is my first ABU Ambassadeur since 1980. I love Ambassadeurs – you buy one and it’ll last you years and years and still work well, so you don’t have to get another one unless you want to look fashionable. This time, I got me a Revo ver 3 STX 8.0. I was sold on its very light weight (even lighter than Daiwa’s Alphas R-Edition); yet it has impressive drag numbers. The 8.0 ratio was something I thought was not viable as it would make the pinion too small, so I had to get one to find out if it is truly cutting edge technology or just a numerically impressive dud.
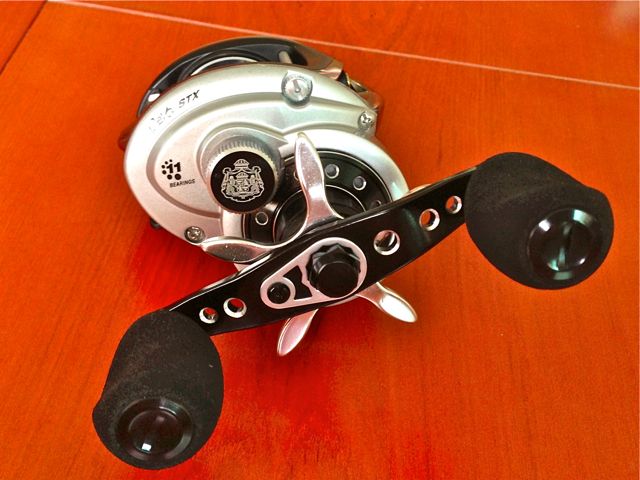
Out of the box, I was disappointed by the cheap plastic look and feel. Cranking on it, the reel feels rough. Everything feels so raw, even the cast-silver crest on old Ambassadeur reels is reduced to an etching on the cast control knob, tucked away from sight as though it is ashamed to be seen on this reel… So much for the joy of finally receiving my mail order reel!
The freespool clutch action feels too hard to depress. It just doesn’t have the tactile feel, refinement and smoothness that I’ve come to associate with an ABU Ambassadeur… or have I gotten too used to using the Daiwas and Shimanos?
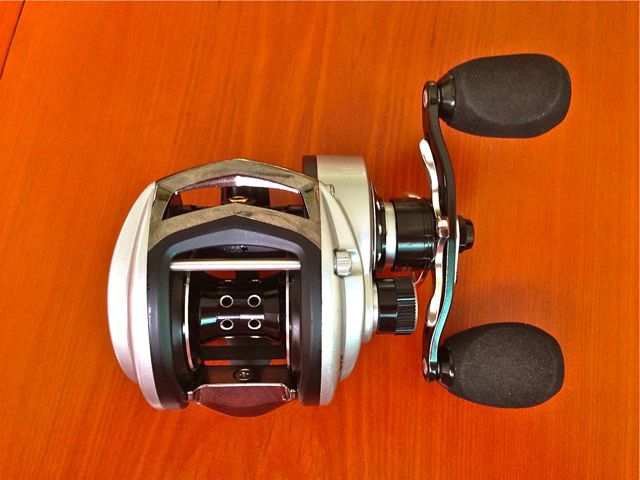
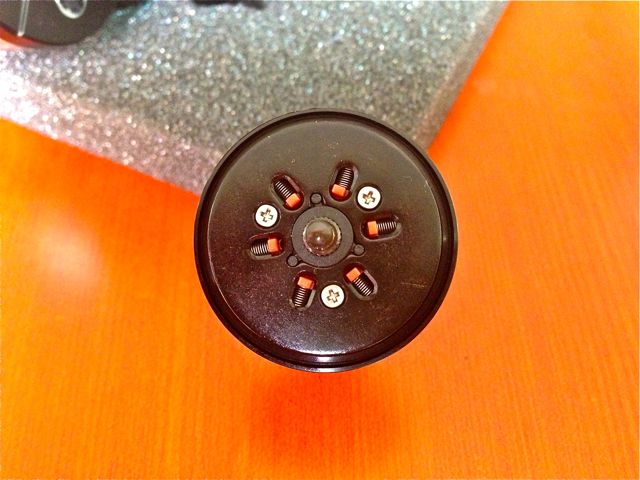
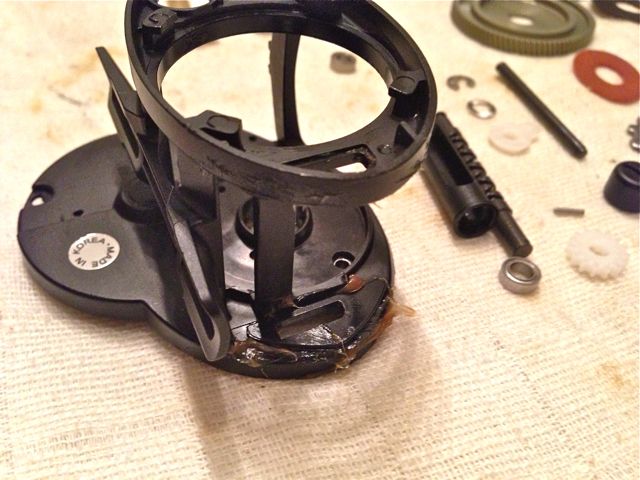
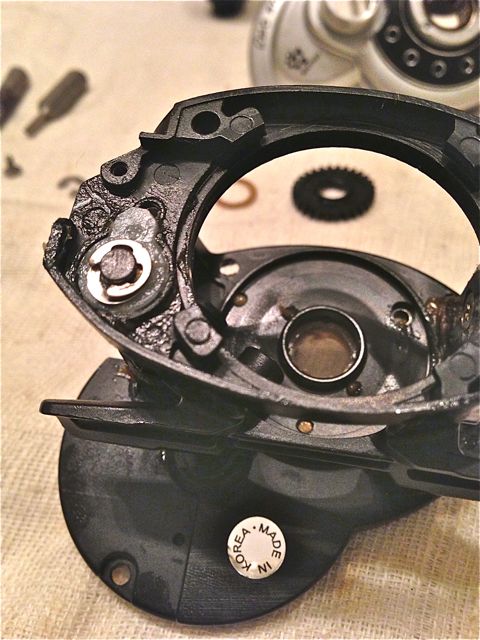
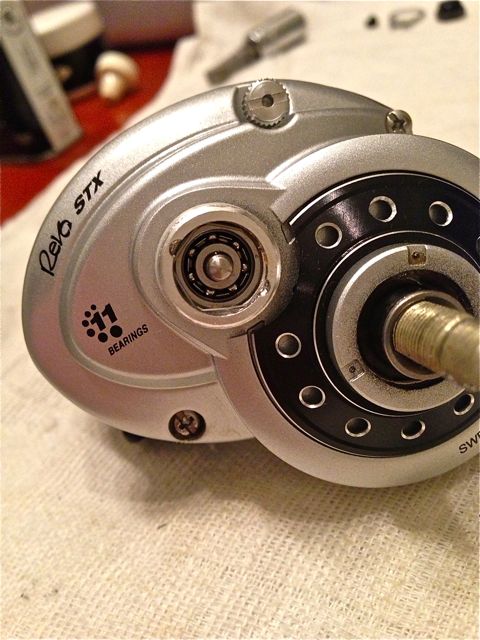
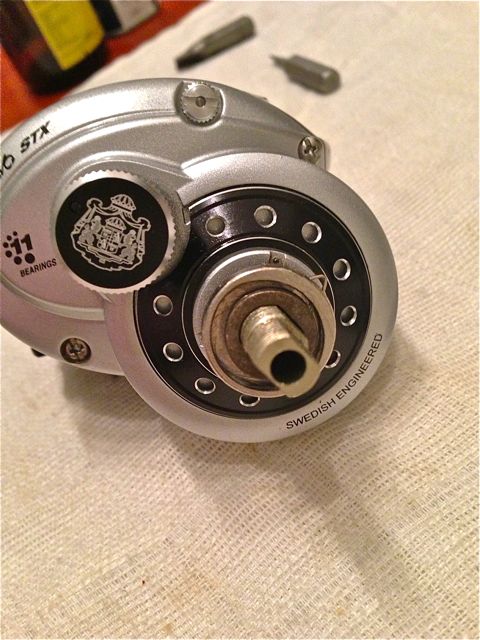
The Magnetic brake adjuster has a positive action, requiring a deliberate twist in order to change settings. This was what I had wanted in my Daiwa as the mag brakes get changed whilst palming the reel. So this is a positive step for me. But on the prominent gearbox housing sat a bright Mylar sticker that says MADE IN KOREA (out of focus in this shot). Korean entertainment has taken the world by storm. Will Korean made ABUs take over the Swedish made ones?
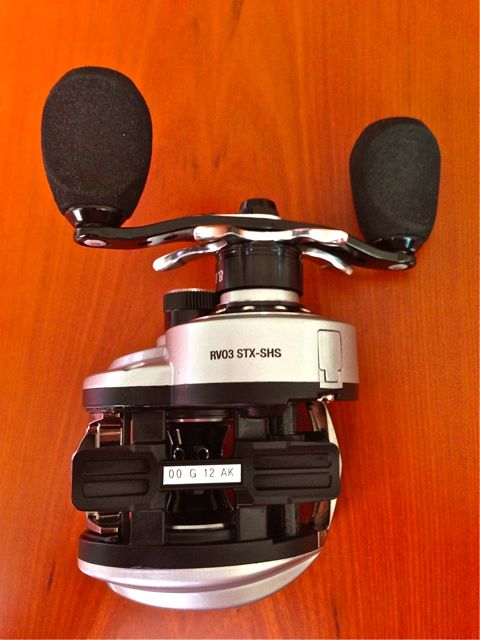
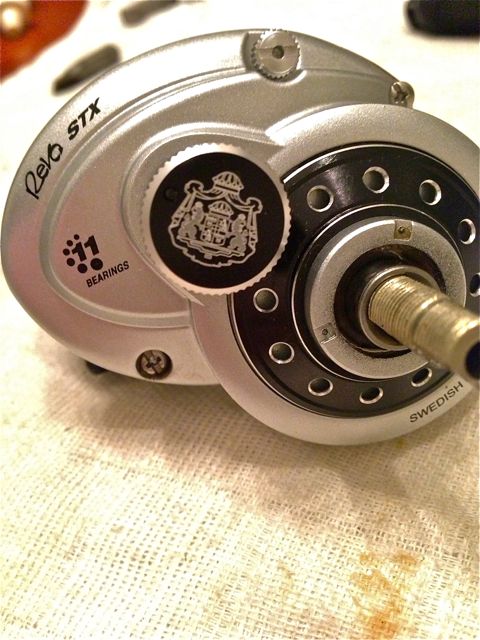
The frame and reel foot is a matt black material that is very light. Could it be some kind of graphite? OOG12AK sounds like the vanity callsign for a gungho Ham! haha.
Even the lettering is printed upside down and appear smudged.
Although the spool feels heavy (which should contribute to long free spin timing), freespool spin time was a mere 7 seconds with no braking pellets activated, magnetic brakes at minimum and cast control set to the lowest possible tension before end play comes in. Hmmm, is this a reel that is meant to only cast heavy lures?
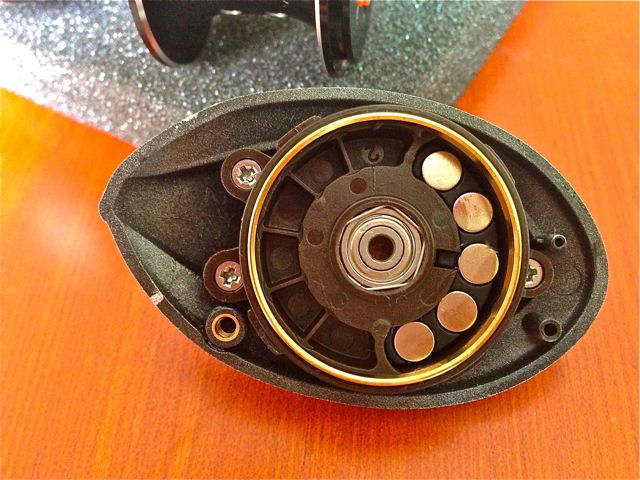
This reel offer both Centrifugal brakes and Magnetic brakes. Titanium Nitride coated races for the Centrifugal brakes is a nice touch.
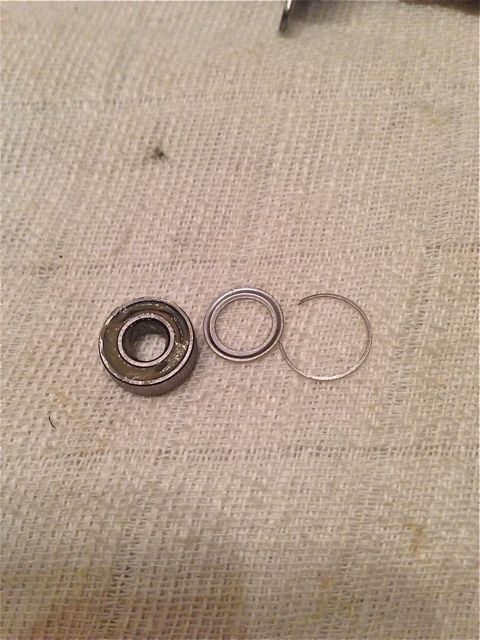
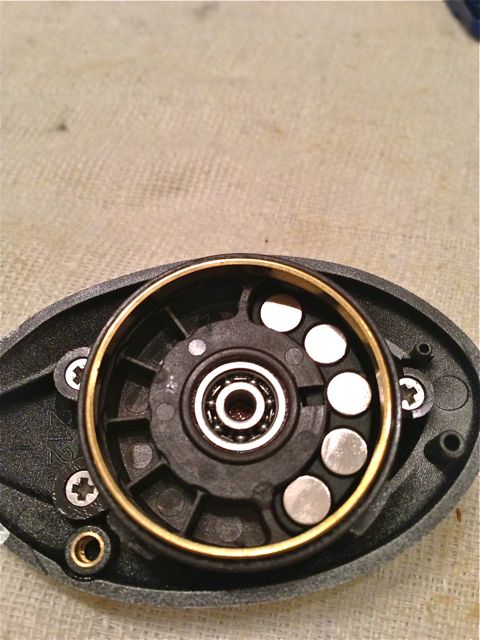
The smaller 10 x 3 x 4mm spool bearing (OD x ID x thickness) has c-clip held shields which can be easily removed for cleaning.
The larger (11 x 5 x 4mm) spool bearing has press fit shields. These shields got to be forcibly pried out, which is a tricky operation considering the sensitive bearings are mere millimeters beneath. Once out, the shields cannot be replaced. Held in place by a cross pin, you’d need a spool pin removal tool in order to take out this bearing for servicing.
Note the spool pin is tapered, so one must be careful which side to press the pin out from.
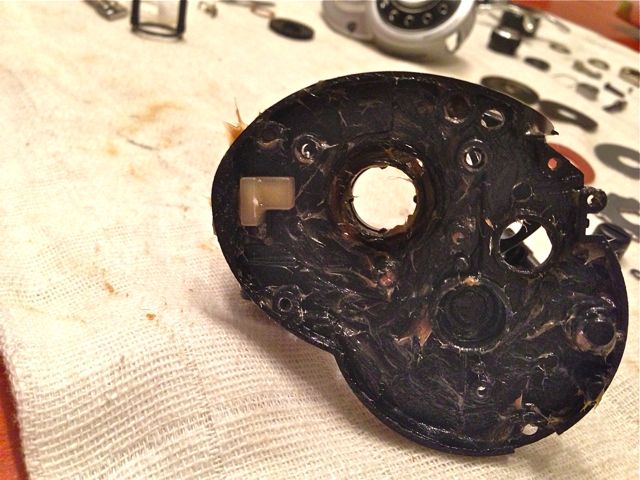
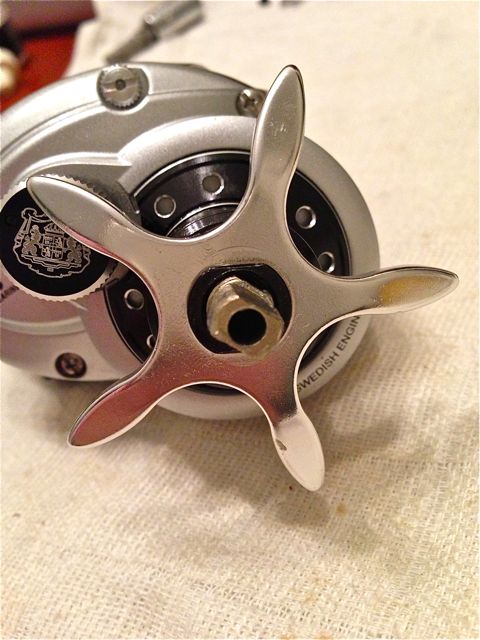
From this end, the spool finish does not inspire belief that this is a finely made product.
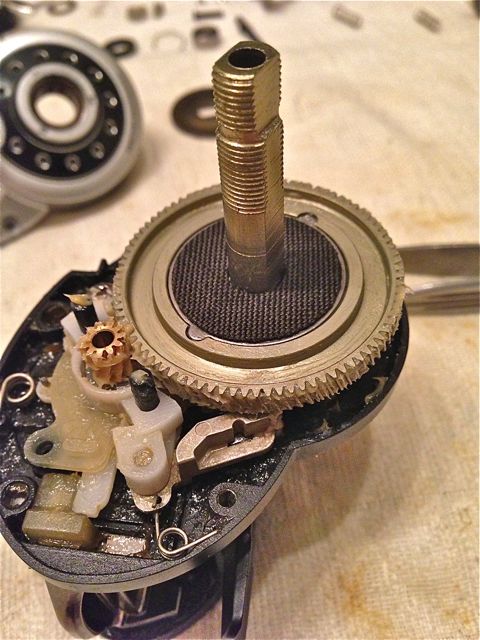
Centrifugal brake pellets have calibrated springs to hold them in when not needed but this device exacts a cost of weight on the spool. The heavier the spool, the more difficult it becomes to cast light lures.
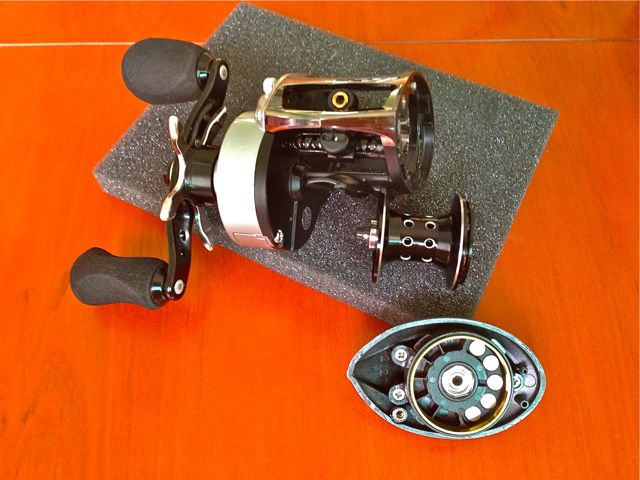
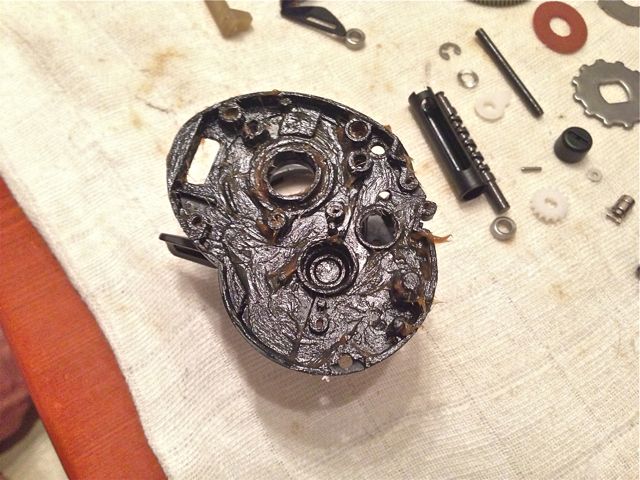
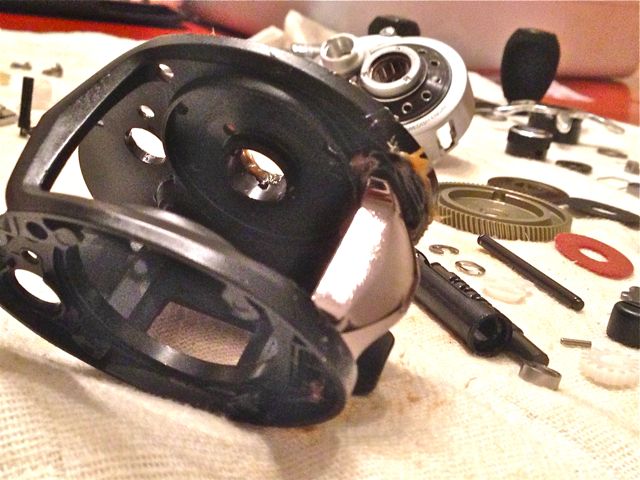
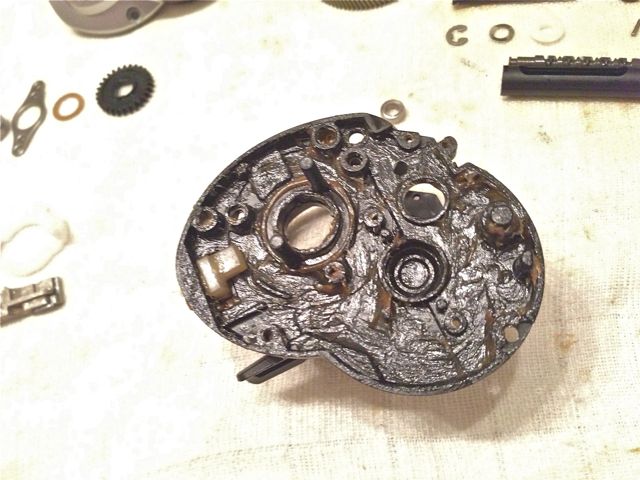
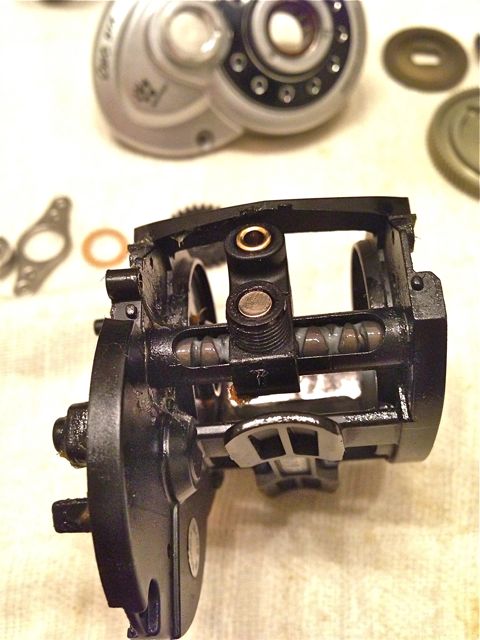
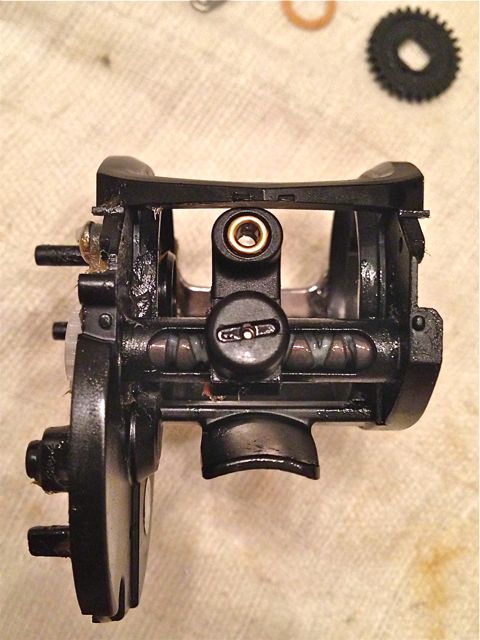
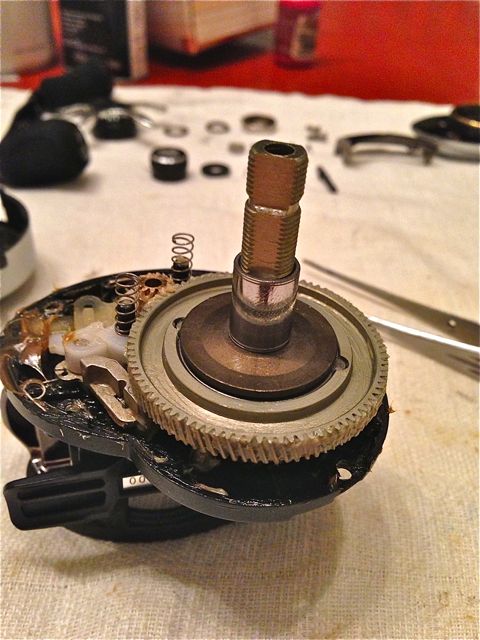
Frame does not appear to be casted to very precise tolerances too… Thus begins the process of stripping down the reel.
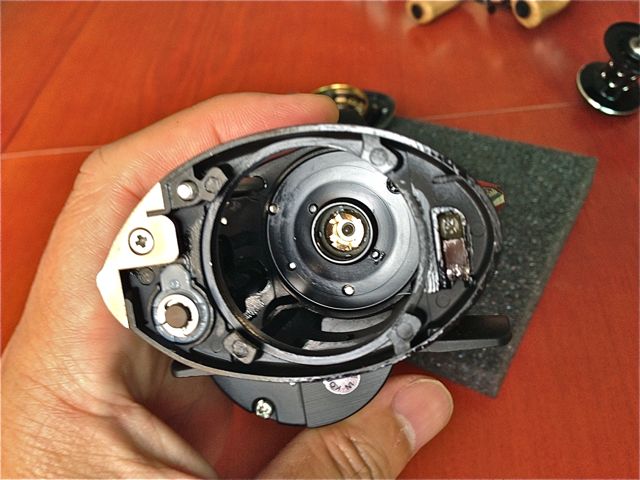
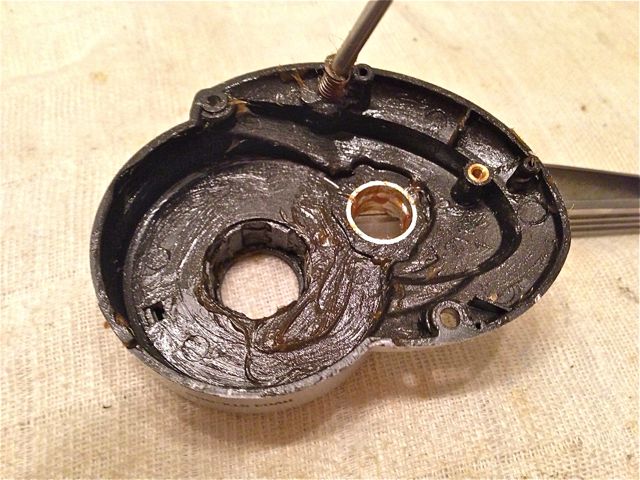
Insides of the reel have a coating of a high viscous oil. This should help the reel stay corrosion free for a while. Thumbs up to ABU.
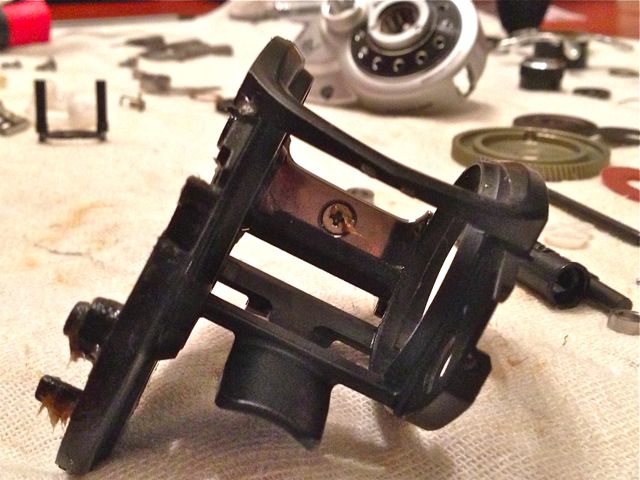
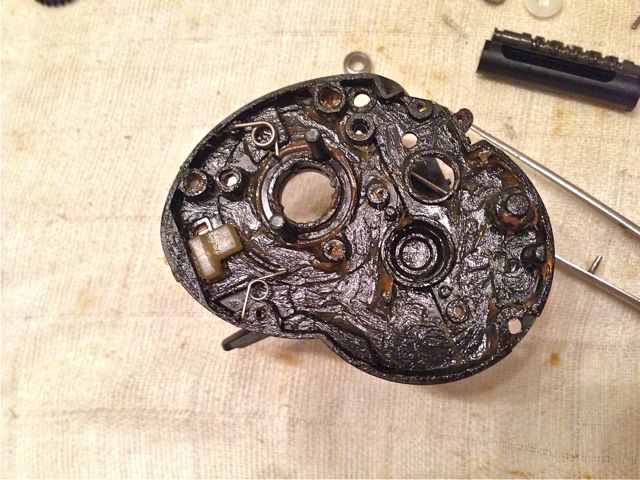
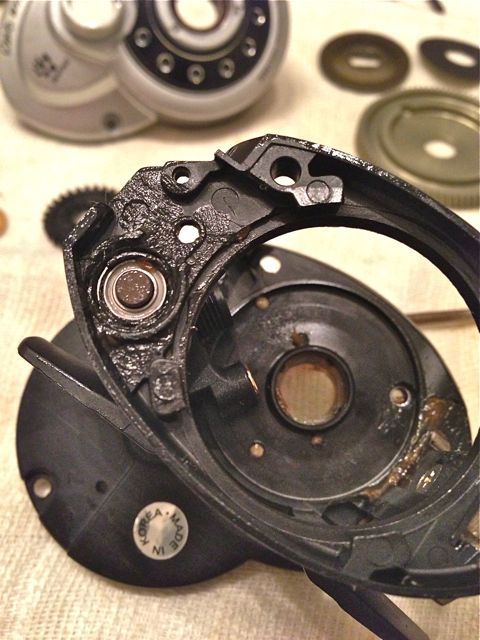
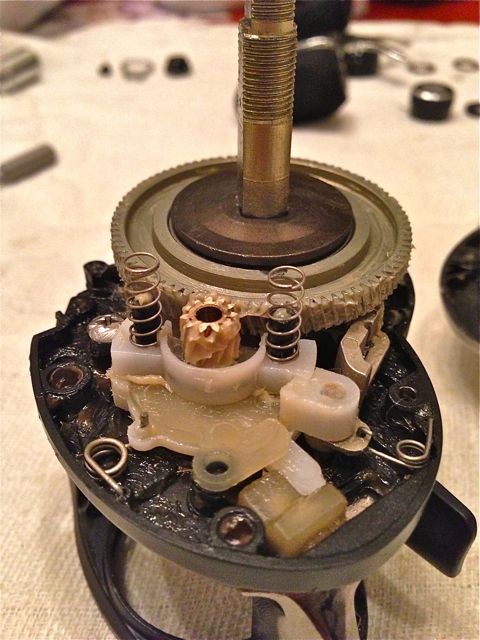
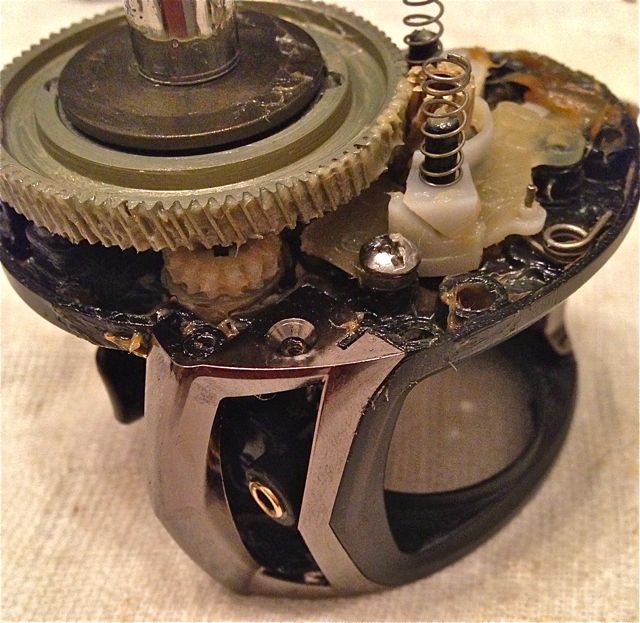
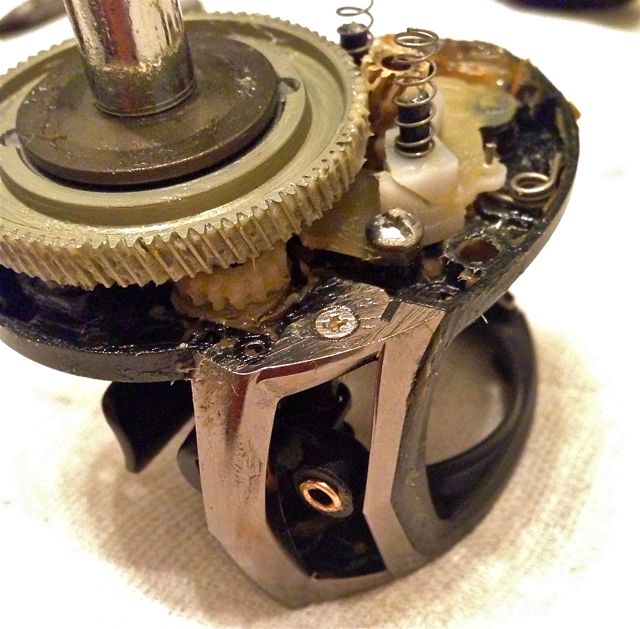
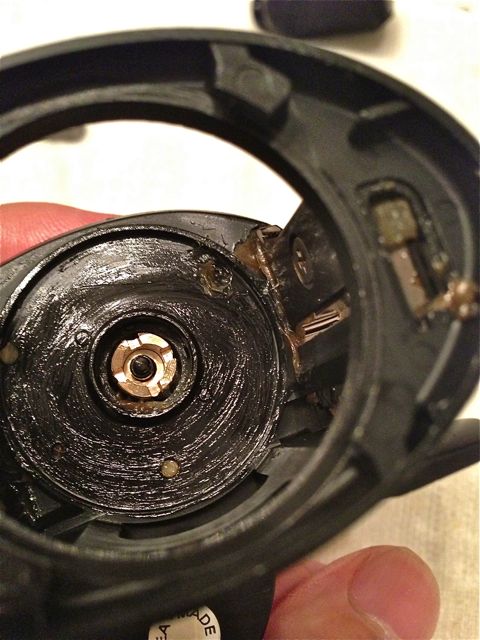
I now understand why the freespool clutch is so heavy to depress – there are 2 return springs!
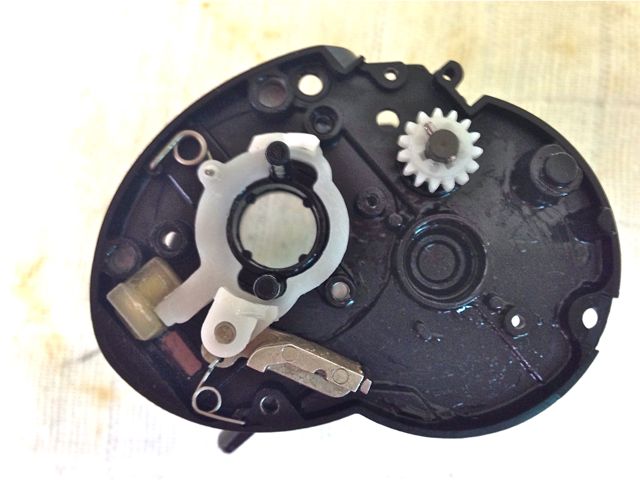
This Kick Lever #1257004, has a metal insert, possibly hardened for wear. I wonder why is ABU placing so much emphasis into beefing up the Engage-disengage mechanism?
UPDATE: After I had the chance to see how many first generation STX reels had ceased working because their kick lever had worn/corroded off, I now understand the emphasis.
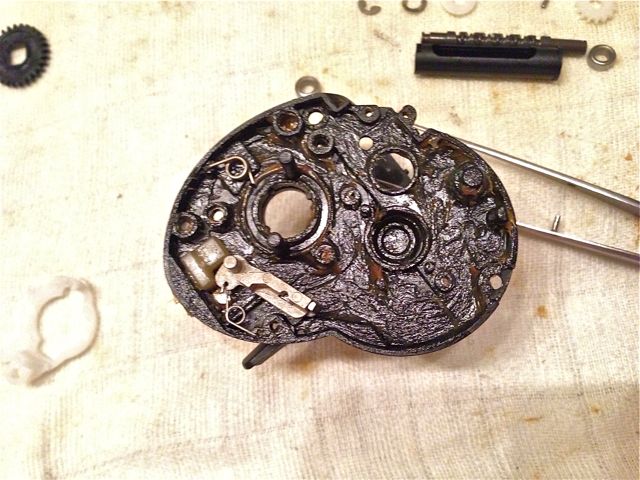
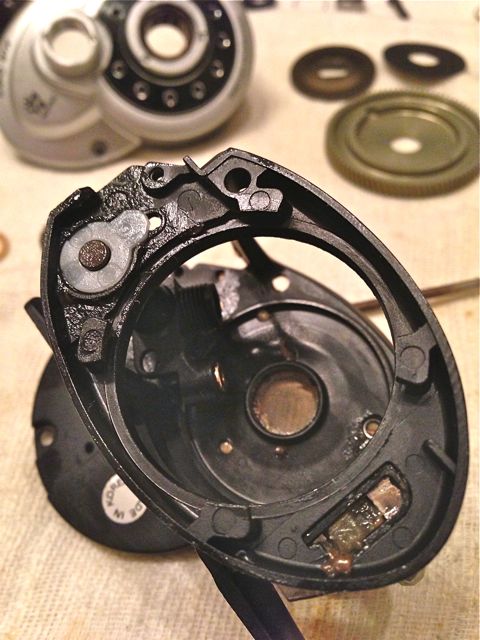
Always have the schematic with you when you strip your reel
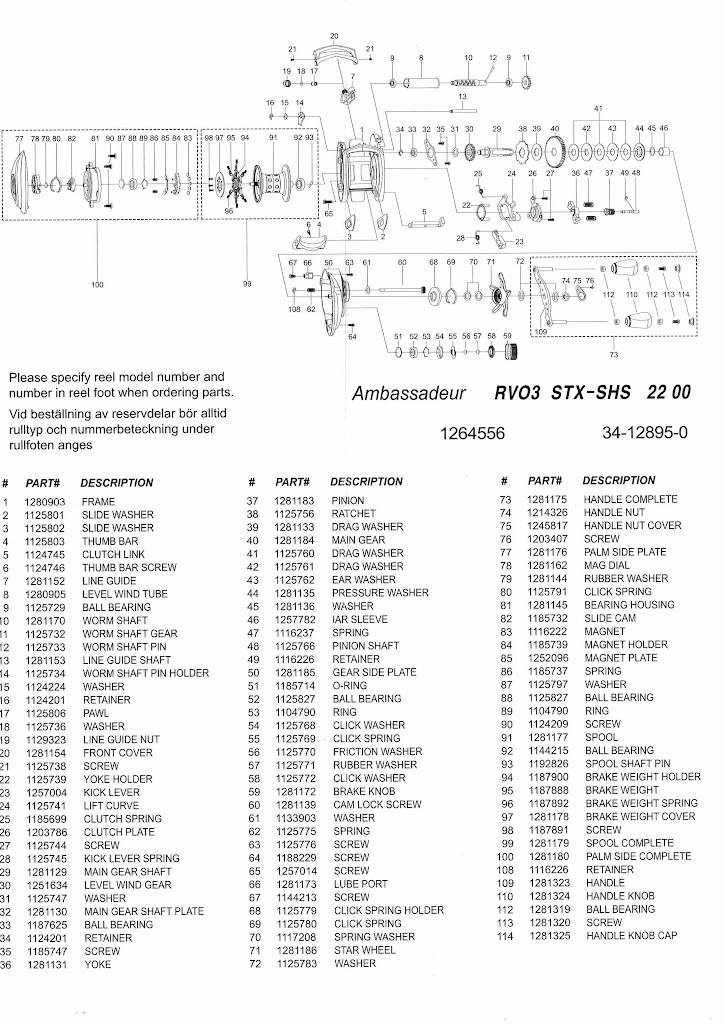
I’ve enlarged the schematic to help with old eyes.
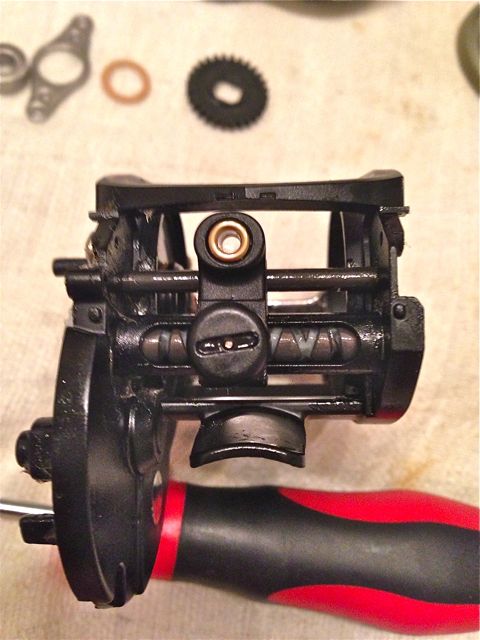
Stripped everything down for a greasing up. Then on to unshielding the ball bearings…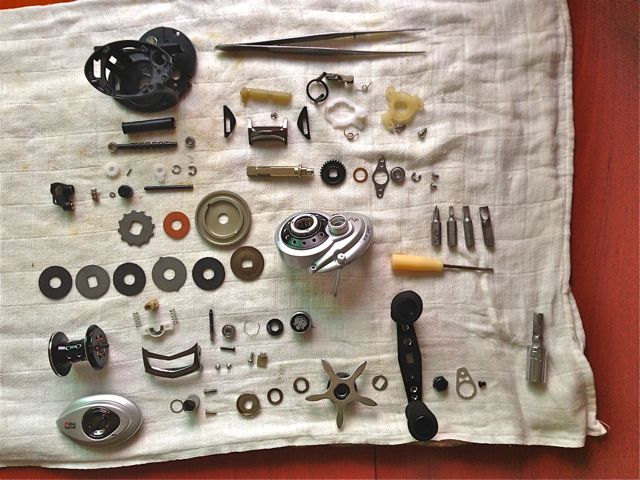
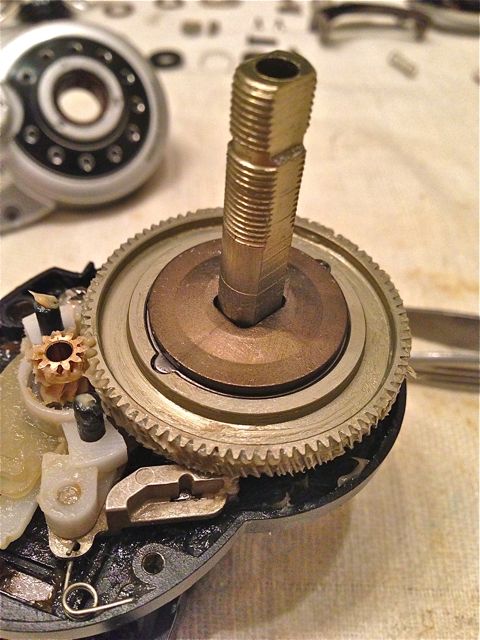
Here’s the reel, stripped down of all its serviceable parts. Compared to the Ss and Ds from the land of the rising sun, ABU engineers have managed to make an 11-bearing reel with a minimum of parts. Other than the handle knobs, magnets and braking pellets, there’s probably nothing else that can be further taken apart. So this should be a really simple to maintain reel, a trait I like in all Ambassadeurs.
The drag could have been a heckuva lot more if they had used up all the real estate on the main gear. BUT… I’d be leery of having so much drag power if they really used the full gear diameter as it has a tiny pinion with a skinny collar which can easily get twisted under too great a load. Carbon fibre washers are run dry by the factory.
ABU engineers have eliminated the pinion support bearing which probably accounts for why there is some roughness in cranking. But that is great news as there’s no more difficult to access Pinion ball bearing to corrode.
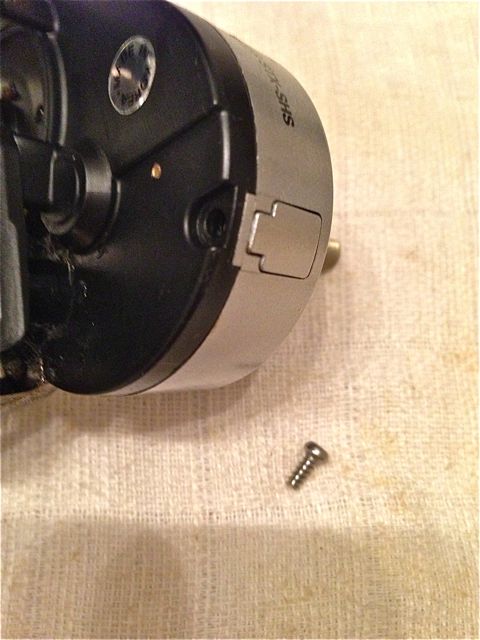
However they too have fallen into the rut of using too many different types of screws to hold the shebang together. I needed 4 sizes of slot screwdriver and a Philips head bit to remove all the screws, not counting those on the handle knobs.
The handle nut was a mite too large after anodizing and scratches show where it is stuck in the 10mm socket wrench.
For a reel that is just new out of the box, the grease is already getting a dark colour. It tells me that there is a fair amount of burr that was not polished off in the manufacturing. Which is good news as the reel should smoothen out after more use and some rounds of servicing.
Oil good, but Grease is better
A coating of Marine grease insures against premature corrosion.
The place where Slide Washer #1125801 and #1125802 sits is a trap for saltwater to do its damage to the frame. Grease helps delay that from happening. The plastic washers are casted with L and R engraved in the mould so you will not get them placed wrongly.
Plastics reduce weight and resist corrosion
Since the Thumb Bar #1125803 is plastic and won’t corrode, grease is not needed.
The Clutch Link #1124745 is also plastic which helps with this reel’s impressive weight reduction. Thread through frame and Thumb Bar #1125803
Secure with Thumb Bar Screw #1124746. If it is difficult to thread a screw like in this case, dab some grease on the screwdriver and screw will stick to it.
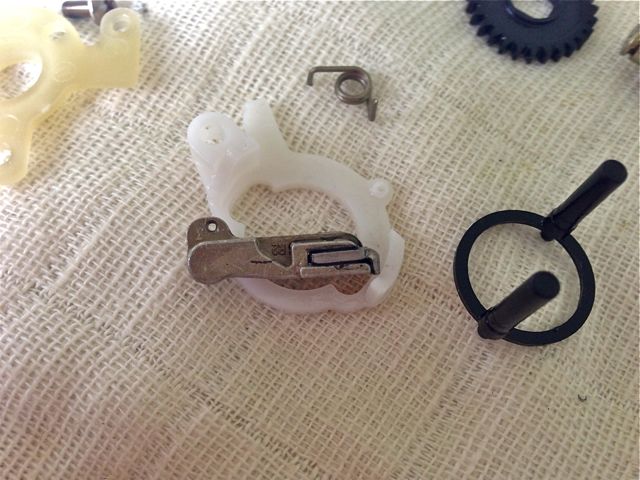
Take careful note of the positions
Yoke Holder #1125739 sits within grooves in the frame. Pins beneath each post fits into corresponding holes in the frame. Take careful note of its seating position as you need to displace it slightly in order to install the springs and Lift Curve #1125741
Insert Clutch Spring # 1185699 and Kick Lever Spring #1125745 into their respective holes in the frame. You should insert the shorter end of Clutch Spring # 1185699 into the frame.
Hook Kick Lever #1257004 to Kick Lever Spring #1125745
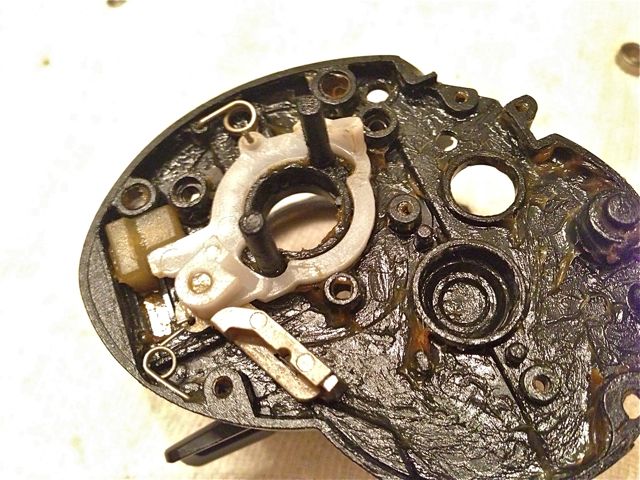
Lift Curve #1125741 is connected to a post on Kick Lever #1257004, the longer end of Clutch Spring # 1185699 and the 2 posts of Yoke Holder #1125739
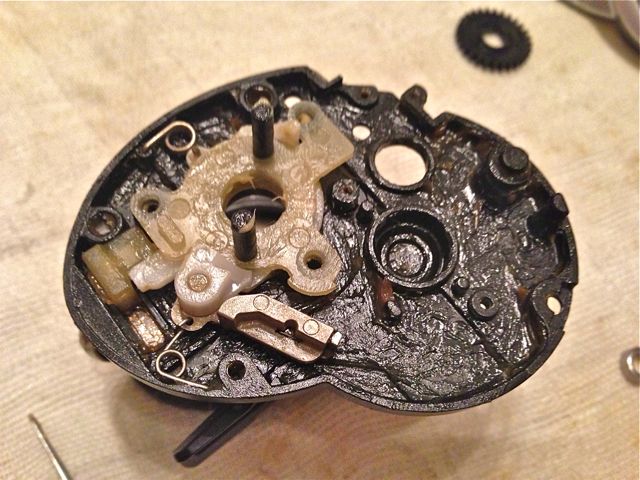
Grease and seat Clutch Plate #1203786 over Yoke Holder #1125739.
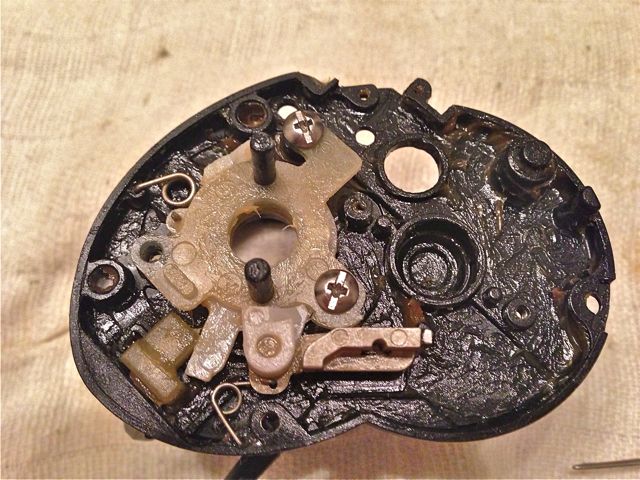
Fasten Clutch Plate #1203786 with 2 Screws #1125744
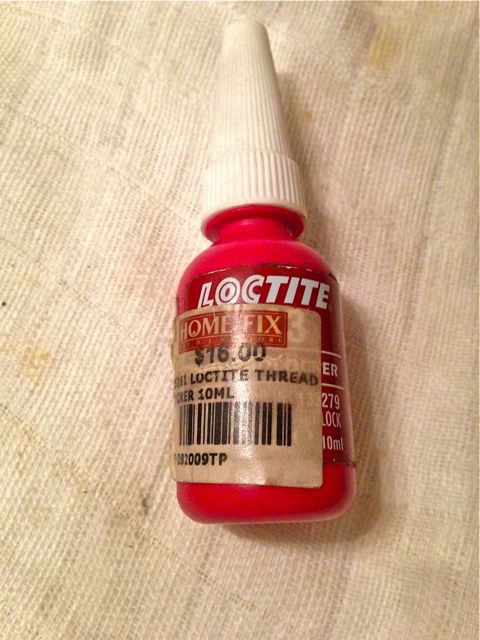
The 2 Screws #1125744 that hold Clutch Plate #1203786 down have their threads glued with blue Loctite
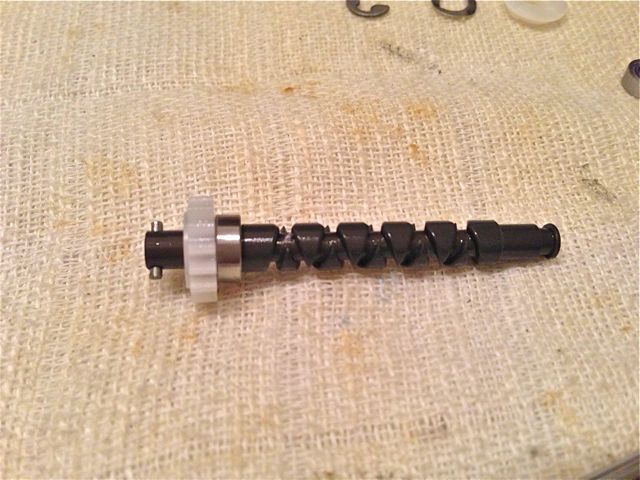
Insert Level Wind Tube #1280905 through frame and Line Guide #1281152
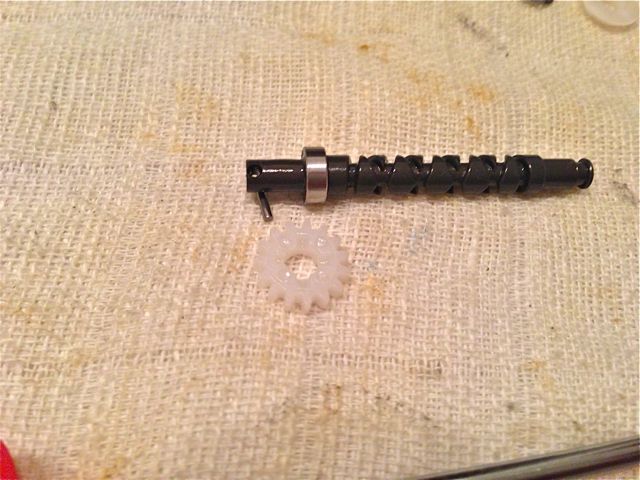
Worm Shaft #1281170 is supported by 2 Ball Bearings #1125729 and held in place by Worm Shaft Pin #1125733 which sits in recessed slots casted into Worm Shaft Gear #1125732. These bearings are so tiny that it is a challenge to just hold them. So I’m not going to attempt removing their shields.
Oiled with Corrosion X and assembled

Insert into Level Wind Tube #1280905
Mount the other Ball Bearings #1125729 on the other end of Worm Shaft #1281170
Grease frame with Marine Grease and fit in Worm Shaft Pin Holder #1125734
Lubricate and then secure with Washer #1125736 and Retainer #1124201
Lubricate Pawl #1125806 with Corrosion X and home it in Line Guide #1281152
Stack on the tiny Washer #1125736 and secure with Line Guide Nut #1129323
Pass Line Guide Shaft #1281153 through holes in the frame and Line Guide #1281152. You are done with the Level wind.
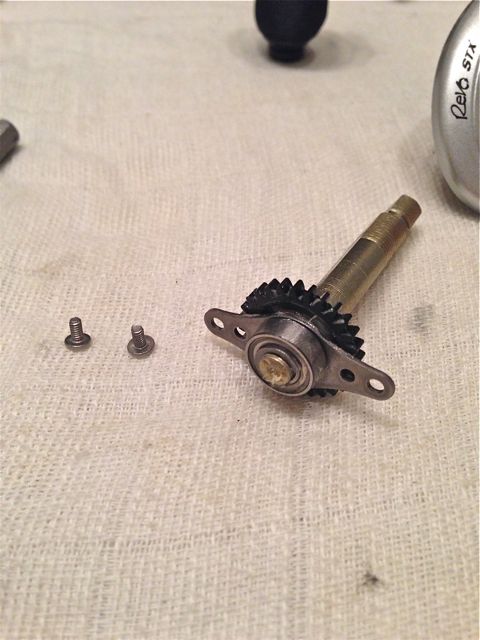
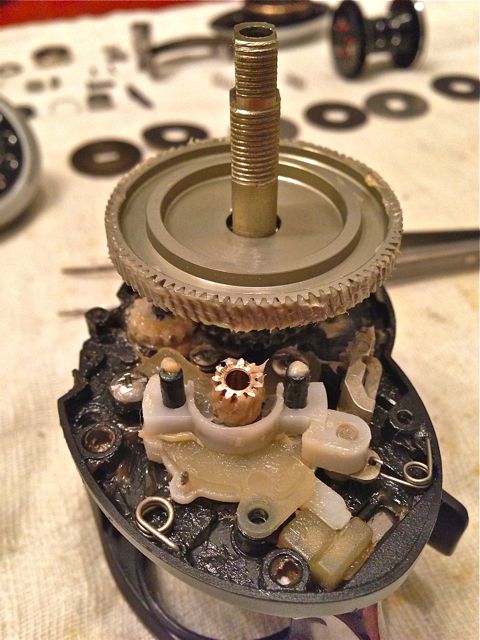
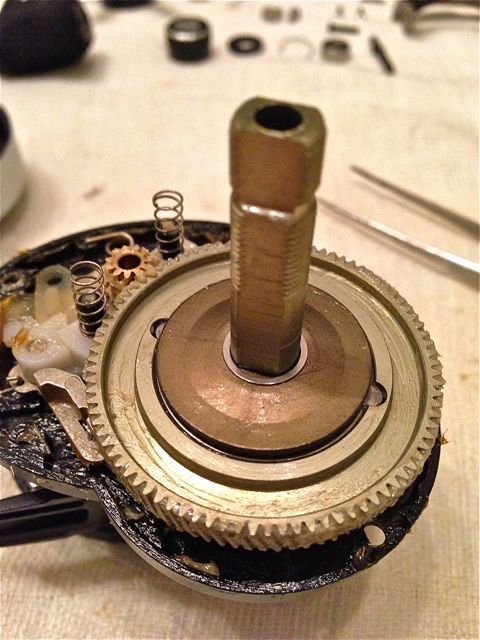
Refitting the Main Gear Shaft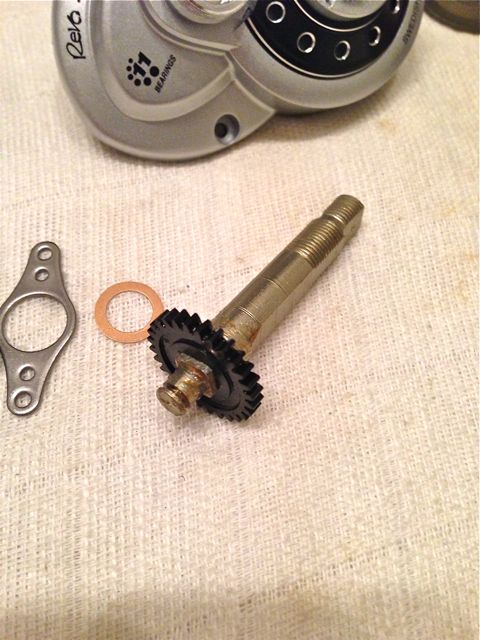
Grease Main Gear Shaft #1281129 and attach Level Wind Gear #1251634
Grease and attach thin copper Washer #1125747
Attach Main Gear Shaft Plate #1281130 with the chamfered edge side facing up.
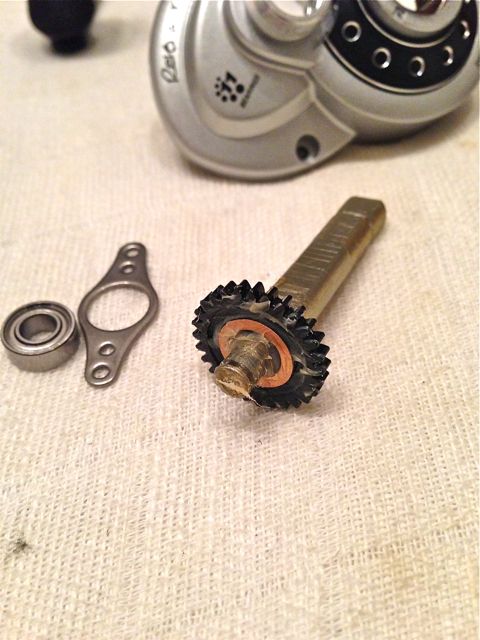
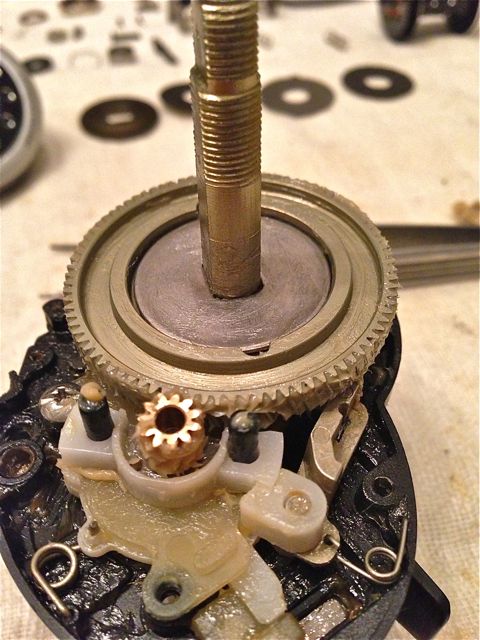
Pack Non Spool Ball Bearings with Grease
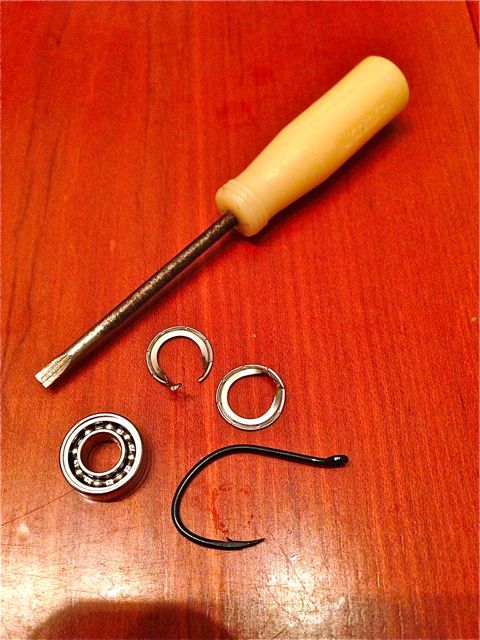
Remove shields of Ball Bearing #1187625 with a SHARP hook. I like to use DaiIchi AJI size 12 hooks for this as they are extremely slim and sharp. If your hook cannot feel the TINY gap between the locking C-clip on the outer race, it is too dull.
Clean away the old lubricant, repack with lightened Cal’s Grease (Regular Cal’s grease that has some Corrosion X mixed in to lighten it) and replace the shields.
Install Ball Bearing #1187625 and secure with Retainer #1124201
Mount on frame and secure with two Screws #1185747. Grease up with Cal’s Grease, working it between the teeth of the gears.
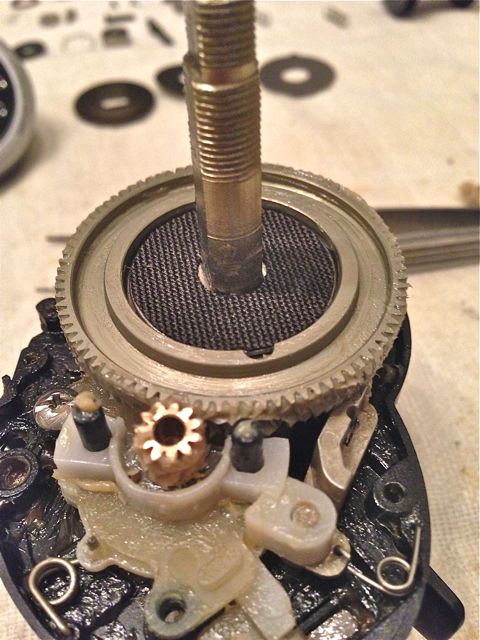
Lightly grease Ratchet #1125756 and Drag Washer #1281133 and install.
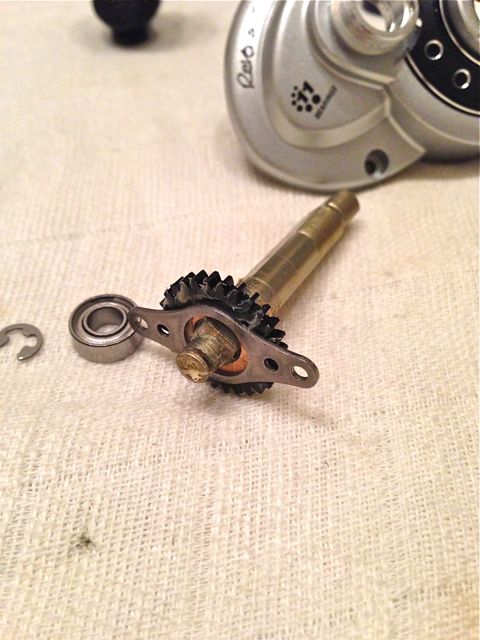
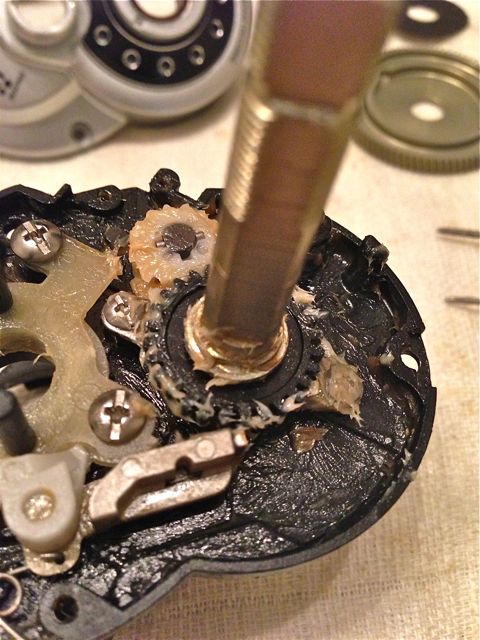
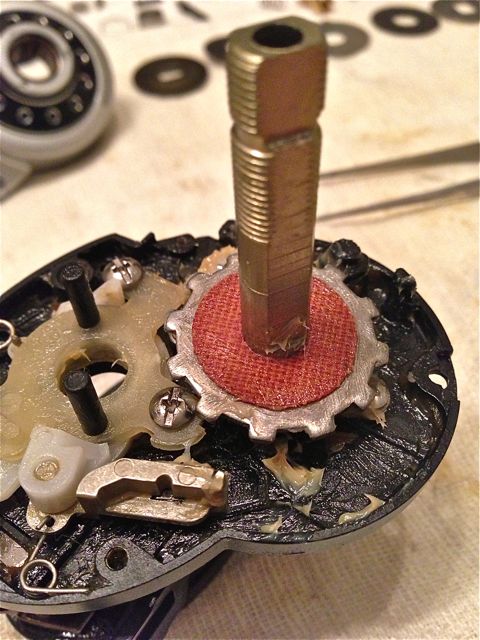
Installing the Drivetrain
Work Cal’s grease between the teeth of Pinion #1281183 and hang it by the neck with Yoke #1281131. Mate holes on Yoke #1281131 with corresponding posts of Yoke Holder #1125739. Also fill grease between the teeth of Main Gear #1281184 and slide down Main Gear Shaft #1281129

Lightly grease inside Main Gear #1281184 with Cal’s Grease and put in a carbon Drag Washer #1125760
Lightly grease both sides of steel Drag Washer #1125761 with Cal’s Grease and drop it above carbon Drag Washer #1125760
Add another carbon Drag Washer #1125760
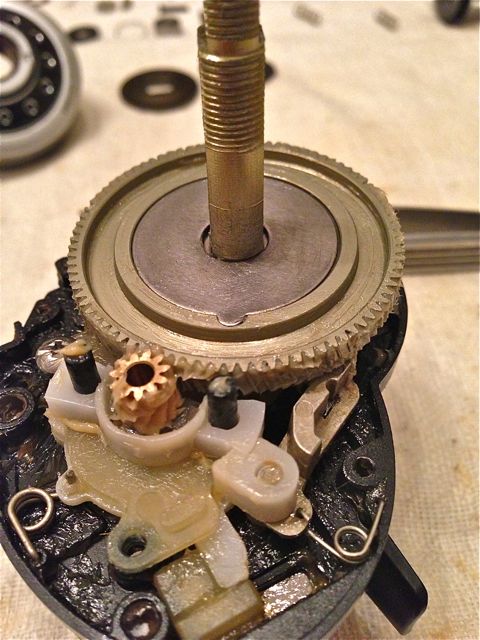
Lightly grease both sides of Ear Washer #1125762 and install
Add the final carbon Drag Washer #1125760
Lightly grease both sides of Pressure Washer #1281135 with Cal’s Grease and install with convex side facing up
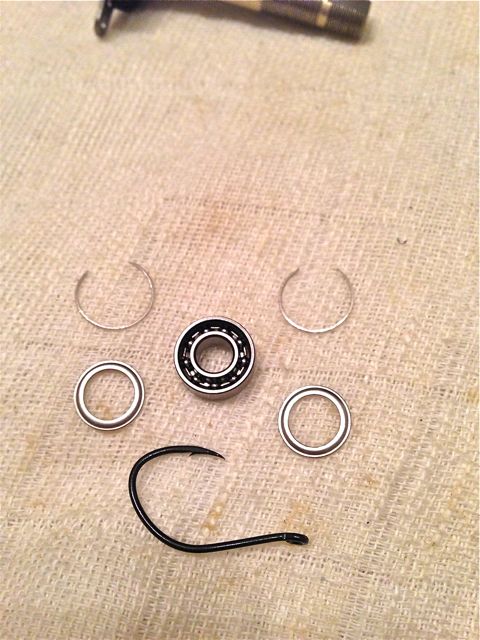
Insert a Spring #1116237 into each post of Yoke Holder #1125739
Installing the Instant Anti Reverse
Oil Washer #1281136 with Corrosion X and install
Lubricate IAR Sleeve #1257782 with Corrosion X and install with the keyed end facing up.
Regrease frame with Marine Grease that was smeared away and fit on the plastic Front Cover #1281154
This is the only other place where you need the Philips Head Screwdriver
Secure Front Cover #1281154 with two Philips head Screws #1125738 and set aside.
Grease Gear Side Plate #1281185 with Marine Grease to protect against galvanic corrosion. Test IAR Bearing (part not listed in schematic) with IAR Sleeve #1257782 to determine which side to insert. Lubricate the IAR bearing needles with Corrosion X and seat squarely.
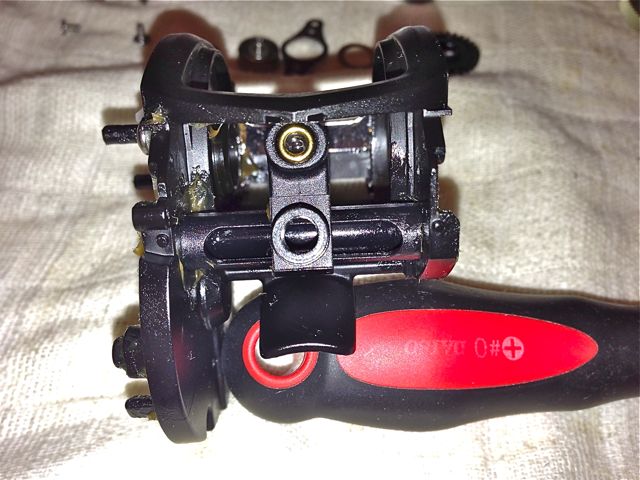
A note here on the Cam Lock Screw #1281139. It is a long, spring loaded aluminum rod that screws on to the Palm Side Plate #1281176. To thread the contraption accurately, is ponderous at best. I see this to be the recipe to many stripped and crossed thread problems. Also, the Cam Lock Screw is spring loaded inwards. This make it a 3 handed operation to open the Palm Side Plate. I’d recommend that you don’t bother with locking the Palm Side Plate to avoid cross threading. It’s not going to work loose even though you do not thread it through.
Different screw sizes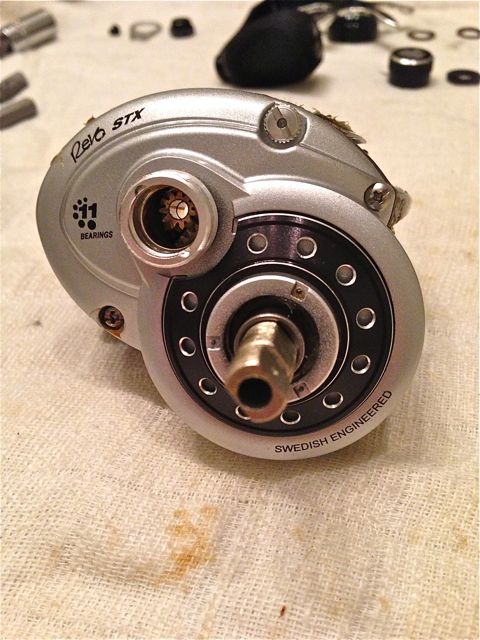
Slide Grease Gear Side Plate #1281185 over frame, taking care not to pinch the two yoke Springs #1116237. Secure with smaller Screw #1125776 at the top and larger Screw #1188229 at the bottom where the “11 Bearings” logo is. Now why can’t ABU engineers use one standard sized screw like the older Ambassadeurs did?

A maintenance port will help busy anglers quickly dab on some grease without having to do a full stripdown.
However, the Lube Port #1281173 is secured with a self tapping Screw #1144213. Why can’t they use a brass insert so that a normal fine thread screw can be used? It’s a matter of time before the threads on Lube Port #1281173 will be worn loose.
Lastly, attach the thin black Screw #1257014 to the hole in the 2 o’clock position and tighten till it is flush within the frame. Clean away excess grease from the frame as the spool runs on tight tolerances here, so any grease will adversely affect casting distance.
With a sharp hook, remove the shields on Ball Bearing #1125827. This is the same Ball Bearing as the 10 x 3 x 4mm spool bearing. Degrease and relube with TSI-301 or any light oil. Lubricate Pinion Shaft #1125776 with TSI-301 too, and install.
The Revo bearings are made to a very high grade. After cleaning, they can spin and spin and spin till you get bored waiting for them to stop spinning. And they are not even ABEC 1 rated! ABU still know how to make GREAT bearings!
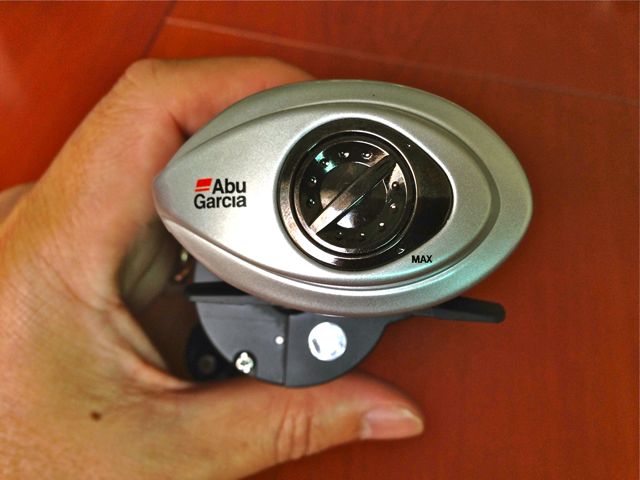
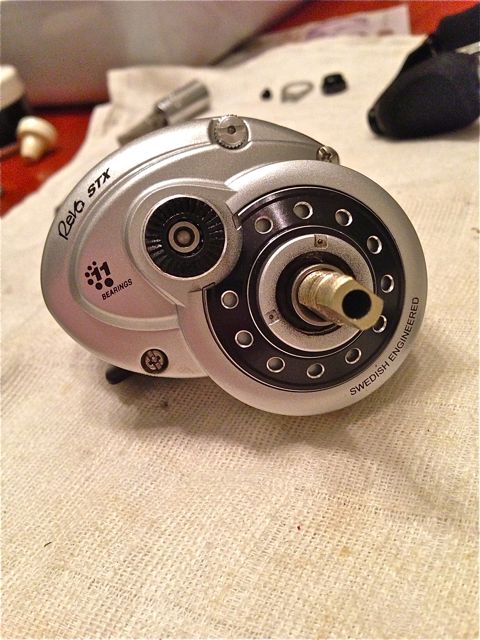
Fitting the Cast Control Knob
Secure Ball Bearing #1125827 with Ring #1104790
Seat Click Washer #1125768 with its two studs in matching slots. Oil lightly with ReelX
Screw on Cast Control Knob
Grease and install Click Spring Assembly #1125779 and oppose the 2 Belleville Spring Washer #1117208. ie facing () or )(
Grease and thread in Star Wheel #1281186. In the schematic, there was a Washer #1125783 that fits on next, which is absent for my reel
Grease and install Handle #1281323 and second Washer #1125783. Cinch down the Star Drag tight.
You’re almost done

Secure on Handle Nut #1214326, Handle Nut Cover #1245817 and Screw #1203407
The Finishing Touch
Remove shields from 10 x 3 x 4mm spool Ball Bearing #1125827, degrease and lubricate with TSI-301. After their shields are removed and degreased, these bearings have longer free spinning times than Orange Seal Ceramic hybrid Boca bearings!

Secure with Ring #1104790. Wipe away any grease or residue from gold Titanium Nitride coated Centrifugal Race
Finally, the Spool Bearing
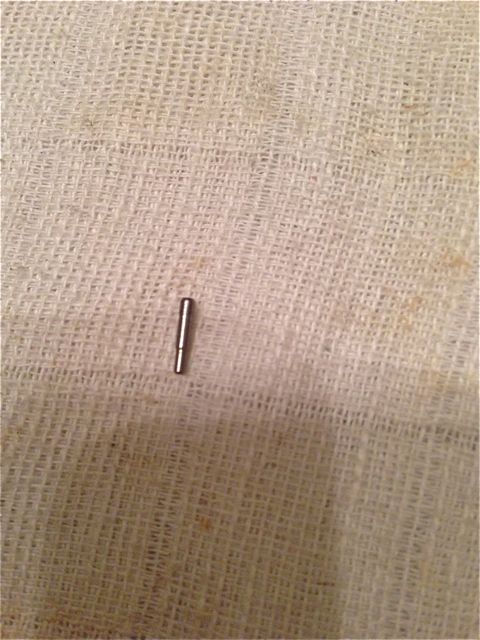
The larger (11 x 5 x 4mm) spool Ball Bearing #1144215 can be taken out only if Spool Shaft Pin #1192826 is removed. You need a spool pin plier or a Hedgehog tool to take this pin out. Note that this pin is tapered so you should be pressing it on the thinner side to take it out. This tapered pin makes it much easier to reinstall.
This time, the shields need to be pried out from the inner race. A sharp hook starts the prying, followed by a small screwdriver till finally the shield can pop out on its own or you’ll need a pair of pliers to pull it out. But Whatever you do, just be very carful when you pry as the sensitive bearings are right below your sharp point.
Degrease and lubricate with TSI-301. Refit and it is done!
PS: after installation, I still do not get long freespool times that I’m so used to with the Shimano and Daiwas. This reel could only give 10 seconds of free spool spinning. But it’s late and I’m off to fish it at the crack of dawn the next day so I’ll just spool in the line and figure it out at another time.
PPS: this reel can take in 300yds of Fireline Crystal 8lbs line. It was a few turns too full, but still castable. At this overfilled condition, greased carbon drags can generate 3.5kg at full pressure, pulling straight from the reel. It’ll be higher when run through a rod and when the spool is less full.
I’ll come back and report on how it did in real fishing conditions.
LL
UPDATE
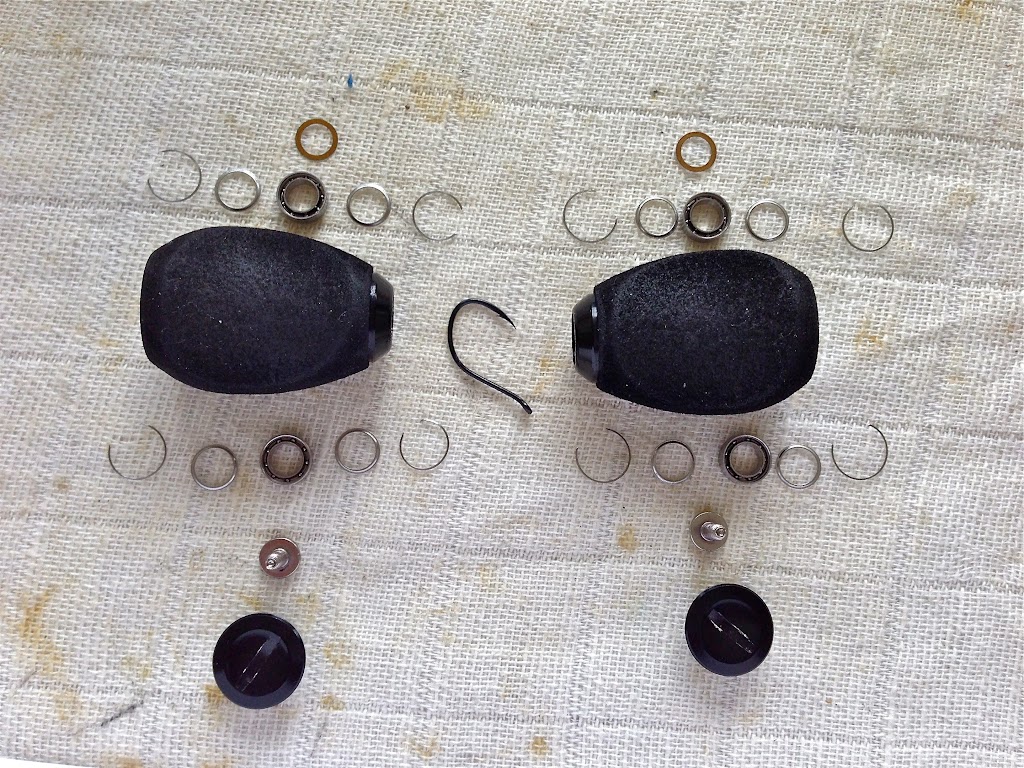
Used the reel for the first time yesterday. There was no GT to burn the reel with but got a small barracuda with it.
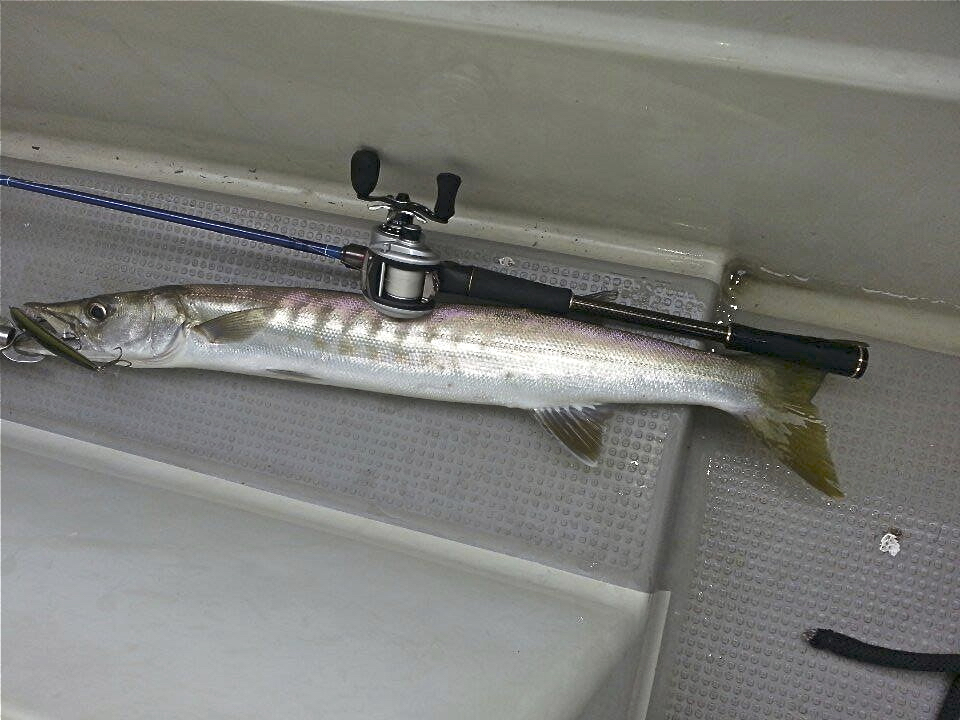
This small barracuda has the guts to chomp on an 180mm lure!
Northeast Monsoon wind was strong yesterday, putting a big curve in the loose line, but the fast 8.0 speed still made darting the lure without twitching the rod possible. As expected, such a high ratio made working with crank baits like the Norman deep diver difficult. But the new speed should make keeping up with fast fish like tarpons and tenpounders a breeze. The little cuda tried to charge the boat but found it being led in to the Boga at a faster pace, thanks to the speedy retrieve — shorter fight, better chance at revival, more successful the release.
I’m used to casting without using any brakes at all. I rather rely on my own thumb on the spool flange. But I was getting overruns after the lure lands because I didn’t hold down the spool long enough after touchdown and the momentum of the heavy spool will keep spinning a bit more. After getting used that, I’m casting lures as light as a 3.8g Tetraworks BiVi or as heavy as the 1 oz 180mm D Lure with no problem. I was quite surprised at the former as I expected not to be able to cast this at all. I guess the home-made SCIII 68MXF does a great job of getting the ultralight vibe out a ways.
At day’s end, the cranking is already much smoother. In another 2 or 3 trips and I estimate the cranking to be butter smooth.
My only disappointment now is the cheap plasticky finish.
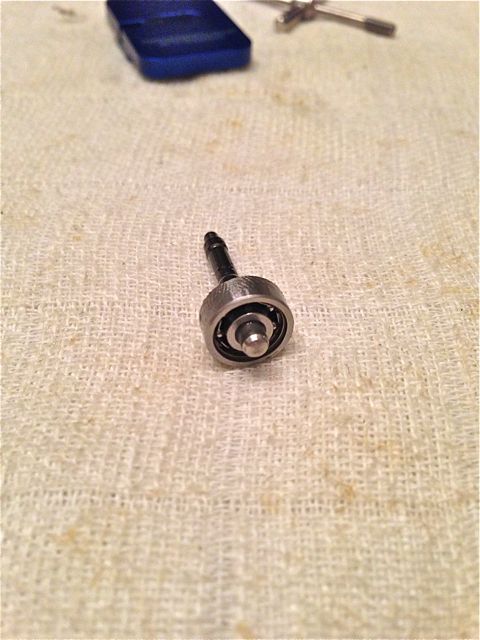
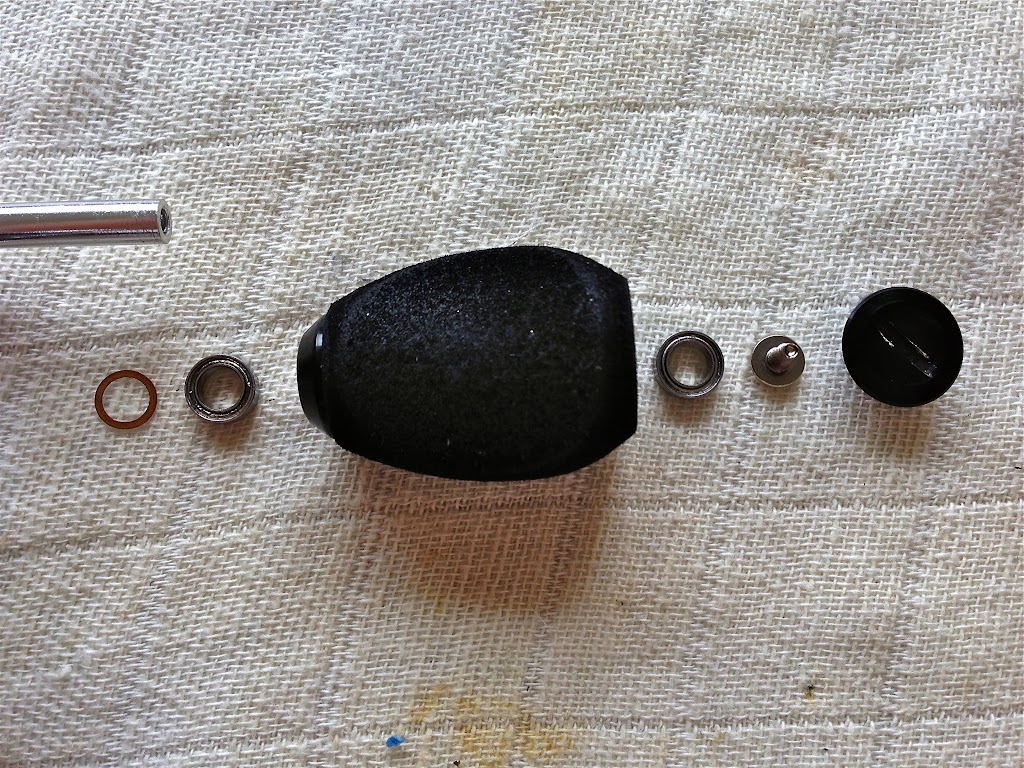
Part 2: Servicing the Handle Ball Bearings
There are 2 ball bearings in each of the handles. If saltwater gets into one of these, you will find cranking feels rough and the handle tends not to turn. To reduce the chance of this happening, we’ll remove the oil from these bearings and fill them with grease
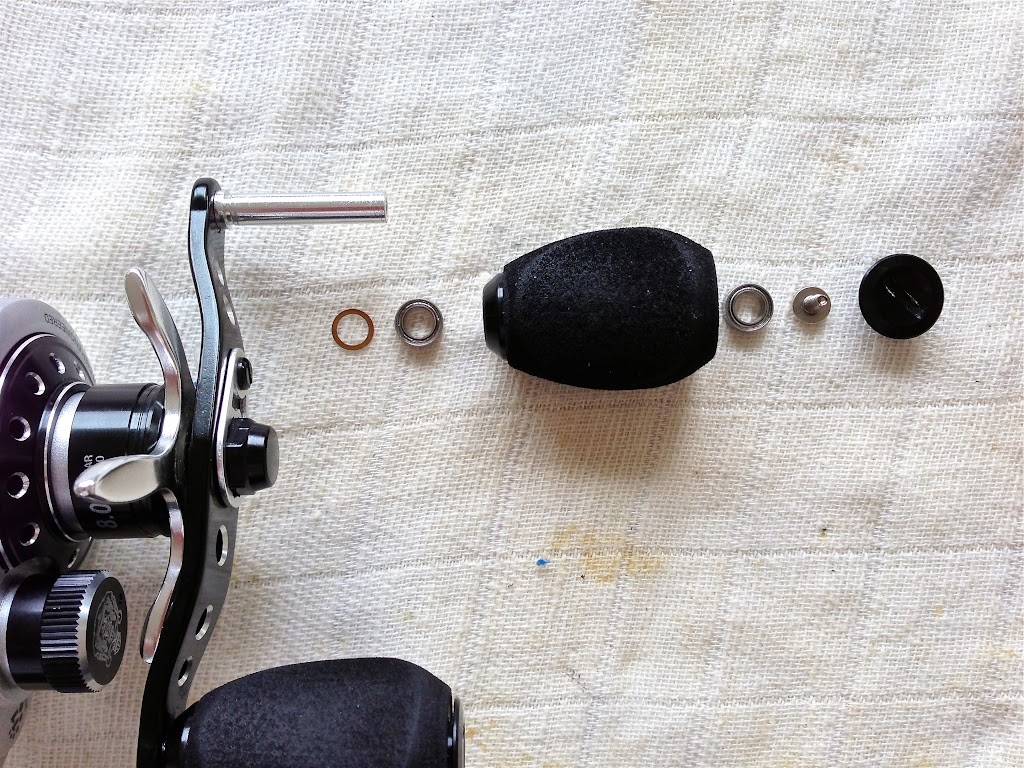
This is the order that each part comes out from the handle. The decorative cap is the most difficult to remove without scratching the finish. I found that using a coin scratches the finish lesser than using a reel handle screwdriver.
You’ll notice here that the ball bearings and the handle spindle have oil as protection. This will only be temporary, and grease is a more lasting protectant against corrosion. However, you will find your handle knobs unable to spin after greasing. That is only a cosmetic effect, as the handle knobs are just as smooth.
Here’s a closer look.
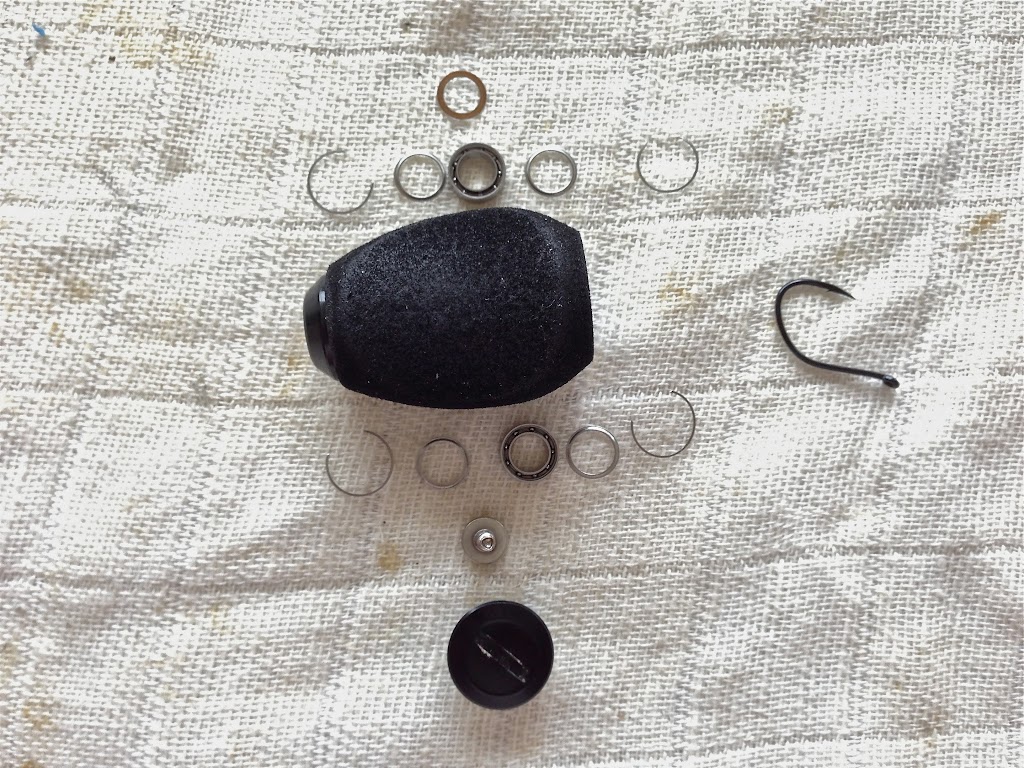
Using a sharp hook, remove the C clip that holds the shields in place.
After you have removed the shields, pack the bearings with a light grease. I lighten Quicksilver 2-4-C grease with some CorrosionX. If you are not sure if your grease will react with your oil, it is best to mix in the oil a few weeks earlier and store it. If it still retains its texture consistency, then you can apply it to your bearings.
I lighten the grease so that the handle knobs don’t feel too stiff.
After packing the bearings, refit the shields and C clips and fix back in reverse order.
Remember to give the handle spindle a coat of marine grease.
HTH,
LL
I hope this step-by-step guide helped you in servicing your own reel too. If you found this useful, please click the blue LIKE and FOLLOW buttons. If you would like me to help you service your reel, or if you would like to help me with the cost of keeping this blog running, please drop me a message via WhatsApp at +65-9431-0400. Thank You!
Text and Images © Lawrence Lee
All Rights Reserved
If you want to use any content for your own publication, please write me @ LawrenceLee_TC@yahoo.com

Pingback: SERVICING — ABU Revo LTZ AE74-Racing | Gasping Gurami·
Pingback: SERVICING — Daiwa Certate Hyper Custom | Gasping Gurami·
Pingback: SERVICING — 13 Concept A | Gasping Gurami·
Pingback: Ball bearing shield removal | Gasping Gurami·