

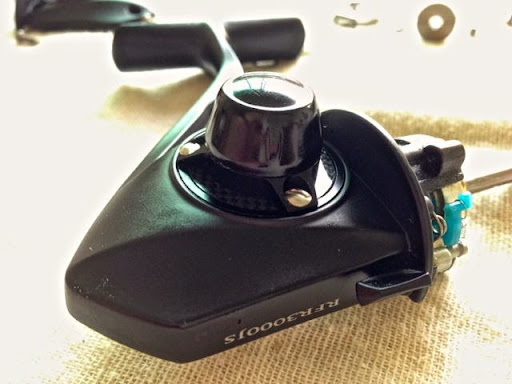
This 3000-sized reel by Rod Ford sure took a long time to arrive – 6 months to be exact! While I was gearing up for my Darwin Runoff 2014 trip, I saw pictures of this reel being circulated on the internet and FaceBook. It looks handsome with it’s matt black livery and drilled skirted spool. Although I’m not an egg beater reel user, I took an instant liking to this reel’s rugged good looks and placed a deposit on it.
Then came the bad news of this reel breaking at the stem. Delivery was halted and the company went back to the drawing boards to get the design reinforced. I went to Darwin without this reel and now, 5 months after I’ve returned, I have the reel in my hands. But better late than never, so with itching fingers, I can’t wait to crack this open to see what it’s like inside…
Handsome Reel
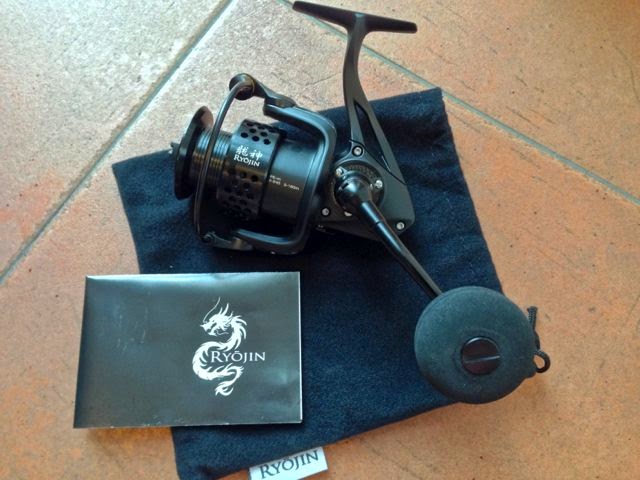
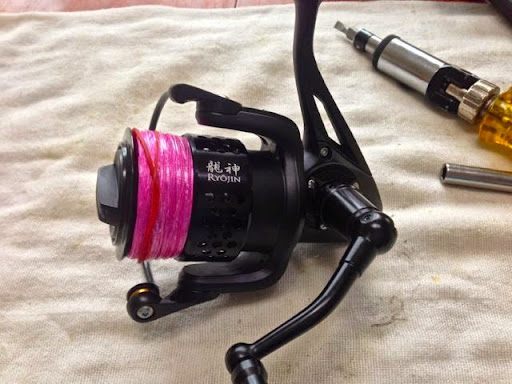
The reel comes with a flannel pouch, and schematics. My model of reel sports an EVA knob. The matt black finish, ported spool, milled handle, faux carbon fibre trim, Torx head fasteners and kanji lettering does lend the reel a higher priced Japanese-reel image than its price tag.
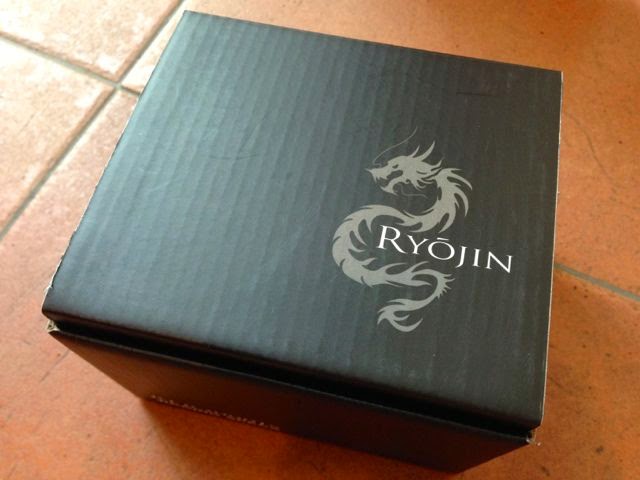
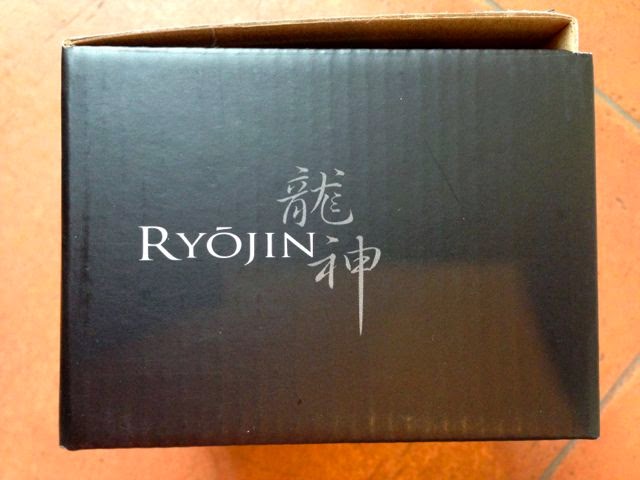
Packaging retains the same matt black look which completes the impression of a pricey Japanese reel.
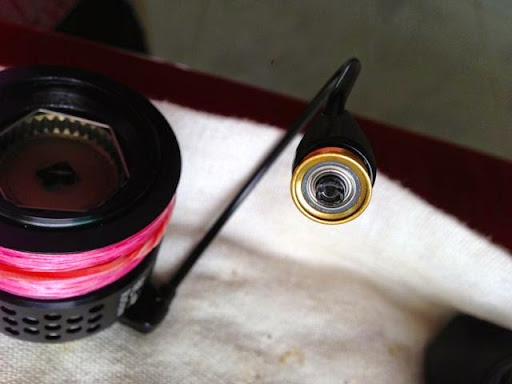
Cranking the new reel, feels smooth with a very faint hint of wobble that I attribute to the inevitable phasing of the rotor and handle in motion. So far, so good!
Before I use this reel at sea, it’s my habit to crack it open to add lubricant to where is needed, and to protect the internals from galvanic corrosion with a layer of marine grease. But before I do that, I’d get the schematic enlarged so that I can see clearly and keep the original schematic clean, even with greasy hands.
I’d also check the tool box to ensure I have the tools needed to get the job done, before proceeding to strip the reel as the lack of a proper tool when your hands are greasy midway in taking apart the reel can result in regrettable mistakes and loss – using something that’s not designed as the proper tool can damage parts. Or, while leaving the bits of a reel on the table as you rush out to the 五金店 (hardware shop) to locate a tool, the dog may come along and sweep the parts away, or maybe the wind, or …
For this reel, prepare: T8, T10 Torx drivers, Philips head screwdriver, Slot head screwdriver, #12 (metric) spanner, Needle-nosed forceps and a sharp fish hook. While you’re at it, also get a few paint brushes to apply your grease and toothbrush to clean off old grease, a bottle of Simple Green cleaner (Available at NTUC), Quicksilver 2-4-C Marine Grease with Teflon, Cal’s Universal Reel and Drag grease, CorrosionX oil and some rags for cleaning.
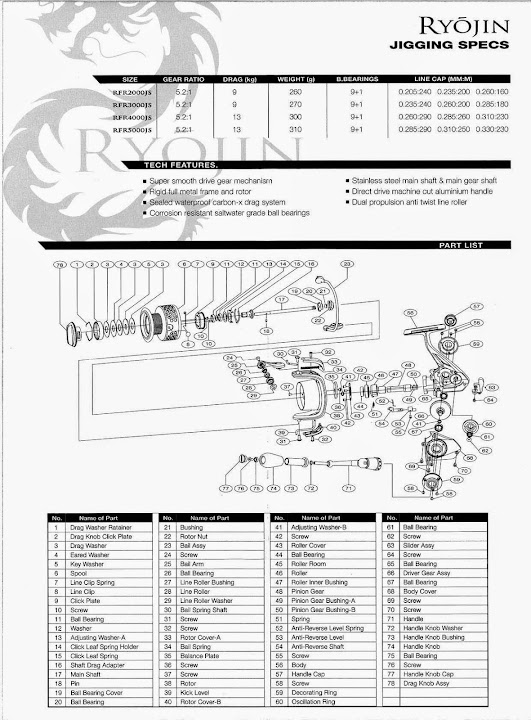
The Schematic offers line capacity in line diameter (mm) and the rotor has line capacity in PE.
Surprisingly few parts
I’m always hesitant to strip spinning reels because of the amount of parts it contains, and the less I open them, the less I like to open one, since I lack the experience which naturally begets a lack of confidence. But this one’s different. I’m surprised by the lack of complexity in this reel. Don’t get me wrong, I mean it as a positive point. What’s the use of having a very complicated reel which one will be reluctant, even afraid to open for maintenance, when a simple design can do the job as well?
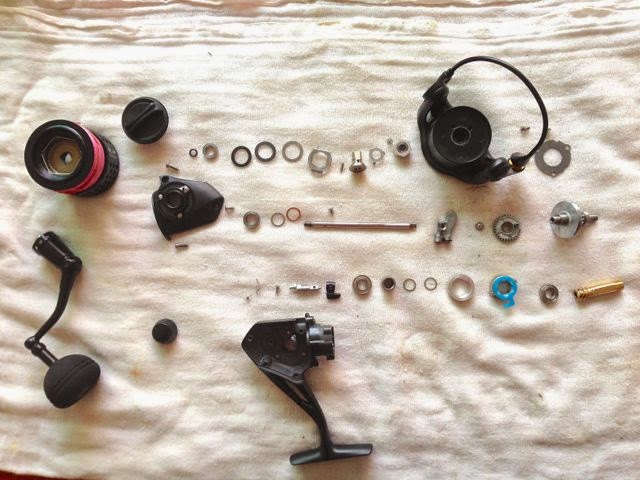
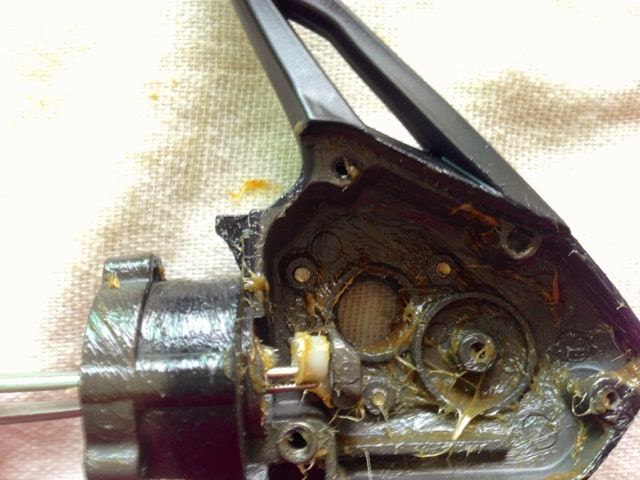
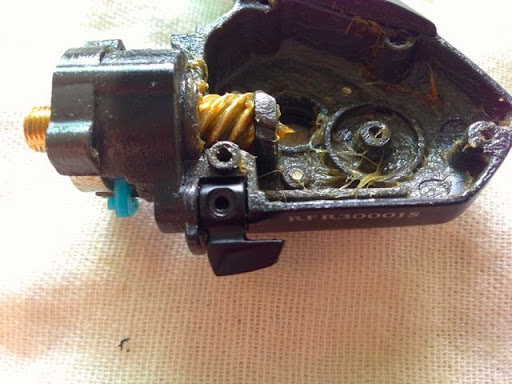
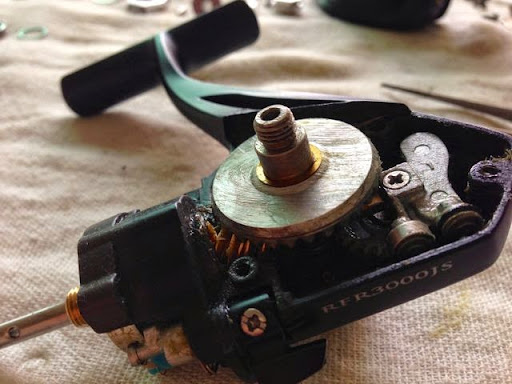
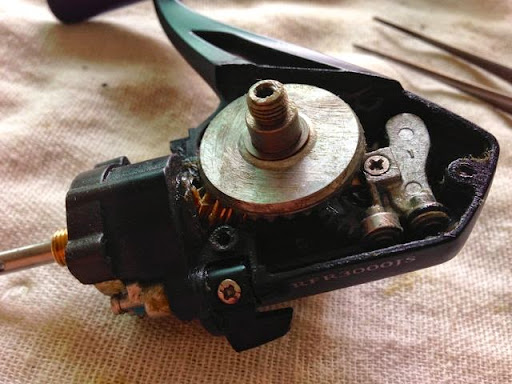
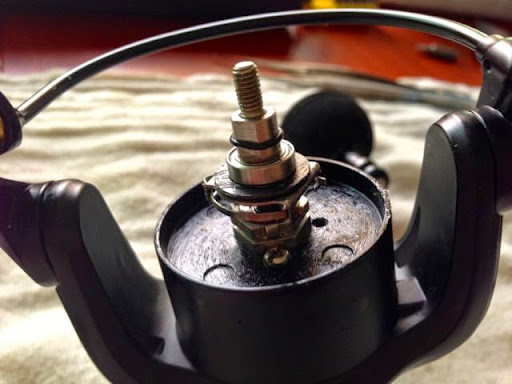
Here’s the reel with serviceable parts taken apart. I’m pleasantly surprised that Rod Ford’s engineers had managed to come up with a smooth cranking reel with so few parts. Well done!
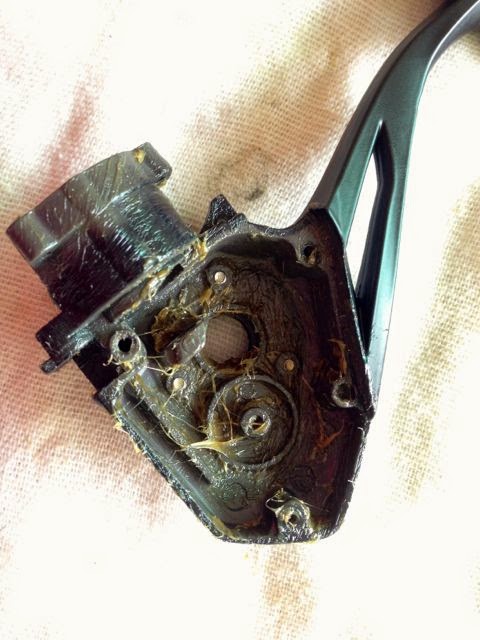
However, I was disappointed to find the reel’s working parts lubricated very sparingly. The frame and side plates were bone dry. If the reel were to get splashed by salt water and not quickly serviced, the onset of galvanic corrosion will have been given a toehold.
A word on stripping the reel
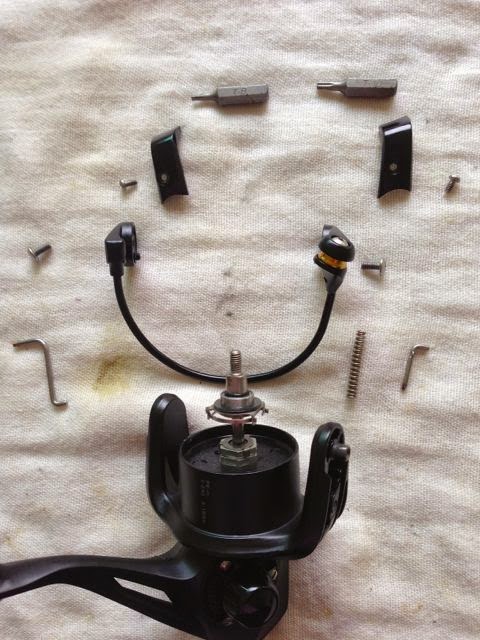
As I strip the reel, I will place the parts in the same order and orientation as it came out of the reel, on my work mat. I place the parts from left to right, layer by layer as I dismantle the reel. This way, when I put it back together, I’ll not be confused which comes first. However, I always have the schematic at hand to countercheck.
Although the schematic should be the most accurate guide for the reel, I’ve noticed that the parts on this reel do not always match what is on the schematic, since it is probably the same for all four sizes that the company offers. (You’ll see those inconsistencies later).
After shooting this picture of the layout of parts, I then take all the bits into the basin to be degreased, cleaned, ready for new lube and installation. I dare not trust only my memory especially on a new reel that I’m unfamiliar with.
Use grease as a cheap but effective form of corrosion control
Paint on Quicksilver 2-4-C Marine Grease with Teflon to #56 Body.
I’ve found over the years, that despite great leaps forward in salt neutralising rinses like SaltX, (https://gaspinggurami.wordpress.com/2013/06/25/maintenance-results-of-6month-experiment-with-saltx/) a bit of grease, applied prophylactically over metal parts will go a long way in protection against galvanic corrosion.
Galvanic corrosion happens when the presence of an electrolyte (salt water) causes one metal (e.g. aluminium body) to be eaten away by an electrical current and deposited to a more noble metal (e.g. Stainless steel Shaft). Washing with tap water once galvanic corrosion had started will not be enough to prevent further breakdown, as tap water contains mineral salts and chlorine (also a salt). In such a case, you’d need a salt neutraliser such as SaltX in your rinse.
And that is why it’s my habit to open a brand new reel, remove all the original lubricants and grease, then coat all metal parts with Quicksilver 2-4-C Marine Grease with Teflon, reapply lubricants then fix back the reel, even before I’ve ever used the reel. Doing so gives the reel it’s best protection against corrosion since I fish most of the time in salt water.
I choose to use Quicksilver 2-4-C Marine Grease with Teflon for no other reason than the fact that I had some left over from servicing my Mercury Outboard. Over the years, I have found that this grease does not cause rubber O-Rings to swell, and it also does not chemically react with CorrosionX oil and Cal’s Grease, so it’s most suitable to do what I need.
If you do not have access to Quicksilver 2-4-C Marine Grease with Teflon, you can choose any other type of grease. However, do check that your grease will not cause rubber O-Rings to swell/melt and it will not react with the common lubricants you use for maintaining your reel. Failing to ensure may see rubber O-Rings melting/swelling and brittle, or lubricants gumming up from chemical reaction.
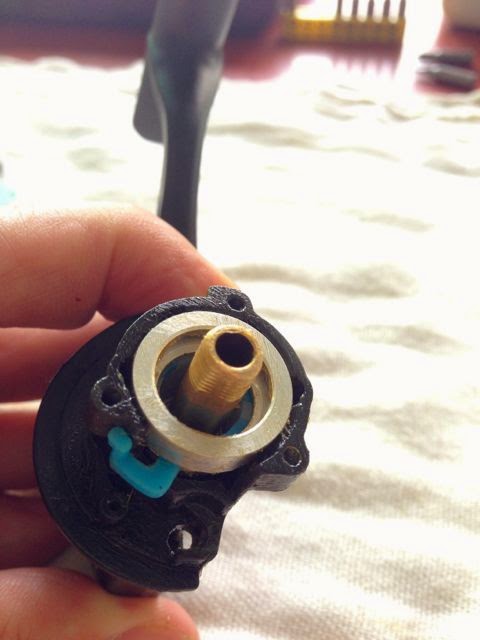
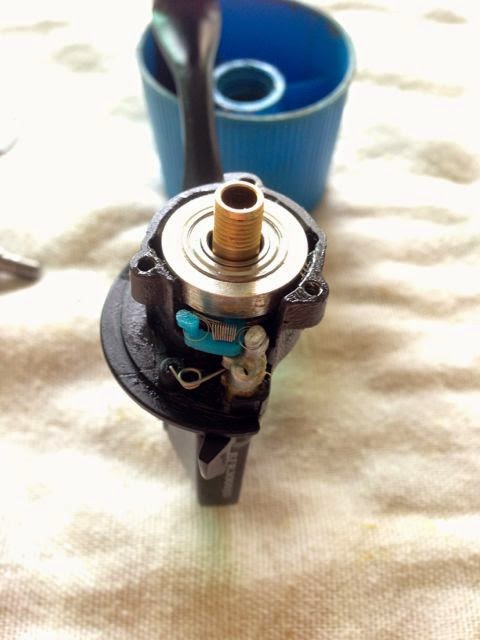
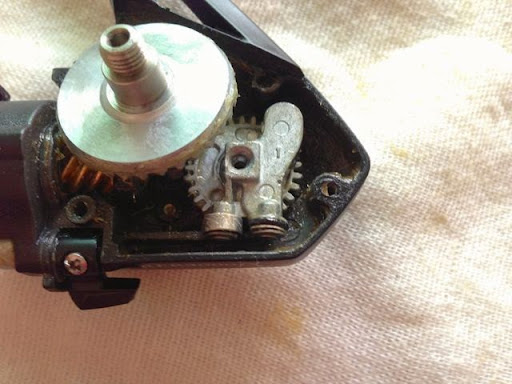
The Schematic shows two Pinion Gear bushings #49 and #50. In my reel, there is only one, with a flange.
New Pinion Gear Bushing (#49/50) fits into Body #56 with the flange outwards as shown above.
Lubricate Ball Bearing (this part is not listed in my schematic), with CorrosionX and fit onto Pinion Gear #48 as shown. Paint on Cal’s Grease, taking care to work the grease between the Pinion’s teeth. Fit loosely into Body #56.
Oil the Rollers #46 with CorrosionX oil. Do not use grease. Fit into Body #56.
Coat Roller Room #45 lightly with Cal’s Grease and install.
Additional parts
When the schematic does not tally with the parts you have in your reel, you will appreciate taking the trouble to lay out your parts neatly, in their correct order and orientation of stripping, and taking a good photo of all of them before you proceed to degrease them in the ultrasonic. This is also the raison d’ȇtre for my posting this step-by-step tutorial so you have a base to draw references from should you get confused.

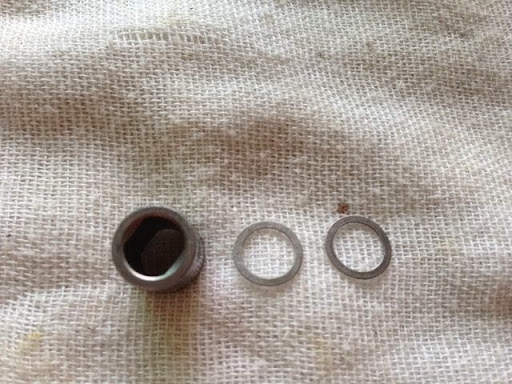
There are two stainless steel washers in my reel that are not listed in my schematic. I guess these serve as shims to support Roller Inner Bushing #47 on the Pinion #48 so that Roller Inner Bushing #47 can be aligned with Roller #46. Your reel may have more or less of these washers.
Slide these washers down Pinion #48. Lubricate Roller Inner Bushing #47 with CorrosionX oil and slide down Pinion #48-Do not contact with grease.

Oil Ball Bearing #44 with CorrosionX and insert into Roller Room #45.
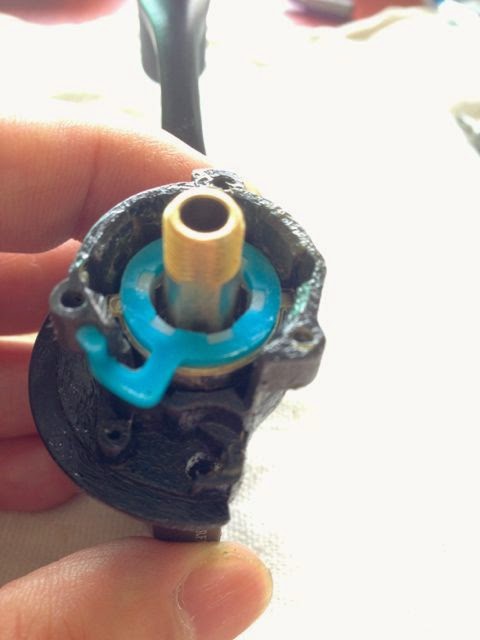
Insert Anti-Reverse Lever #53 into its home on Body #56.
Grease Anti-Reverse Shaft #54 with Cal’s Grease and insert through Anti-Reverse Lever #53.
Secure with Screw #55.

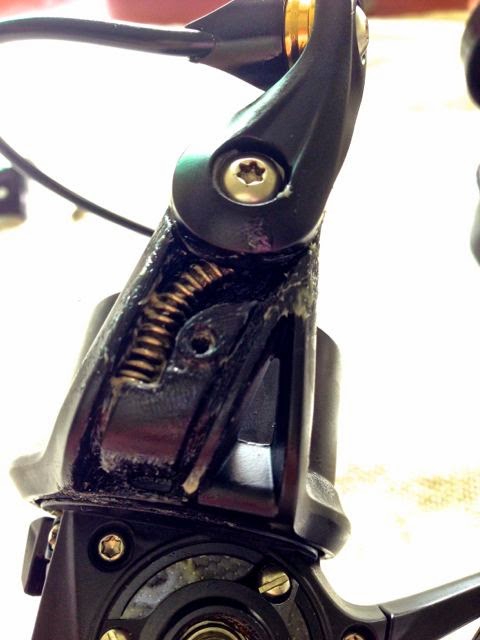
Install Anti-Reverse Lever Spring #52. The shorter arm is to the Body #56 and the longer arm to a slot on Anti-Reverse Shaft #54. A pair of locking needle nosed pliers such as Vice Grips or Haemostat forceps is invaluable in this procedure. If you don’t have one, I’d advise you to do the assembly within a clear plastic bag so that you don’t lose the spring as it slips off your slippery greased fingers and go flying into space.
Attach Spring #51 onto the blue plastic arm of Roller #46 and Anti-Reverse Shaft #54.
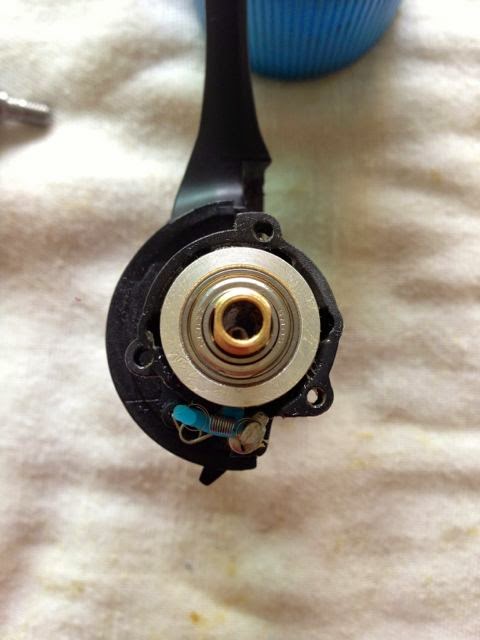
Looking from the above view, rotate Pinion #48 Shaft Clockwise to check that the Anti reverse is working properly. Flick the Anti-Reverse Lever #53 off and check that now the Pinion #48 can rotate in reverse.
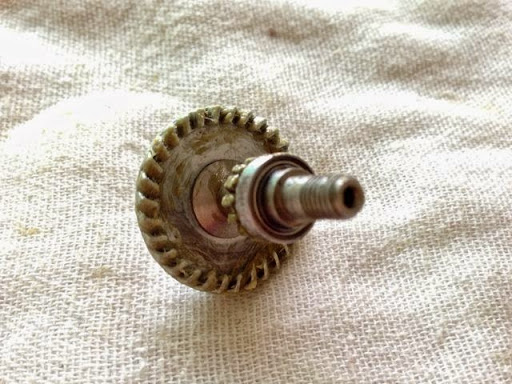
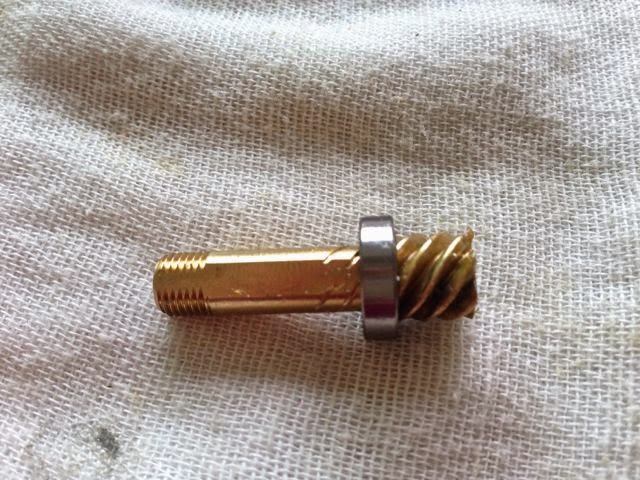
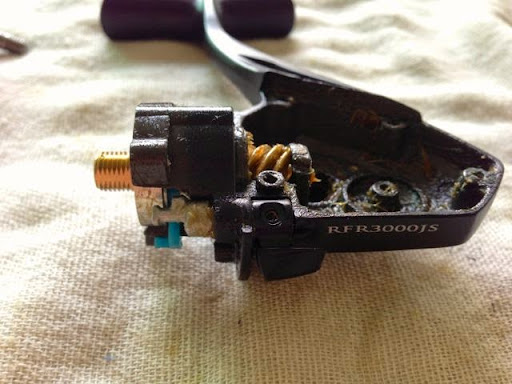
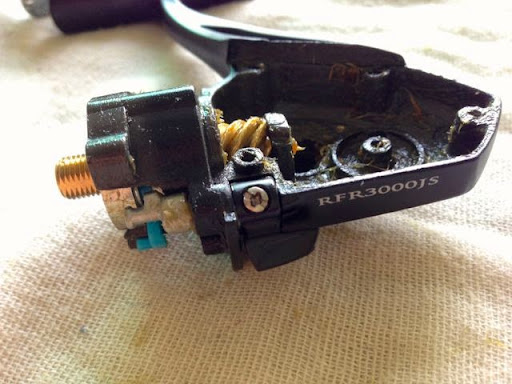
Grease Drive Gear Assy #66 with Cal’s Grease, taking care to work the grease in between the teeth. Repack Ball Bearing #65 with grease, and install on Body #56. Because there are rough filing marks scoring my Drive Gear Assy #66 Shaft, this caused the Ball Bearing #65 to be stuck on Drive Gear Assy #66 and gave me considerable grief trying to remove the Assembly from the reel, and when refitting, Drive Gear Assembly #66 needed to be in first, which gets in the way of work. Hopefully, future reels will have better castings and this problem will not be encountered.
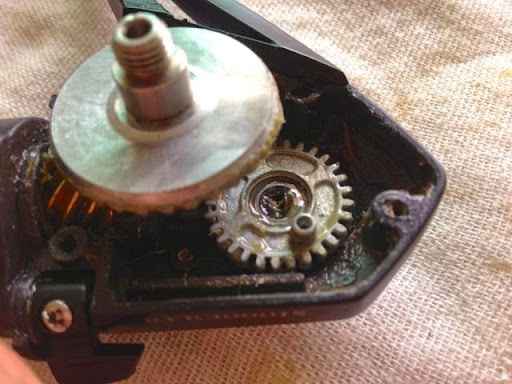
Grease Oscillation Ring #60 with Cal’s Grease, taking care to work the grease between all teeth. Oil Ball Bearing #61 With CorrosionX and fit into Oscillation Ring #60. Install on Body #56, and secure with Philips head Screw #62.
You need not install Drive Gear Assy #66 unlike this picture, if your Ball Bearing #65 can be detached from Drive Gear Assy #66.
Lubricate Ball Bearing on Slider Assy #63 with CorrosionX. Grease Slider Assy #63 with Cal’s Grease and install over the stump on Oscillation Ring #60.
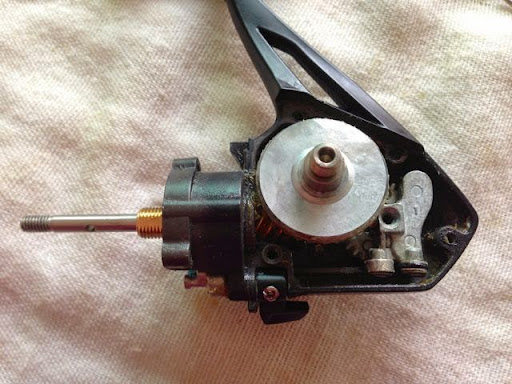
Oil Main Shaft #17 with CorrosionX and insert through Pinion Gear #48 with its threaded end outwards. Twist Main Shaft #17 until the hole at the end aligns with the hole on Slider Assy #63.
Secure Main Shaft #17 to Slider Assy #63 with Screw #64.
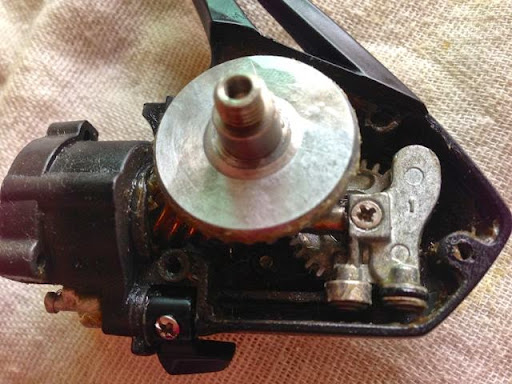
If your Ball Bearing #65 is able to separate from Drive Gear Assy #66, now insert Drive Gear Assy #66 and mesh up the teeth on Pinion Gear #48, Oscillation Ring #60 and Drive Gear Assy #66.
Screw on Handle Cap #57 to hold Drive Gear Assy #66 in place.
There are two washers on my reel for the Drive Gear Assy #66 although the schematic only lists one – Adjusting Washer-B #41. Grease and install the brass-coloured washer first.
Grease and install Adjusting Washer-B #41 on top of the unlisted brass-coloured washer.

Pack Ball Bearing #67 with grease and install.
Finishing Up
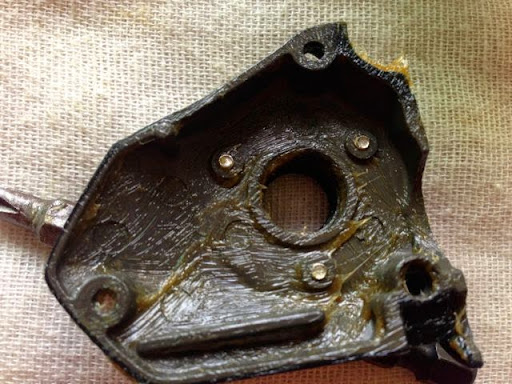
Protect Body Cover #68 with a layer of Quicksilver 2-4-C Marine Grease with Teflon. At this time, inspect the other half of Body #56 and touch up the area where Quicksilver 2-4-C Marine Grease with Teflon had been wiped off.
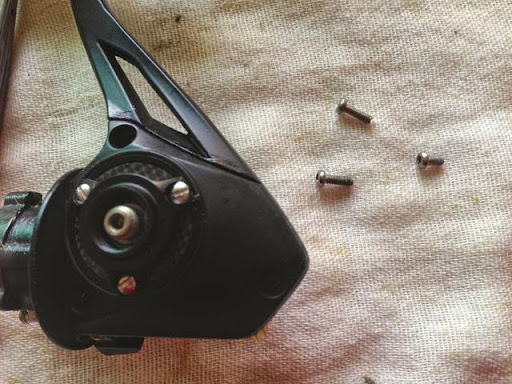
Note there’s two longer Screws #69 although the Schematic shows three. The longer Screws fit the front two holes. The short Screw #70 fits the back hole. Lubricate the threads with Cal’s Grease and install, taking care not to over torque.

Place Roller Cover #43 over Roller Room #45, aligning the 3 holes with those on the Body #56.
Lubricate the threads of the three Screws #42 and secure Roller Cover #43.
Coat the underside of Rotor #38 with Quicksilver 2-4-C Marine Grease with Teflon to prevent corrosion. Install over Pinion Gear #48. Observe that although holes are provided for Balance Plate #35 and Screw #36, these are absent on my reel.
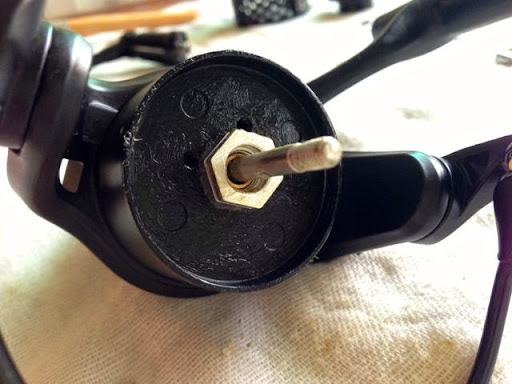
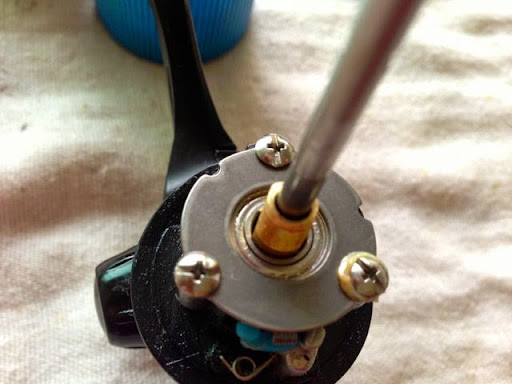
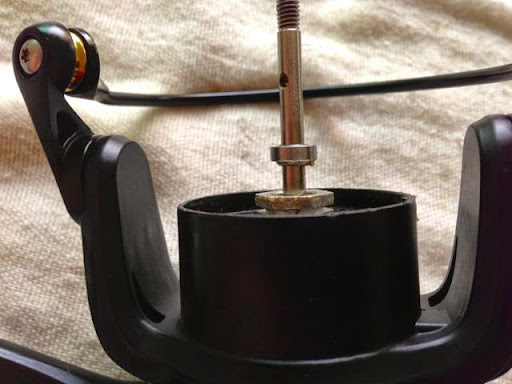
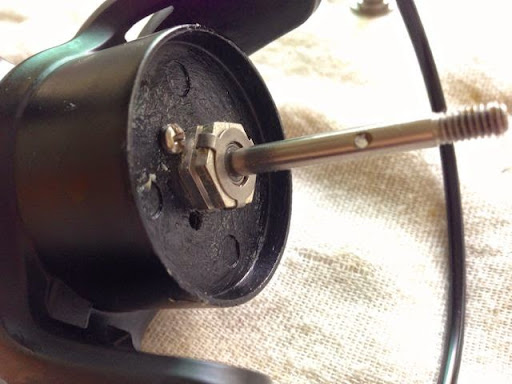
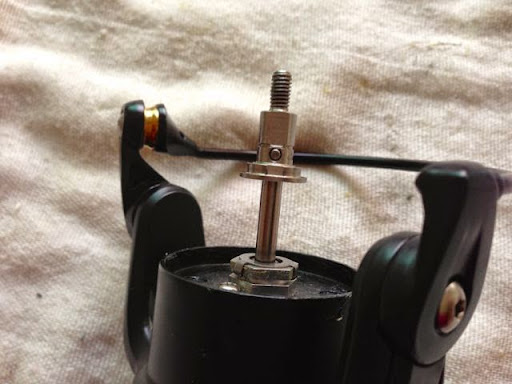
Lubricate threads of Rotor Nut #22 with Cal’s Grease and secure Rotor #38. Note this Rotor Nut #22 has reversed threads and is screwed in by turning counter clockwise. Tighten with size 12 Ring Spanner (metric).
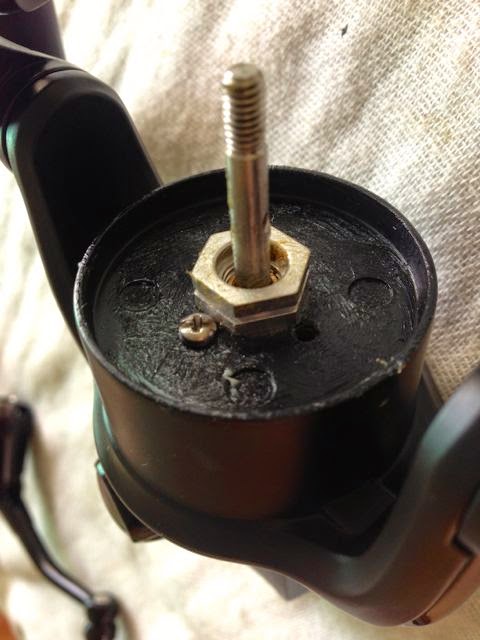
Secure Rotor Nut #22 in place with Screw #37.
Lubricating and Opening up a Ball Bearing
For those of you who are familiar with my step-by-step tutorials, you will know that I will clean up my ball bearings and relube according to purpose – for slow speed ball bearings and those that tend to get wet or neglected due to inaccessibility, I will pack with grease. For ball bearings that spin at medium speed and for Anti-Reverse e.g. on the Rotor, Anti-Reverse and Line Roller, I’ll use an oil such as CorrosionX. Spinning reels do not have high speed ball bearings unlike baitcasters, so there’s no need for ultra low viscosity oils or dry lubes.
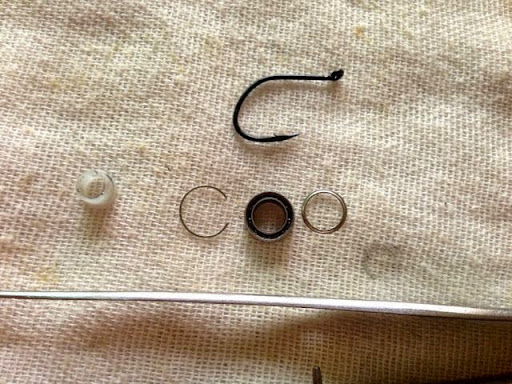
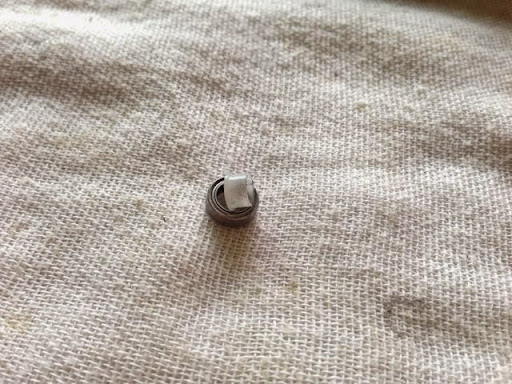
To open up the Ball Bearings on this reel, get yourself the sharpest fish hooks you can find. Here, I’m using aDaiichi #12 AJI hook. Look for a small gap formed by the C Clip on the outer race of the ball bearing (A magnifier and bright illumination helps). Pry one end of this C Clip out with the hook. If you are unable to catch on the end, it means your hook is not sharp enough.
The end of the C Clip will pop out. Gently ease the C Clip off. With a blast of compressed air, the shield will come off. Repeat for opposite side. You can clean ball bearings with Simple Green solution. Put them in a small bottle to prevent wastage, and run it in a water bath on the Ultrasonic Cleaner. If you do not have an Ultrasonic Cleaner, apply some alcohol such as lighter fuel or acetone and spin it till you hear the bearings rattle loosely. Wash off all traces of oil with Simple Green Solution and rinse off with tap water. Finally, dry off with a hair drier set on low power.
To repack with grease, I mix CorrosionX with a dab of Cal’s Grease with a toothpick till it feels like melting ice-cream. I’d apply a ring of the grease between the races and squeeze hard between thumb and finger. Repeat the packing until grease comes out on the opposite side of the Ball Bearing. Refit the shield on that side, secure with C Clip and then continue to pack till grease can’t go in anymore, or oozes out through the opposite shield. Finally cap back the other shield and secure with C Clip. The outer edge of the shield should be lower than the inner when fitted correctly.
If you are using any other lube other than CorrosionX to lighten Cal’s Grease, always test a small batch and set aside for one month to ensure that the oil don’t separate from grease nor the mixture turn into a sticky goo.
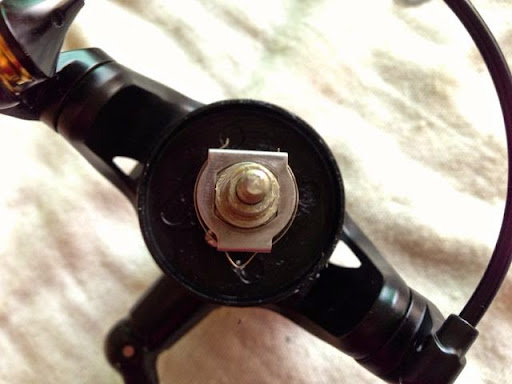
Insert plastic Bushing #21 into Ball Bearing #20. Slide assembly down Main Shaft #17 into the Rotor Nut #22.
Snap Ball Bearing Cover #19 over Rotor Nut #22.
Slip Shaft Drag Adaptor #16 down Main Shaft #17 and secure with Pin #18.
Lightly paint Cal’s Grease on Click Leaf Spring #15, Snap into Click Leaf Spring Holder #14 and install with spring side facing reel.
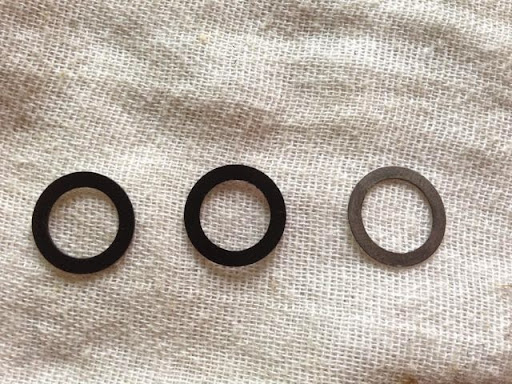
There are two black plastic washers and one steel washer on my reel, although the schematic lists one for each. The schematic also lists two Ball Bearings #11 but mine has only one. I believe the schematic to be in error on this. So I’ll name the plastic washers Washer #12 and the steel washer Adjustment Washer A #13. Coat them thinly with Cal’s Grease.
First insert the steel Adjustment Washer A #13, then the two black plastic Washer #12.
The shields on Ball Bearing #11 is not replaceable. So I cleaned away the old lubricant as best as I could on the Ultrasonic Cleaner, and relubricated with CorrosionX and install.
Slip rubber O Ring (not listed on schematic) to keep Ball Bearing #11 in place.
Your reel is mainly done. Go take a break. I’ll wait for you. 🙂 Meanwhile, I’ll spool in with PE2 sized Sufix Versa Game line which is very smooth and tight weaved, and sold at an incredibly low price for its quality. I even got a crank bait free with purchase! Talk about value for money.
I didn’t spool in the line with sufficient tension, so I had to unspool to redo it. You can take a longer break. When spooling in the line, I noticed the Line Roller isn’t as smooth as can be. A jammed line roller can induce the dreaded line twist. I pulled a length of PE line up and down the Line roller and can feel it tends to catch at irregular times. Also as I unspooled the line by cranking it into another BC reel, I noticed the drag was jerky even when loosened, and the Drag Knob Assy #78 worked itself loose when line is pulled out. Not good.
Lubricating and Servicing the Bail Mechanism
The Line Roller’s Ball bearing tends to get corroded quickly as salt water collects in there. It should pay dividends if you do a bit of preventive maintenance here, before using the reel.
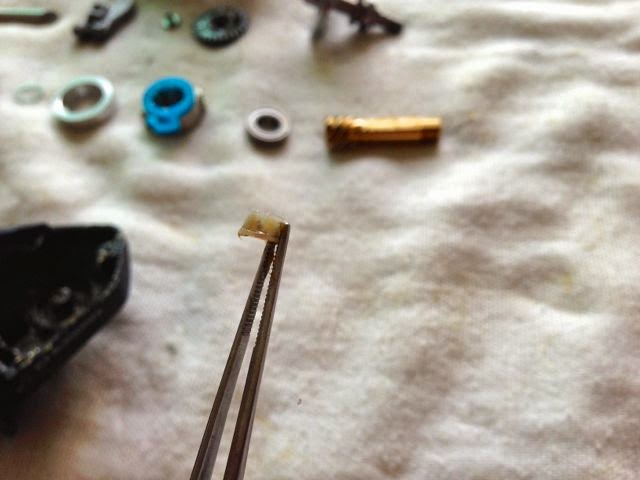
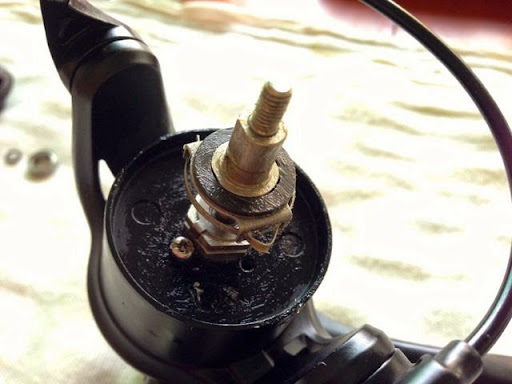
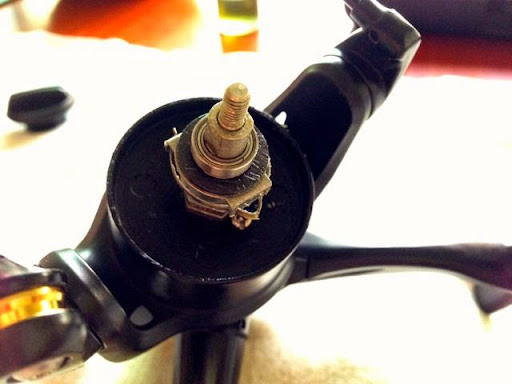
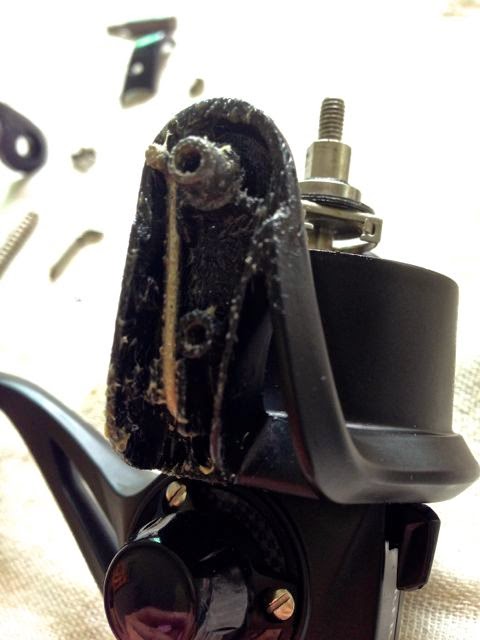
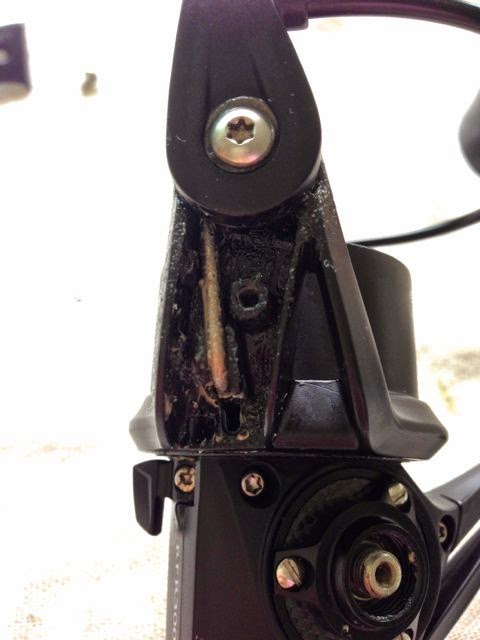
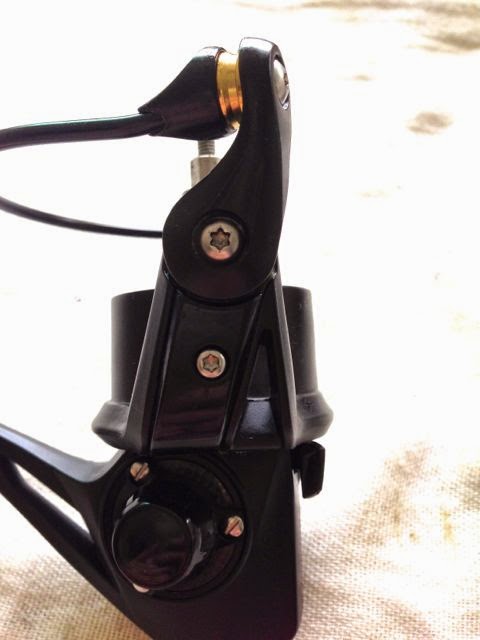
Unfortunately, I was unable to access the Ball bearing #26 beneath the Line Roller #28 as the end of Bail Assy #23 seem to have been expanded and chipped.
From this view, you can see the chip and how the tip of Bail Assy #23 is expanded, preventing the Ball Bearing #26 from extraction. I cleaned as best as I could and liberally applied CorrosionX to protect it. Bits of black paint was found in the wash water of the Ultrasonic cleaner, and after lubricating and re-installation, the Line Roller #28 is smooth again. I guess some paint had gotten into the screw hole and when the Bail Assy #23 was assembled, the torx Screw #24 may have expanded the tip of Bail Assy #23, effectively making removal of the Ball Bearing #26 and Line Roller #28 impossible. Paint flakes that may have cracked off might have gotten caught in the Line Roller #28 causing the roughness that I felt.
Hopefully, QC for future Ryojin reels can be stepped up to prevent these problems.
Coat the ends of Rotor #38 with a protective coat of Quicksilver 2-4-C Marine Grease with Teflon. Insert Kick Lever #39. Observe that this side of the Rotor #38 is different from the opposite side.

Similarly, coat the ends of Rotor #38 with a protective coat of Quicksilver 2-4-C Marine Grease with Teflon. Insert Bail Spring #34 and Bail Spring Shaft #30. Observe that this side is considerably heavier than the other side. By doing so, Rod Ford engineers had managed to make the extra weight and parts of the Balancing Plate #35 redundant and has saved some weight too.
Attach Bail Arm #25 to the Bail Spring Shaft #30 and secure with Screw #31.
Attach Kick Lever #39 to Bail Assy #23 and secure with Screw #31.

Attach plastic Rotor Cover B #40 and secure with Screw #32.
Attach plastic Rotor Cover A #33 to Bail Arm side and secure with Screw #32. Test your bail arm and trip mechanism works correctly and tighten Screws #31firmly.
Servicing the Drag
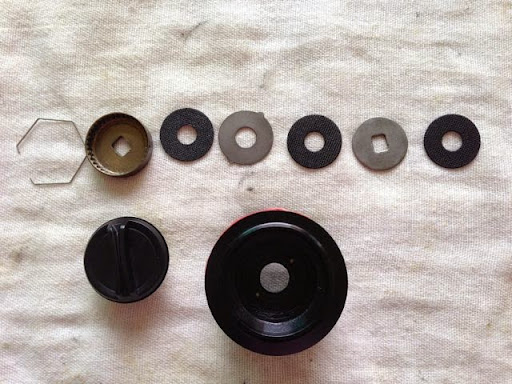
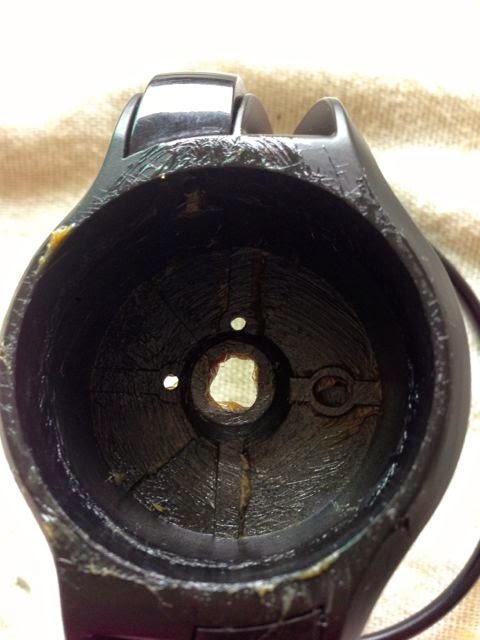
The Ryojin sports multi-piece carbon fibre Drag Washers #3. The washers were sparingly greased when I opened them up. The washers were also a very loose fit in the spool. The last Drag Washer #3 is pressed directly to the aluminium Spool #6. Over time, this will wear off the black anodise and bite into the aluminium material.
I applied a thin coat of Cal’s Grease to all steel washers and the spool. Re-installation is in the following order:
Drag Washer #3, Square-holed Key Washer #5, Drag Washer #3, Eared Washer #4, Drag Washer #3, Drag Knob Click Plate #2 and Drag Washer Retainer #1.
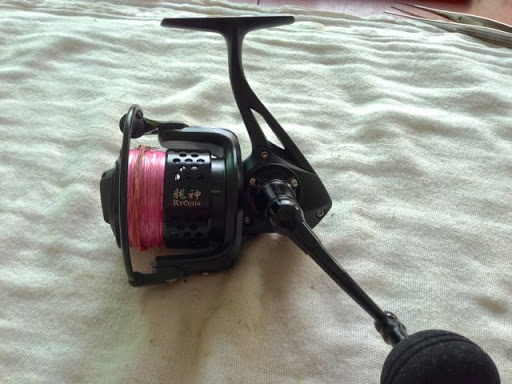
So here’s the Ryojin RFR3000JS serviced. I was similarly unable to remove the Handle Knob #74, as the Screw #76 was tightened fast. I will return one day with an impact driver, but for now, I’ll make do with dropping a couple drops of CorrosionX oil after ever use.
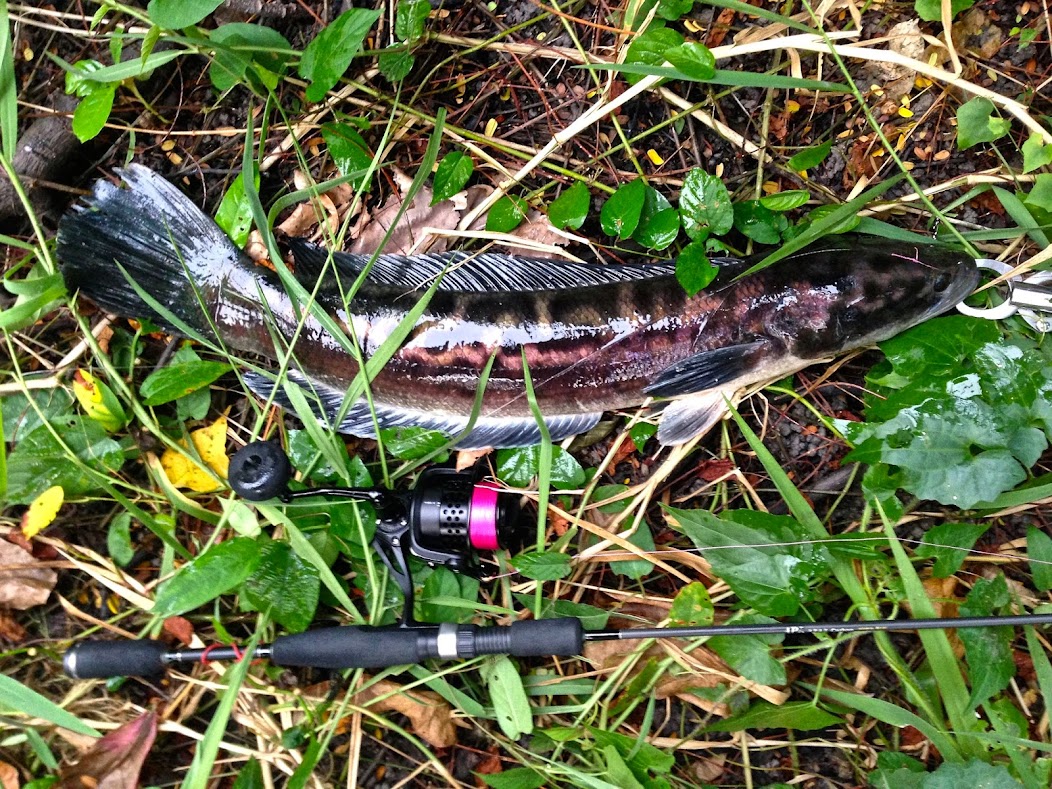
I took it for a test spin, flipping an unweighted Squidgie at my backyard pond. The resident snakeheads obliged with glee and although I didn’t get to test the drag to extremes, It did give satisfactory performance and the reel performed to expectation, which is very impressive for the price tag.
HTH,
LL
I hope this step-by-step guide helped you in servicing your own reel too. If you found this useful, please click the blue LIKE and FOLLOW buttons. If you would like me to help you service your reel, or if you would like to help me with the cost of keeping this blog running, please drop me a message via WhatsApp at +65-9431-0400. Thank You!
Text and Images © Lawrence Lee
All Rights Reserved
If you want to use any content for your own publication, please write me @ LawrenceLee_TC@yahoo.com

Hi.. I need to know code ball bearing in ryojin 3000.. In diagram no 57/65 or all code ball bearing in ryojin reel tq.. My ball bearing broken..
Sorry but I didn’t measure the ball bearings of this reel. You could simply take your reel’s ball bearings to the bearing shop and the shop should be able to get replacements for you.
Hi, I just bought the ryojin 4000 for rm260 and its come with two Ball Bearings #11. I think it is because of the different size of the reel. I’m going into lubricating process after this. Thanks for your effort to explains the lubricating process, I’ll use it as a guidelines. btw, I want to ask if there any chance to replace “Pinion Gear Bushing (#49/50)” with the ball bearing?
I’m happy that this guide is helpful to you.
There is a flange on Pinion Gear Bushing #49/50. That flange IMO serves to reduce friction between the Pinion and the body, like a teflon washer would. Moreover, the pinion does not rotate in this part, so I do not see why adding a ball bearing can be of greater benefit to the reel.
Hi thanks for your reply, owh, I thought the bushing rotating together with the pinion gear. Thank you for enlighten me. But again I notice the few differences. Despite of the upgraded support arm, slightly thicker than previous model (the hole size on the support arm also smaller). Most of the screw with torx head has been replace with philips especially on the bail arm. This just confusing me, whether they are reducing cost for upgrading process or the reel is fake (but I don’t think there’s a fake ryojin reel).
Hi Bro How much is this reel , I though it is made in Malaysia
Sorry bro, I’ve forgotten the price. But it’s not a lot.
The reel is designed in Malaysia. Manufactured in China
Hi,
Ya I check with some My website but they cannot get the 3000 only the 5000 offering at 290RM, I was luck to get the reel 3000 for 138S$ and A 2000 for 135S$ and the rod 5ft6 fro 48S$ each. I also bought a Shimano stragic CI4+ 3000FA. How to mod this to be better, Do you have a video? What be a good rod to pair with, is back drop slow jigging special good or a shimano sienna 1pc rod…hope to hear your recommendation. Thks
I’m sorry Parry, I do not try to modify my reels. You might want to contact Reel Spa at
https://www.facebook.com/ReelSpa/?pnref=lhc
They are better able to help you modify your reel.
As for slow pitch jigging, it’s best done with a conventional (overhead) reel, than using an egg beater reel. You might want to visit http://www.anglers-secrets.com/ for more detail in this style of jigging.
HTH,
LL
Hi, Thks for your reply. I have spoken to Toto before. I ahev also bought a few of those overhead reels. But as I see on youtube many are also using spinning reels so I just try them out as they are much lighter.
Rgds
Best of luck for your endeavour
Same (莎美) from Taiwan has a spinning rod they claim can be used for Slow Pitch, which landed a YellowFin Tuna
https://www.facebook.com/same.fishing/
halo bro . nak tanya barang i handle cap hilang . macam mana nak dapat kan barang itu ?
Sila tel:+6078619289